Easy Dal Dhokli Recipe (Varan Phal): Your New Favourite Yummy Lentil Dumpling Curry!#
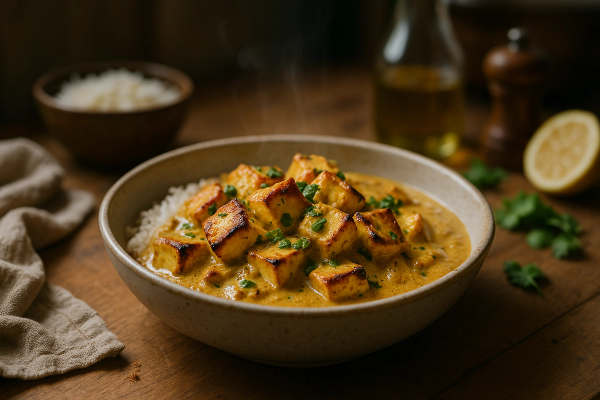
Craving some real comfort food? Something warm, hearty, and bursting with flavour? Let me introduce you to Dal Dhokli, also known lovingly as Varan Phal in Maharashtra. This isn't just any lentil dish; it's a complete, one-pot meal featuring tender whole wheat dumplings simmered in a flavourful, tangy, and slightly sweet lentil curry. If you've been searching for an authentic dal dhokli recipe that's both delicious and surprisingly easy to make, you've come to the right place! This yummy lentil dumpling curry is perfect for a cozy weeknight dinner or a lazy Sunday lunch.
Whether you know it as Gujarati Dal Dhokli or Maharashtrian Varan Phal, the essence remains the same: pure, unadulterated comfort in a bowl. Forget complicated steps; this easy dal dhokli recipe breaks it down simply, making it accessible even for beginner cooks. Get ready to add a star to your collection of easy dinner ideas!
What Exactly IS Dal Dhokli / Varan Phal?#
Think of it as Indian pasta in a lentil sauce, but so much better! At its heart, Dal Dhokli is a traditional dish popular in the western Indian states of Gujarat and Maharashtra. It consists of two main components:
- The Dal (Lentil Curry): Typically made with Toor Dal (split pigeon peas), cooked until soft and then simmered with a blend of aromatic spices, tomatoes, ginger, garlic, and often peanuts. The flavour profile is a beautiful balance of tangy (from tamarind or kokum), sweet (from jaggery or sugar), and savoury/spicy.
- The Dhokli / Phal (Dumplings): These are simple, diamond-shaped (or sometimes square/round) dumplings made from whole wheat flour (atta), sometimes with a bit of gram flour (besan) added for texture, and seasoned with basic spices like turmeric and chili powder. They are rolled thin and then simmered directly in the boiling dal, absorbing all the wonderful flavours and cooking to a tender, slightly chewy perfection.
It's a fantastic example of a traditional Indian lentil curry elevated into a complete meal. The combination of the soft dal and the tender dumplings is incredibly satisfying.
Why You'll Absolutely Love This Easy Dal Dhokli Recipe#
- Ultimate Comfort Food: Warm, flavourful, and deeply satisfying. It's like a hug in a bowl!
- One-Pot Wonder: While you cook the dal and make the dough separately initially, the final cooking happens in one pot, minimizing cleanup. Great for easy dinner ideas!
- Nutritious & Wholesome: Packed with protein from lentils and fibre from whole wheat flour.
- Amazingly Flavourful: A delightful balance of sweet, sour, spicy, and savoury notes.
- Customizable: Easily adjust the spice levels, sweetness, and tanginess to your preference. You can also add vegetables!
- Family Favourite: Kids and adults alike tend to love this unique dish.
This easy dal dhokli recipe brings authentic Indian flavours to your table without intimidation. It's comfort food elevated!
Ingredients You'll Need#
Gather these ingredients to create this masterpiece. Don't worry, most are pantry staples in an Indian kitchen!
For the Dal (Lentil Curry):#
- Toor Dal (Arhar Dal / Split Pigeon Peas): 3/4 cup, rinsed thoroughly
- Water: About 4-5 cups (adjust for consistency)
- Turmeric Powder (Haldi): 1/2 teaspoon
- Red Chili Powder: 1/2 teaspoon (adjust to taste)
- Tomato: 1 medium, finely chopped (optional but recommended)
- Ginger-Garlic Paste: 1 teaspoon (or finely grated ginger & garlic)
- Green Chilies: 1-2, slit (optional, adjust heat)
- Tamarind Pulp or Kokum: 1 tablespoon (or lemon juice, adjust sourness)
- Jaggery or Sugar: 1-2 teaspoons (adjust sweetness)
- Peanuts: 1-2 tablespoons (raw, optional)
- Salt: To taste
For Tempering (Tadka):#
- Ghee or Oil: 1.5 tablespoons (Ghee highly recommended!)
- Mustard Seeds (Rai): 1 teaspoon
- Cumin Seeds (Jeera): 1 teaspoon
- Asafoetida (Hing): 1/4 teaspoon
- Curry Leaves: 8-10
- Dried Red Chilies: 1-2 (optional)
- Fenugreek Seeds (Methi Dana): 1/4 teaspoon (optional, adds slight bitterness)
- Cloves (Laung): 2-3 (optional)
- Cinnamon Stick (Dalchini): 1 small piece (optional)
For the Dhokli / Phal (Dumplings):#
- Whole Wheat Flour (Atta): 1 cup
- Gram Flour (Besan): 2 tablespoons (optional, adds flavour and texture)
- Turmeric Powder (Haldi): 1/4 teaspoon
- Red Chili Powder: 1/4 teaspoon
- Ajwain (Carom Seeds): 1/2 teaspoon (crush lightly)
- Oil: 1 teaspoon
- Salt: To taste
- Water: As needed to make a firm dough (approx 1/3 to 1/2 cup)
Step-by-Step Guide: Making Your Dal Dhokli / Varan Phal#
Let's break down this dal dhokli recipe into easy-to-follow steps.
Step 1: Cook the Dal#
- Rinse the Toor Dal thoroughly under cold running water until the water runs clear.
- Place the rinsed dal in a pressure cooker.
- Add about 2 cups of water, 1/4 teaspoon turmeric powder, a pinch of salt, and a few drops of oil (helps prevent frothing).
- Pressure cook for 3-4 whistles on medium heat, or until the dal is completely soft and mushy. Let the pressure release naturally.
- Once cooked, whisk the dal well until smooth. If it looks too thick, add some hot water to adjust the consistency (it should be pourable but not watery). Set aside.
Step 2: Prepare the Dhokli Dough#
- In a mixing bowl, combine the whole wheat flour, besan (if using), turmeric powder, red chili powder, ajwain, salt, and 1 teaspoon of oil.
- Mix everything well with your fingertips.
- Gradually add water, a little at a time, and knead to form a firm, smooth dough (similar to roti or chapati dough, but slightly stiffer).
- Cover the dough and let it rest for 10-15 minutes.
Step 3: Roll and Cut the Dhokli#
- Divide the rested dough into 2-3 equal portions.
- Take one portion and roll it out on a lightly floured surface into a thin circle (like a chapati, maybe slightly thicker, around 7-8 inches in diameter). Don't make it too thick, or it won't cook properly.
- Using a knife or pizza cutter, cut the rolled-out circle into diamond or square shapes (about 1-1.5 inches).
- Keep the cut dhokli pieces on a plate, ensuring they don't stick together (you can lightly dust them with flour if needed). Repeat with the remaining dough portions.
Step 4: Prepare the Dal Base & Tempering#
- Heat ghee or oil in a large, heavy-bottomed pot or kadai over medium heat.
- Once hot, add mustard seeds. Let them splutter.
- Add cumin seeds, asafoetida, curry leaves, dried red chilies, fenugreek seeds, cloves, and cinnamon stick (if using). Sauté for about 30 seconds until fragrant.
- Add the ginger-garlic paste and slit green chilies. Sauté for another minute until the raw smell disappears.
- Add the chopped tomatoes (if using) and cook until they soften.
- Now, add the remaining turmeric powder (1/4 tsp), red chili powder, and peanuts (if using). Stir well and cook for 30 seconds.
Step 5: Simmer the Dal#
- Carefully pour the whisked, cooked dal into the pot.
- Add about 2-3 cups of hot water (adjust based on desired consistency – remember the dhokli will absorb some liquid).
- Add salt to taste, tamarind pulp (or kokum/lemon juice), and jaggery/sugar.
- Stir everything well and bring the dal to a rolling boil.
Step 6: Cook the Dhokli in the Dal#
- Once the dal is boiling vigorously, gently slide the cut dhokli pieces into the pot, one by one, ensuring they don't clump together. Stir gently after adding a batch.
- Reduce the heat to medium-low, cover the pot partially (leaving a small gap for steam to escape), and let the dhokli simmer in the dal for 12-15 minutes, or until they are cooked through and float to the top. Stir occasionally to prevent sticking.
(How to check if Dhokli is cooked? Take a piece out and cut it. It should be cooked evenly without any raw dough visible inside. It should feel tender but hold its shape.)
- Once cooked, check the consistency of the dal. If it's too thick, add a little hot water. If it's too thin, simmer for a few more minutes uncovered.
- Taste and adjust salt, sweetness, or sourness if needed.
Step 7: Garnish and Serve#
- Turn off the heat. Garnish generously with chopped fresh coriander leaves.
- Let the Dal Dhokli rest for 5-10 minutes before serving. This allows the flavours to meld beautifully.
- Serve hot, drizzled with a little extra ghee on top. Enjoy your delicious, yummy lentil dumpling curry!
Pro Tips for the Perfect Dal Dhokli / Varan Phal#
- Dal Consistency is Key: Aim for a medium consistency – not too thick, not too thin. The dal thickens as it cools and as the dhokli cooks.
- Don't Roll Dhokli Too Thick: Thinly rolled dhokli cook faster and taste better. Thick ones can remain doughy inside.
- Balance Flavours: Taste and adjust! The hallmark of a good Dal Dhokli is the perfect balance of sweet, sour, and spice.
- Boiling is Crucial: Ensure the dal is boiling well before adding the dhokli pieces. This prevents them from becoming mushy or sticking together.
- Ghee Makes it Better: While you can use oil, serving with a dollop of ghee on top takes the flavour to another level. Trust me!
- Resting Time: Letting it sit for 5-10 minutes after cooking really enhances the flavour.
Making this varan phal recipe? Remember to taste and adjust seasonings at the end – it makes all the difference!
Variations to Try#
While this easy dal dhokli recipe is fantastic as is, here are some popular variations:
- Gujarati Style: Often includes more jaggery for sweetness, kokum for sourness, and peanuts.
- Maharashtrian Varan Phal: Can sometimes be spicier, might use Goda masala, and sometimes includes drumsticks (moringa).
- Add Veggies: Feel free to add vegetables like drumsticks, pumpkin pieces, or ivy gourd (tendli) to the dal while it simmers.
- Different Dals: While Toor Dal is traditional, some variations use a mix of dals like Masoor Dal or Moong Dal.
- Jain Dal Dhokli: Skip onion, garlic, and ginger. Rely more on asafoetida, tomatoes, and spices for flavour.
- Gluten-Free Dhokli: You can experiment with gluten-free flour blends (like jowar or bajra mixed with besan), though the texture will differ significantly.
Serving Suggestions#
Dal Dhokli / Varan Phal is a complete meal in itself! Here’s how to best enjoy it:
- Serve piping hot in bowls.
- Always add a generous drizzle of ghee on top before serving.
- A squeeze of fresh lemon juice enhances the flavours.
- Serve alongside some plain rice (though it's usually eaten on its own).
- Accompaniments like Indian pickle (achar), roasted papad, or a simple kachumber salad (onion-tomato-cucumber) work well.
It's truly one of the most satisfying and easy dinner ideas you can whip up.
Storing and Reheating#
Dal Dhokli tastes best fresh. However, leftovers can be stored in an airtight container in the refrigerator for 1-2 days.
To reheat: Gently warm it on the stovetop over low heat. You might need to add a splash of hot water as the dal tends to thicken considerably upon cooling. Avoid microwaving if possible, as it can make the dhokli rubbery.
Frequently Asked Questions (FAQ)#
Q1: Why did my dhokli turn hard or chewy?#
This could happen if the dough was too stiff, rolled too thick, or not simmered long enough in the dal. Ensure the dough is pliable (firm but smooth) and roll it thinly.
Q2: Can I make Dal Dhokli ahead of time?#
It's best served fresh. Making it too far ahead can make the dhokli soggy. You can cook the dal base ahead and make/cook the dhokli just before serving.
Q3: Can I use other lentils instead of Toor Dal?#
Yes, you can use Masoor Dal (red lentils) or Moong Dal (yellow lentils), or a mix. Cooking times and flavour profiles will vary slightly.
Q4: Is this Dal Dhokli recipe vegan?#
This recipe is easily adaptable for vegans. Simply replace the ghee with a neutral vegetable oil. Ensure your jaggery/sugar source is vegan.
Ready to Cook Some Comfort?#
This easy Dal Dhokli recipe, or Varan Phal recipe, is more than just food; it's an experience. It's the warmth of home cooking, the joy of simple ingredients transforming into something magical, and the satisfaction of creating a delicious, wholesome meal.
Give this yummy lentil dumpling curry a try soon! It's bound to become a regular in your kitchen, especially when you need a comforting pick-me-up or one of those reliable easy dinner ideas. Don't forget that drizzle of ghee!
Have you tried making Dal Dhokli before? What are your favourite variations? Share your thoughts and experiences in the comments below! We'd love to hear from you.
For more delicious and easy Indian recipes, explore other posts on AllBlogs.in.


