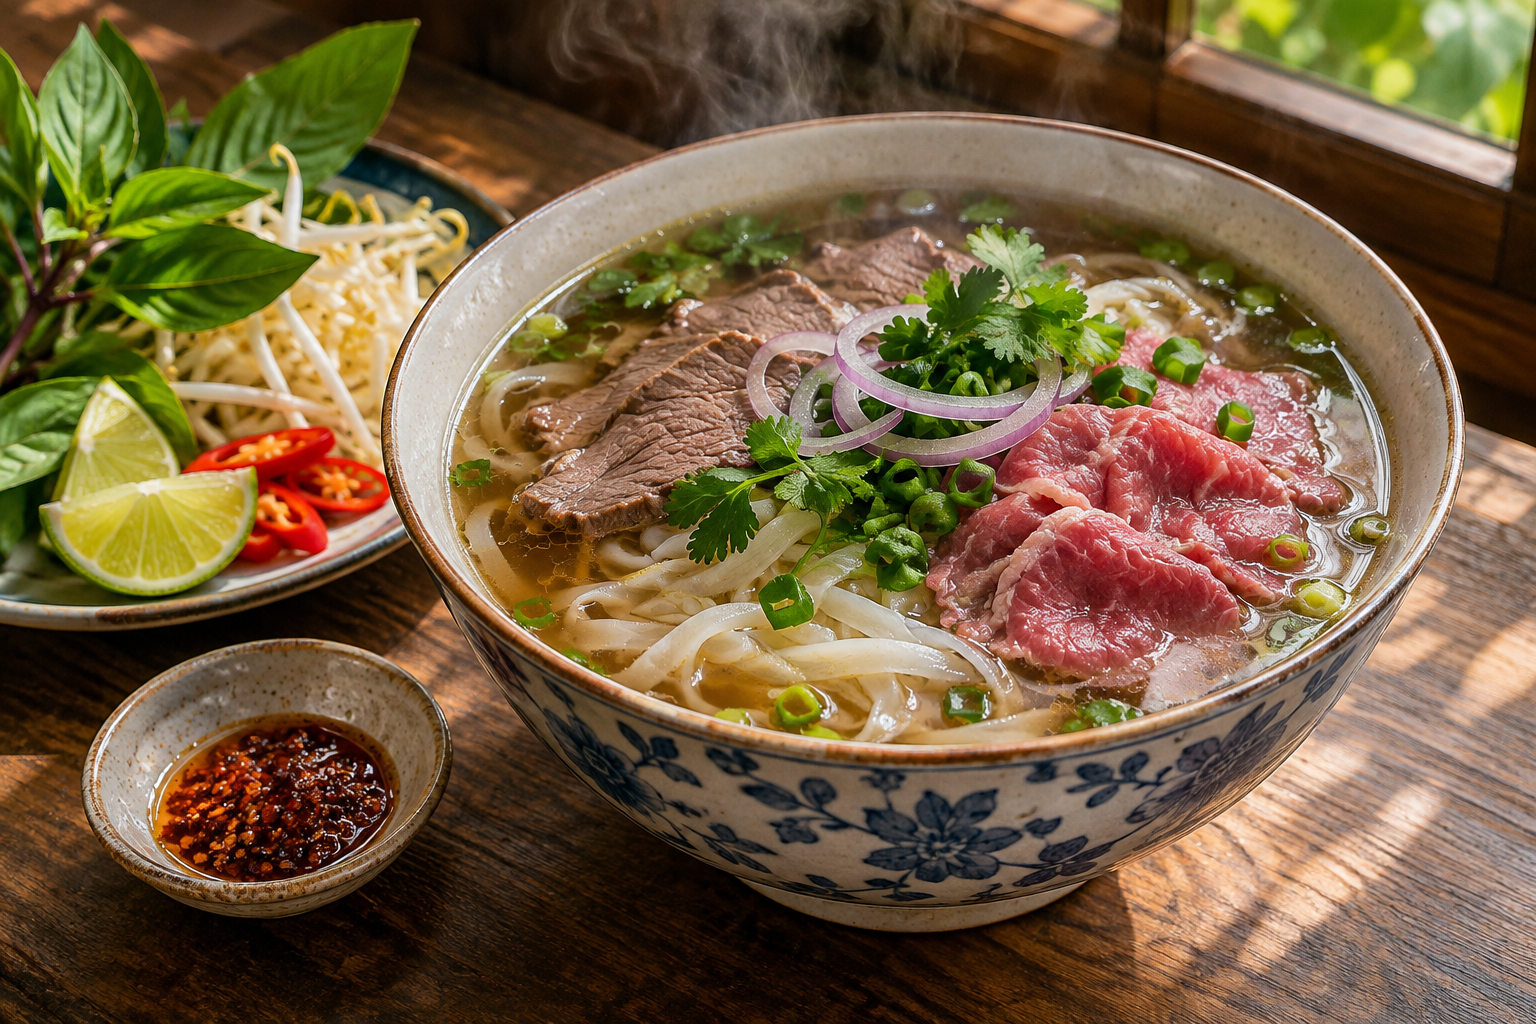
The Architecture of Authentic Vietnamese Beef Pho
#A great bowl of Vietnamese beef pho (Pho Bo) is judged entirely by its broth. 
The broth should not be a cloudy, heavy brown gravy, and it should not taste like salt water spiked with cinnamon powder. In Vietnam, a master pho broth is crystal-clear, deep amber in color, and layered with the clean richness of marrow bones, the gentle smoke of charred ginger, and the warm aroma of toasted star anise.
Recreating that iconic street-stall broth at home is not difficult, but you cannot rush it. 
There are four non-negotiable rules for real pho:
- You must parboil your beef bones and scrub them clean under cold water before starting the broth.
- You must char whole unpeeled onions and fresh ginger root over an open flame until the skins are blackened.
- You must simmer the stock at a gentle murmur for five to six hours, never letting the water boil violently.
- You must toast your whole spices dry and only steep them in the broth for the final hour.
When you follow these steps, the broth develops incredible depth without needing MSG cubes or canned broth shortcuts. Here is everything you need to build authentic, restaurant-quality Vietnamese beef pho from the bones up.
Choosing the Right Beef Bones: Marrow vs. Knuckle vs. Oxtail
#The biggest mistake beginners make is buying cheap stew beef or plain soup bones from the grocery store. 
Pho broth needs two distinct elements from beef bones: rich marrow fat for flavor and dissolved collagen for body.
- Marrow Bones (Femur and Shank): These straight, thick bones contain the soft, fatty marrow inside their central hollows. As they simmer, the marrow dissolves into tiny microscopic fat droplets that give the broth a silky mouthfeel and rich beefy sweetness.
- Knuckle and Joint Bones: These rounded, knobby bones from the knee and hip joints are packed with connective cartilage. Over hours of low heat, that cartilage breaks down into liquid gelatin. Gelatin gives the broth physical body and weight, coating your tongue so the spices linger.
- Oxtail or Short Ribs (Optional Enhancement): Oxtail contains both dense bone and sweet, tender meat. While more expensive, adding half a kilogram of oxtail to your bone mix elevates the broth to celebratory banquet quality.
For a standard six-serving batch, aim for roughly two kilograms (4.5 pounds) of bones. The ideal combination is 60 percent knuckle bones for gelatin and 40 percent center-cut marrow bones for rich marrow fat.
The Mandatory 10-Minute Parboil and Bone Wash
#If you have ever made beef broth that ended up looking grey, murky, and cloudy, this is the step you skipped.
Raw beef bones are filled with trapped blood, marrow impurities, and water-soluble proteins called myoglobin. If you put raw bones into cold water and simmer them for six hours, those proteins slowly coagulate into millions of tiny grey flakes that stay suspended in the liquid forever. No amount of fine-mesh straining or skimming with a ladle will ever make that broth clear.
The only way to achieve crystal-clear broth is a preliminary parboil.
How to Parboil the Bones Properly
#- Place all two kilograms of raw beef bones into your largest stockpot (at least 8 to 10 liters in volume).
- Cover the bones completely with cold tap water, making sure the water sits at least two inches above the top of the bones.
- Place the pot over high heat and bring it to a vigorous, rolling boil.
- Let the pot boil hard for exactly ten minutes. You will see a thick, foul-smelling, dark grey foam rise to the surface. That is all the residual blood and coagulated proteins being forced out of the bone cavities.
- Turn off the heat. Pour the entire contents of the pot through a large colander in the sink, dumping every drop of that dirty water down the drain.
- Leave the bones in the colander. Take each bone under cold running tap water and scrub it thoroughly with your fingers or a small clean brush. Wash away any clinging black residue, grey scum, or bits of clotted marrow.
- Wash the inside of the stockpot with soap and hot water to remove the grey scum ring stuck to the walls.
Now, and only now, are your bones clean enough to make real pho broth.
Charring the Aromatics: Flame, Smoke, and Sugar
#The unmistakable aroma that hits you when you walk into a Hanoi pho stall comes from charred alliums.
In Vietnamese cooking, you do not dice onions or mince ginger into hot oil. You leave them whole, keep the skins on, and roast them directly over open fire until the outsides are completely blackened and blistering.
Charring does two things:
- Caramelization: The intense, direct heat burns the bitter sulfur compounds out of the onion, turning its natural starches into sweet, caramelized sugars that dissolve into the soup.
- Smoky Color: The blackened skins impart a warm, golden-amber tint to the broth and infuse it with a faint, clean woodsmoke fragrance that balances the rich beef fat.
How to Char Over Gas Flame or Broiler
#Take two large yellow onions. Do not peel them; the papery skins protect the interior from drying out. Slice each onion in half across its equator.
Take 100 grams of fresh, plump ginger root. Do not peel the skin. Slice the root in half lengthwise so you have two long, flat pieces.
- On a Gas Stove: Place the onion halves and ginger pieces cut-side down directly onto the metal grates of your gas burners over medium-high heat. Let the open flames lick the vegetables directly. Turn them with metal tongs every two to three minutes. After 10 to 12 minutes, the skins will be charred jet-black, and the ginger will be fragrant and softened.
- In an Oven Broiler: If you do not have a gas stove, place the onions and ginger cut-side up on a foil-lined baking sheet. Set your oven broiler to high and slide the sheet onto the top rack, two inches below the heating element. Broil for 12 to 15 minutes until charred and blackened.
Once charred, let the aromatics cool for five minutes. Take them to the sink and gently scrape off the loosest, flaky black ash under cool running water. Do not wash away all the char; you want the golden-brown caramelized surface intact. Smash the ginger halves firmly with the side of a heavy cleaver to break open the fibers, allowing their juices to seep into the broth.
The Spice Blend: Balancing the Holy Trinity
#Pho is an aromatic broth, but the spices must act as a background choir, not a screaming soloist. If your broth tastes like a cup of spiced holiday chai, you used too much cinnamon or steeped the spices for too long.
The traditional pho spice profile revolves around five whole spices:
- Star Anise: The soul of pho. Provides sweet, licorice-like warmth. Use five whole eight-pointed stars.
- Cinnamon or Cassia Bark: Adds deep woody sweetness. Use one three-inch stick of true Vietnamese cassia or Ceylon cinnamon.
- Black Cardamom (Thao Qua): Highly smoky, resinous, and earthy. This is the secret ingredient that separates authentic street pho from Western supermarket soup. Crack one pod open with the flat of a knife so the seeds are exposed.
- Whole Cloves: Intensely aromatic. Use only three whole cloves; any more will overpower the entire pot.
- Coriander and Fennel Seeds: One tablespoon of coriander seeds and one tablespoon of fennel seeds provide sweet herbal lift and balance the heavy beef marrow.
Toasting and the 60-Minute Steeping Window
#Never drop raw, cold spices directly into your broth.
Place a dry stainless steel skillet over medium heat. Add all your whole spices. Shake the pan constantly for two to three minutes. As the heat activates the essential oils inside the spices, you will smell an incredible wave of sweet, peppery fragrance.
Pour the toasted spices onto a clean piece of cotton cheesecloth, gather the corners, and tie it securely with kitchen twine to make a spice sachet. A large stainless steel mesh tea infuser works equally well.
Here is the critical timing rule: Do not drop the spice sachet into the broth at the beginning of the five-hour simmer. 
Whole spices contain heavy tannins. If you boil cinnamon, cloves, and star anise for five hours, those tannins leach into the liquid, turning your sweet broth bitter, cloudy, and medicinal. 
Add the spice sachet only for the final 45 to 60 minutes of simmering. That is the exact window needed to extract their sweet, volatile aromatic oils while leaving the bitter tannins trapped inside the spices.
Simmering: Why Boiling Kills Broth Clarity
#Return your scrubbed, clean bones to the washed stockpot. Add a 500-gram piece of boneless beef brisket or chuck roast—this meat will simmer along with the bones to provide tender cooked beef slices for the bowls later.
Add your charred onions, smashed charred ginger, and five liters of clean, cold water. 
Set the pot over medium heat and bring it slowly to a gentle simmer. As soon as the first bubbles reach the surface, immediately drop the heat to low.
The Physics of Broth Clarity
#Watch the surface of your pot. 
You do not want large, rolling bubbles violently churning the water. When water boils aggressively, the physical turbulence whips tiny droplets of rendered marrow fat into the water, creating a cloudy, milky emulsion (the exact opposite of what you want in pho).
You want what French chefs call a frémir—a quiet, gentle shudder. The surface of the broth should look calm, with only tiny, lazy bubbles rising near the edges of the pot every few seconds. 
Leave the pot completely uncovered. Uncovered simmering allows excess water to evaporate slowly, concentrating the natural beef sugars while preventing steam from dripping back into the broth.
Skimming and Brisket Timing
#During the first hour of simmering, a thin layer of foam and golden fat will rise to the top. Use a wide, shallow spoon or fine-mesh skimmer to gently skim this foam off the surface. Do not skim away all the yellow fat—a thin layer of fragrant beef fat (nuoc beo) on top is essential for locking in the heat and carrying aroma to the diner's nose.
Check your piece of beef brisket after two hours of gentle simmering. Pierce it with a fork; if it slides in with little resistance, the meat is fully cooked and tender. 
Pull the brisket out with tongs. Submerge the hot meat in a bowl of ice-cold water for five minutes. This quick thermal shock tightens the exterior proteins and stops the meat from turning dark brown and oxidized. Wrap the chilled brisket tightly in plastic wrap and store it in the fridge until assembly.
Continue simmering the bones, charred onions, and ginger for another three hours (five hours of total bone simmering).
Seasoning the Broth: Nuoc Mam and Rock Sugar
#At the five-hour mark, drop your toasted spice sachet into the gently simmering broth. Let it steep for 45 to 60 minutes.
Turn off the heat. Use tongs to lift out the large bones and discard them. Pour the broth through a fine-mesh colander lined with cheesecloth into a clean pot. You should be left with roughly 3.5 to 4 liters of shimmering, transparent, amber-gold broth.
Now it is time to season. A traditional pho broth is seasoned with only three things:
- Fish Sauce (Nuoc Mam): Use a high-quality Vietnamese fish sauce made from black anchovies and salt (look for 40°N or 35°N on the glass bottle). Add 60 milliliters (about four tablespoons). Fish sauce provides intense savory umami and depth that table salt cannot match.
- Yellow Rock Sugar (Duong Phen): Refined white granulated sugar gives broth a sharp, flat sweetness. Vietnamese yellow rock sugar has a mellow, honey-like sweetness that rounds out the sharp edges of the fish sauce. Add 35 grams of yellow rock sugar (about two small lumps) and stir until dissolved.
- Sea Salt: Add one tablespoon of fine sea salt.
Taste the broth with a spoon. It should taste slightly saltier than your ideal bowl of soup. When you pour the broth over plain, unsalted rice noodles and fresh bean sprouts, the starch and water from the toppings will dilute the broth. If your broth tastes just right in the pot, it will taste bland in the bowl.
Noodles, Raw Beef Slicing, and Bowl Assembly
#With the broth finished and held at a gentle boil on the back burner, prepare your noodles and beef toppings.
The Noodles (Banh Pho)
#If you live near an Asian supermarket, buy fresh flat rice noodles (banh pho tuoi) from the refrigerated aisle. Fresh rice noodles have a silky, tender chew that dried noodles can never duplicate.
- If using fresh noodles: Drop them into a pot of rapidly boiling water for just 15 to 20 seconds to heat them through. Drain them aggressively in a colander, shaking out all excess water.
- If using dried flat rice noodles: Soak them in warm water for 25 minutes until pliable, then boil for two to three minutes until tender but firm. Drain thoroughly.
Divide the hot, drained noodles among six deep, preheated ceramic soup bowls.
Slicing the Raw Beef (Pho Tai)
#The most dramatic component of pho is pho tai—thin slices of raw beef that cook in the scalding broth right at the table.
Buy a good piece of beef flank steak, eye of round, or tenderloin. 
Place the meat in your freezer for 20 to 30 minutes before slicing. Chilling the meat firms up the muscle fibers without freezing it solid, allowing your sharp chef's knife to shave the beef paper-thin across the grain. The slices should be translucent—no thicker than two millimeters. 
Take your chilled, cooked brisket from the fridge and slice it thinly across the grain as well.
The Assembling Sequence
#- Lay three or four slices of cooked brisket over one side of the hot noodles.
- Spread your paper-thin slices of raw flank steak flat across the top of the noodles in a single layer. Do not pile the raw meat in a dense clump, or the hot broth will not be able to reach the center.
- Scatter a handful of thinly sliced scallions, shaved red onions, and fresh cilantro leaves directly over the meat.
Bring your strained broth to a furious rolling boil on the stove. 
Using a large ladle, immediately pour the boiling broth directly over the raw beef slices. Watch the meat turn before your eyes: the intense heat flash-poaches the thin beef from ruby-red to a delicate, tender pale pink in less than 15 seconds.
Table Garnish Etiquette: How to Eat Pho
#Carry the steaming bowls immediately to the table. Pho waits for no one—if it sits for five minutes, the noodles will absorb too much broth and turn soft.
Serve the bowls with a large communal platter loaded with:
- Fresh Thai basil sprigs
- Crisp raw bean sprouts
- Fresh lime wedges
- Thinly sliced fresh bird's eye chilies
- Culantro (sawtooth herb), if you can find it at an Asian grocer
The Traditional Tasting Ritual
#Before you squirt any sauces into your bowl, take your soup spoon and sip the broth completely plain. Appreciate the clarity, the warmth of the star anise, the gentle sweetness of the charred alliums, and the deep savoriness of the marrow bones.
Squeeze a wedge of fresh lime into the broth. Drop in a handful of fresh bean sprouts, push them down to the bottom of the bowl so the boiling broth wilts them, and tear a few fresh Thai basil leaves over the top.
Never squirt hoisin sauce or sriracha chili sauce directly into the broth of a well-made bowl of pho—it masks all the delicate bone flavors you spent six hours coaxing out of the pot. Instead, squirt your hoisin and sriracha into a small dipping dish on the side. Use your chopsticks to pick up a slice of tender beef, dip it lightly into the sauce, and eat it alongside a slurp of fragrant noodles and clean, hot broth.