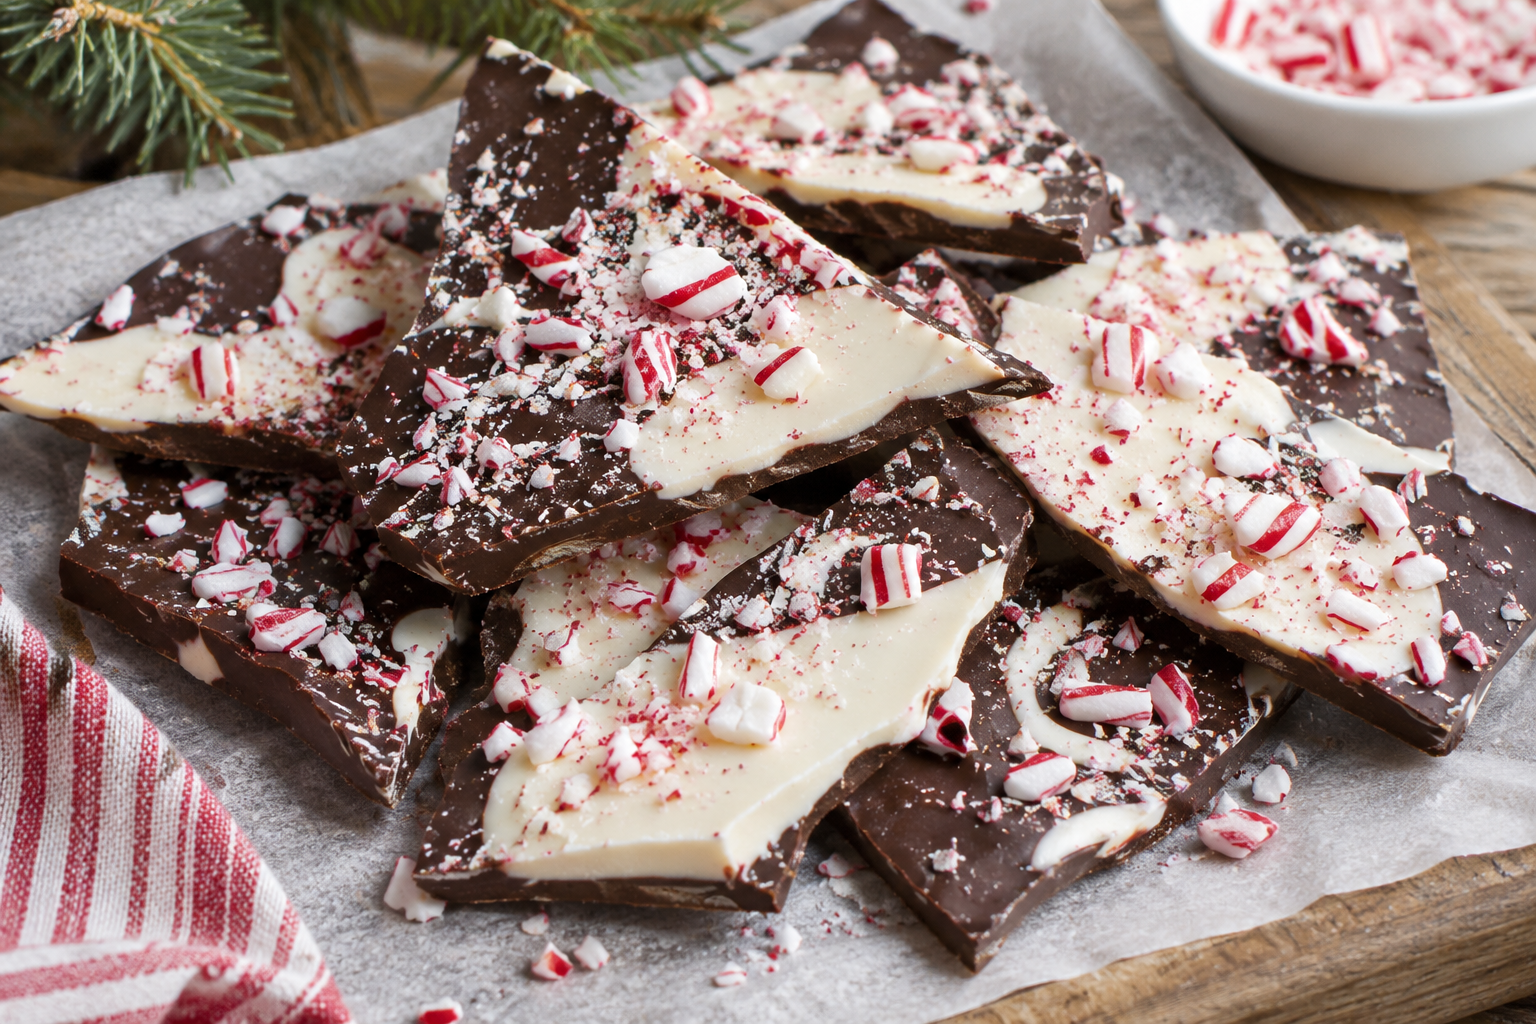
I’d wait for the dark chocolate to hold its shape before spreading the white layer, while there’s still a little give on the surface. Then I’d leave the finished bark alone until it’s hard. Those two waits have different jobs. One helps you layer the chocolates, the other gives you pieces you can pack.
Peppermint bark is a good gift when you can make a sheet, break it into pieces and sort them into tins. Set the parchment out first. There’s very little time to clear the counter once the chocolate is melted and ready to spread.
Choose chocolate that spreads well
#King Arthur’s version uses bars or chopped chocolate for both layers. I’d choose a bittersweet bar for the bottom and white chocolate for the top. The white layer and candy carry plenty of sweetness. A darker base gives you a different taste when you bite through both layers.
The shape matters too. Chopped bars tend to spread more easily than chips in this recipe. If two chocolates have very different thicknesses when melted, the thicker one can need more pressure from the spatula. That makes it harder to keep the bottom layer where you put it.
Use peppermint extract as measured in the recipe. Use oil only when it’s suitable for food and the recipe gives you a specific substitution. Bottles with similar names can have different strengths. Set the bottle away from the bowl after measuring so you don’t grab it again while adding the candy.
Get the tray and candy ready
#Line a flat tray with parchment. Crushed candy canes or hard peppermint candies give you little red and white pieces. Crush them in a clean bag and set aside the amount you need. I’d aim for a mixture of small pieces and a few bigger ones that are still easy to bite. Very large chunks can make the bark awkward to cut neatly.
Take a moment to check the tray will sit flat while the bark cools. If you’re working on a crowded kitchen counter, make yourself a landing spot now. Moving a tray of liquid chocolate around a saucepan and a sink full of dishes is a job you can avoid.
Watch the first layer
#Melt the dark chocolate gently. Use dry tools, and keep water away from the bowl if you’re melting it over hot water. Draw the melted chocolate out over the parchment. The shape can be rough, but keep the thickness fairly even so one end doesn’t break long before the thick middle does.
Give the spread layer time to set. I’d test a small edge with the tip of a clean spatula. If the base drags along with it, wait. When the layer holds its shape, get the white chocolate ready. The recipe calls for applying the top layer before the base hardens completely. Spread with light pressure so you don’t pull up the dark layer.
| What you notice | What to do |
|---|---|
| Dark chocolate moves with the spatula | Wait before adding the top. |
| The white layer spreads in streaks | Use fewer strokes and a lighter hand. |
| Candy pieces are falling off | Press the topping in gently while the white chocolate is soft. |
| The slab bends when you lift an edge | Give the finished bark more time to firm up. |
Let the finish decide how you break it
#Once the bark has hardened, lift it by the parchment and decide how you want to portion it. For loose pieces, start at an edge and break off a strip. Break the strip into smaller portions you can fit into the tin. For straighter pieces, work on a board and cut carefully rather than forcing the whole slab into a perfect grid.
If the layers separate on one piece, check how the others behave before assuming the whole batch is lost. Keep the fragments for serving in a bowl or chopping over a dessert. They still taste like peppermint chocolate. If it happens across the tray, try the recipe’s partially set base cue next time and record whether the base was already hard when the top went on.
Tempering the chocolate can give a firmer, shinier finish. I’d only take that route if I had a chocolate tempering method I could follow. For a first batch, the useful things to get right are the spread, the wait between layers and the final set.
Pack pieces you’d want to open
#Set the nicest pieces aside before you start filling every box. Put similar sizes together and use a piece of parchment between layers if they’re likely to rub. A small rigid tin helps the pieces stay in place. Pack it after the bark has finished setting, rather than hoping it will settle into the shape you want inside the gift box.
King Arthur’s storage guidance for this version is an airtight container at room temperature for up to a week. Choose a cool spot away from sun and heat. The source also gives freezing as an option for longer storage. If you’re gifting it, keep the ingredient labels so you can tell someone what the chocolates and candies contain.
I’d save a few odd pieces before sealing the boxes. They give you something to serve right away and leave the gift pieces alone once you’ve packed them.
Make a small plan for the second layer
#I’d read the top-layer step before melting the first bowl of chocolate. You need different things ready at the same moment: a base that holds still, melted white chocolate you can still spread and candy within reach. Lay out two dry bowls and two spatulas if you have them. It’s easier to keep the chocolates separate, and you won’t have to wash a spatula and dry it halfway through.
Once the dark chocolate is on the tray, look at the outside and the centre. A thin edge can firm up while the middle still moves. Touch a tiny spot near the thickest part with a dry utensil, and watch what happens when you lift it. If the surface comes away in a wet streak, wait. If it holds and you can still leave a slight mark, get the white layer on while you have that window.
If this is your first tray, an oval with a rough outline is plenty. Let the parchment carry the chocolate to the board when it’s ready. You’ll spend less time pulling thin chocolate back from the edge of a pan, and an uneven perimeter gives you a natural place to break the first pieces off.
Keep an eye on the white chocolate
#White chocolate can be thick enough that you have to work quickly. I’d chop it before the dark base goes onto the tray. Melt it gently and stir so pieces near the edge don’t get hotter than those in the middle. Put the bowl on a dry surface before you add candy or go near the tray.
If it’s hard to spread, start with a small area. Push the top out with a few light strokes. Repeatedly going over the same spot can pull the dark chocolate up. A streak of dark through the top is fine for a tray you’ll break up later. You can leave it where it is and add the crushed candy once the top is in place.
Tempering takes more care than melting. If you already have a reliable method for the chocolate you bought, you can use it. If the main goal is a tin of pieces for family, I’d put my attention into an even slab and give it time to firm up before cutting. The look of the tray matters much less once people start taking pieces from the tin.
Decide where the pieces will go
#| If you’re making it for | How I’d portion it |
|---|---|
| A plate at home | Break a mix of large and small pieces and put out a few at a time. |
| Small gift tins | Break a test piece and check that it fits below the lid. |
| A holiday dessert plate | Keep a few little fragments aside for scattering over a dessert. |
Imagine you’re packing four small tins. Before breaking the full slab, check the bottom of one tin and use its size to judge the first piece. Then set aside roughly equal groups and fill the boxes. It may be tempting to fill the first tin while the bark is still in one sheet. Working in groups makes it easier to see whether the fourth tin will get the same mix of pieces as the first.
Put a sheet of parchment between layers if the candy pieces stick out. Choose a cool spot for the boxes while you finish other jobs. If you’re carrying them across town, keep them away from direct sun or a heater vent. Chocolate that has softened in a hot car can stick to the paper even if it looked great when it went into the tin.
When the tray comes out a little different
#A light or dark streak across the top can stay. A broken corner can go on the serving plate. If the layers separate, I’d look at when the top went on and how firm the base was at that moment. Compare notes with the recipe before changing the chocolate and the timing on the same try.
If you need the pieces to look uniform, make a few smaller cuts along one edge after the slab has firmed. Look at the first cut before you do the rest. If the layers are holding and the chocolate breaks crisply, keep going. If a few pieces splinter, set them aside and cut the rest into slightly larger sections. For gifts, the practical goal is a piece someone can lift from the tin and eat without the top falling onto their lap.