If a UPI payment fails, stays pending, or is debited without reaching the receiver, save the UTR, the app Transaction ID, screenshots, bank SMS, amount, date, time and receiver or merchant details first. After you file a complaint, save the Complaint Reference Number (CRN) too. The UPI Transaction ID helps your app find the payment, the UTR helps banks trace it, and the CRN helps track your complaint.
This guide is for general education only. It is not legal, financial, tax or compensation advice. Complaint handling can vary by bank, payment app, merchant and official process.
Quick comparison: UPI Transaction ID vs UTR vs CRN
#A simple way to remember it: Transaction ID identifies the payment inside your app, UTR helps trace the payment through banking records, and CRN identifies the complaint after you raise it.
Why these numbers matter
#UPI looks simple on your phone, but a payment problem may involve your UPI app, your bank, the receiver’s bank, the merchant system and NPCI rails. Support teams need exact details because “money got deducted” is not enough to trace a specific transaction.
Before you retry, argue with the merchant, delete messages or close the app, collect the proof. The clearest complaint usually answers:
- Which account was debited?
- What was the exact amount?
- What was the date and time?
- Which UPI ID, merchant or receiver was involved?
- What status did the app show: successful, failed, pending, timed out, refunded or reversed?
- What is the UTR or bank reference number?
- Was a complaint already filed? If yes, what is the CRN?
Proof checklist before you complain
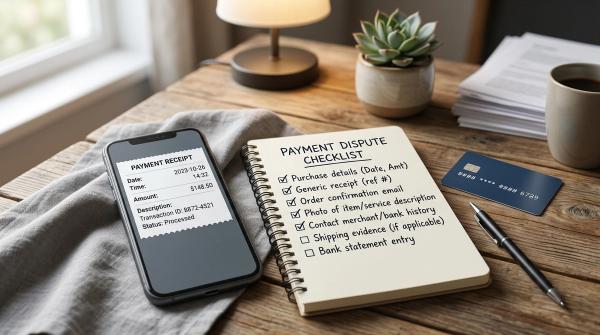
#Save these details in one folder on your phone:
- Screenshot of the transaction status page.
- Screenshot of the full receipt, if available.
- UPI Transaction ID or payment ID.
- UTR, UPI Ref No., RRN or bank reference number.
- Bank debit SMS.
- Bank statement entry, if visible.
- Exact date and time.
- Exact amount.
- Receiver UPI ID, merchant name, order ID or mobile number if visible.
- Refund or reversal screenshot, if the app shows one.
- CRN, ticket ID or service request number after filing the complaint.
Do not rely only on memory. A payment made “around 8 PM for about ₹500” is harder to trace than one with an exact UTR, timestamp and bank SMS.
What you should never share
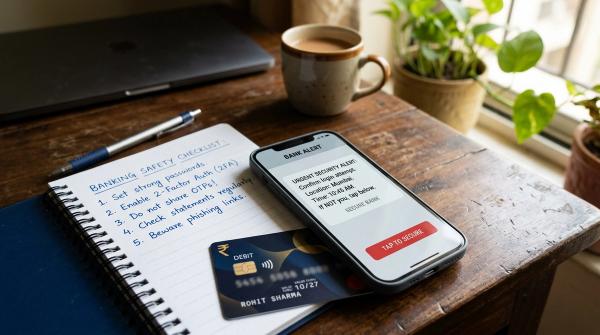
#When money is stuck, scammers often pretend to be bank support, payment app support, refund agents or unofficial helplines. Never share:
- UPI PIN
- OTP
- CVV
- Full card number
- Card expiry date
- Net banking password
- App login password
- Full bank account details
- Screen-sharing access with unknown callers
You do not need to enter your UPI PIN to receive money or get a refund. If someone asks you to enter a PIN, approve a collect request, install a screen-sharing app, or share an OTP to “release” a refund, stop and use only official support routes.
Where to find your UPI Transaction ID
#Open the app used for the payment and go to transaction history. Tap the payment and look for terms such as:
- Transaction ID
- UPI Transaction ID
- Payment ID
- Order ID
- Receipt number
- Transaction reference
Different apps use different labels. For app support, copy the exact number shown. Do not shorten it or guess missing digits.
Where to find your UTR number
#The UTR is usually one of the most useful details for tracing a UPI payment. It may appear as:
- UTR
- UPI Ref No.
- RRN
- Bank reference number
- Transaction reference
Check your UPI receipt first. If it is not visible there, check the bank debit SMS, mobile banking transaction details, account statement or passbook entry. If you still cannot find it, contact your bank through official channels and ask for the transaction reference for that UPI debit.
Where to find your Complaint Reference Number
#A CRN is created only after you file a complaint. It may also be called a complaint number, ticket ID, service request number, reference number or grievance number.
You may receive it through app support chat, bank email, SMS, a complaint confirmation screen, branch acknowledgement or an official complaint portal. Save it immediately because it proves you already reported the problem.
Step-by-step: what to do after a UPI payment problem
#1. Check the payment status
#Open the transaction in your app and read the status carefully. It may say successful, failed, pending, processing, timed out, refunded or reversed. Take a screenshot of the complete page.
If the transaction is pending, avoid making repeated payments in a hurry unless payment is truly urgent. A second payment can create duplicate debit confusion if the first one later succeeds or reverses.
2. Raise the issue with the app or bank first
#Use the app’s transaction help flow or your bank’s official channel. Share the amount, date, time, UTR, app Transaction ID and receiver or merchant details. If the app allows attachments, include screenshots.
A clear complaint can be short:
I made a UPI payment of ₹[amount] on [date] at [time] through [app]. The amount was debited, but the status is [failed/pending/successful but receiver did not get it]. UTR: [number]. App Transaction ID: [number]. Please check and resolve. Screenshots attached.
Ask for an acknowledgement and save the CRN or ticket ID.
3. Track the complaint
#Do not depend only on phone conversations. Track the complaint using the CRN, support ticket, email or SMS. Keep a note of follow-up dates and replies.
4. Escalate through official channels if needed
#If your app or bank does not resolve the issue, use official NPCI and RBI routes where applicable. NPCI’s UPI information and complaint pages are the relevant official source for UPI-related complaint routes. RBI’s Integrated Ombudsman route applies to eligible complaints against regulated entities and should be used only after following the required process.
Keep the UTR, Transaction ID, CRN, screenshots, SMS and replies ready before escalation.
What proof to save for common UPI problems
#Money debited but receiver says not received
#Save the UTR, app receipt, bank debit SMS, receiver details, amount, date and time. If the receiver sends a screenshot showing they did not receive it, save that too.
Payment failed but amount was debited
#Save the failed-status screenshot, bank debit SMS, UTR or reference number, app Transaction ID, amount, date and time. Raise a dispute from the transaction page if your app provides that option.
Payment pending for a long time
#Save the pending screenshot, UTR if visible, bank SMS, date, time and amount. Check the status later before paying again.
Paid the wrong UPI ID or wrong person
#Save the UTR, transaction receipt, receiver UPI ID or name, date, time and amount. Report quickly through official app or bank support. Do not trust anyone claiming they can reverse it if you share your PIN or OTP.
Merchant says payment was not received
#Save the UTR, merchant order ID, app receipt, bank debit SMS and the merchant’s unpaid status message if available. Share only necessary proof and hide sensitive information.
Refund promised but not visible
#Save the original payment UTR, refund screenshot if available, merchant communication, amount, date, and bank statement around the refund period. Ask for written confirmation or refund reference through official support.
Official-source notes for safer wording
#NPCI describes UPI as an instant, real-time inter-bank payment system for mobile payments. NPCI complaint status and complaint pages emphasize using transaction details or complaint reference information for tracking. RBI’s RB-IOS 2026 is described by RBI as a cost-free grievance redressal mechanism for complaints involving regulated entities, effective from July 1, 2026.
Because official processes can change, always verify the latest complaint route on the official NPCI, RBI, bank or payment-app website before sharing details.
Final takeaway
#For any UPI payment problem, follow this order:
- Save the transaction screenshot.
- Find the UTR or bank reference number.
- Note the app Transaction ID.
- Save the bank debit SMS and statement entry.
- Raise a complaint through official app or bank support.
- Save the CRN.
- Escalate through official NPCI or RBI routes only if needed.
The safest habit is simple: save proof, use official channels, and never share your UPI PIN, OTP, CVV, passwords or full financial details.