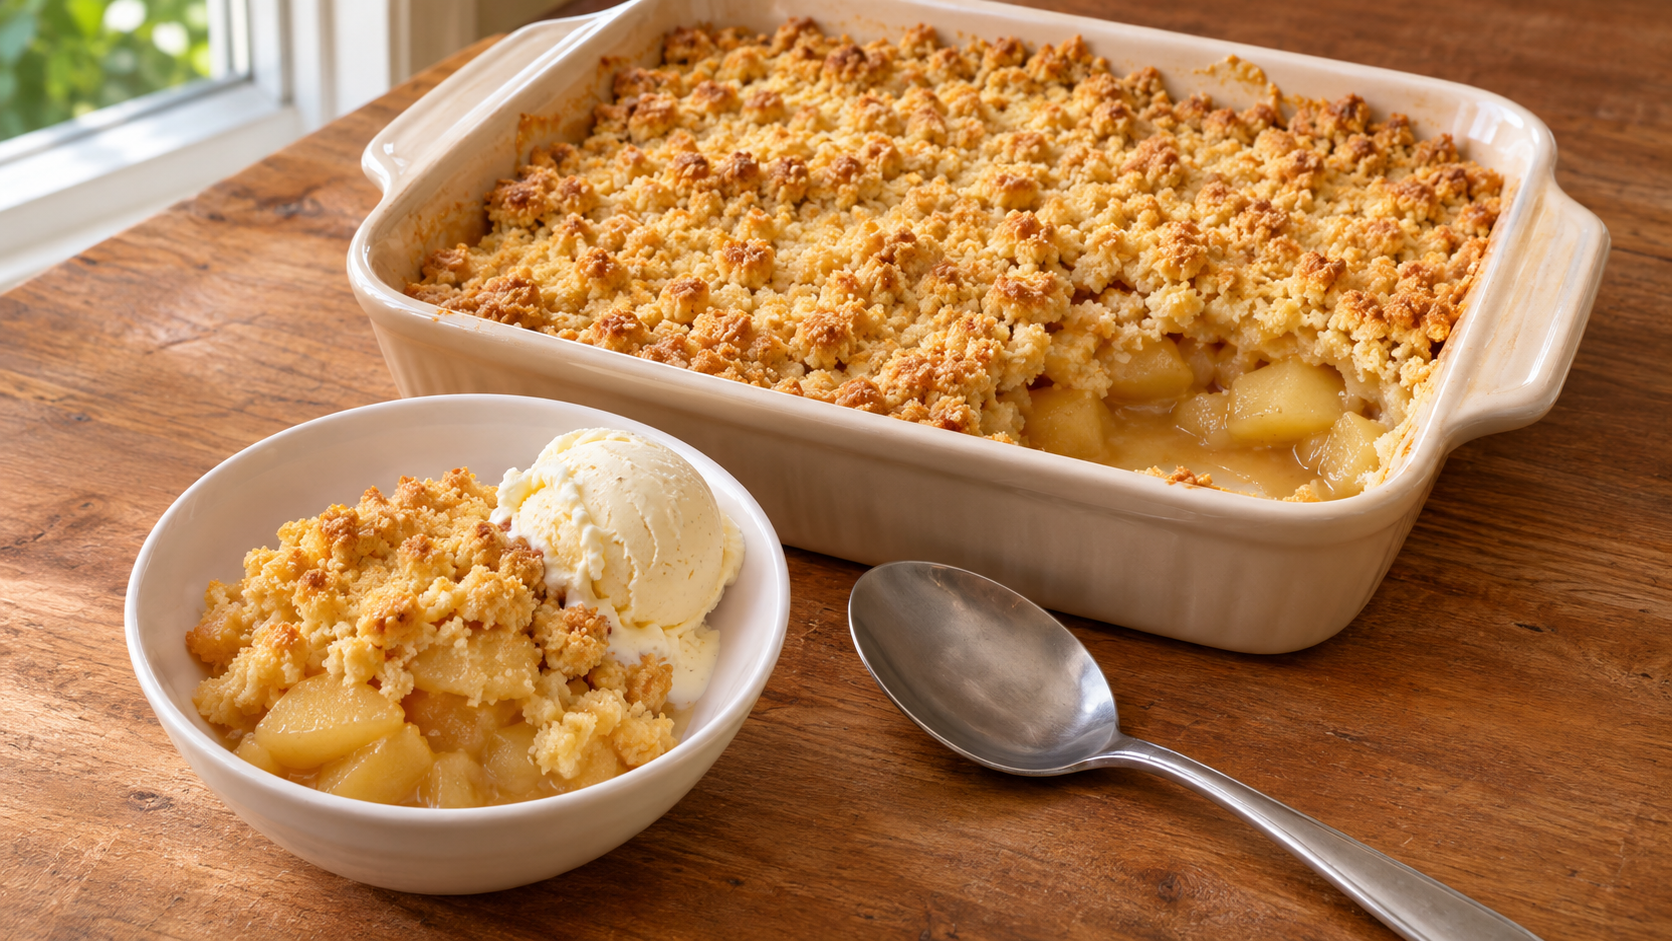
For a good apple crumble, soften the apples before adding the topping, deal with any loose juice in the pan, and bake until the crumbs are golden and the fruit underneath is tender. A brown top alone doesn't tell you whether dinner's dessert is ready.
I'd start with the apples you have. The bag on the counter might contain sharp green ones, sweet red ones, or a mixture bought on different shopping trips. You can use that mixture, but it helps to decide whether you want soft, almost spoonable filling or pieces of apple that still hold their shape.
You can check the fruit before you cover it, feel the topping between your fingers and test the middle before serving. Each check tells you something you can act on while you're cooking.
The recipe card below adapts Jamie Oliver's classic apple crumble. It makes eight portions with a light flour-and-butter topping, and uses a short stove step before baking. You'll find the full amounts and instructions in the card, after the FAQs.
Start with the kind of filling you want
#A crumble with soft Bramley apples and one with firm eating apples can both taste good. They'll feel different on the spoon. If you're expecting neat pieces and use apples that cook down, more time in the oven won't bring those pieces back.
For a softer filling, use some cooking apples such as Bramley where they're available. For more distinct chunks, choose firm baking apples such as Braeburn or Pink Lady. A mixture lets you keep some pieces among the softer fruit.
Granny Smith is another familiar tart option, though the result still depends on the fruit and how long you cook it. I wouldn't make a special shopping trip for one named variety if you already have sound apples suitable for baking. Check what you have, then choose the texture you're aiming for.
Taste a small piece of the raw apple before cooking. Sweet fruit and sharp fruit need different decisions about filling sugar. Keep the topping amounts consistent for your first batch; if you want to adjust sweetness, make that decision in the fruit rather than changing both layers at once.
Peel and core the apples, then cut pieces to a similar size. Put a small piece beside one of the larger ones as you work. A few uneven cuts are fine, but tiny scraps can soften while a much larger chunk stays firm. Cutting with that in mind saves you from trying to correct the difference later.
Give the apples a head start, then look in the saucepan
#The short stove step gives you a chance to see how your particular apples behave. Keep the lid on at first as the recipe directs, then lift it and check the fruit. Some pieces will soften sooner than others.
Use a spoon to turn them with care. You want to avoid breaking the whole pan into purée if you've chosen apples for a chunkier filling. If that softer texture is what you wanted, there's no need to worry about a few broken pieces.
Look at the liquid around the fruit before moving it into the baking dish. A little juice belongs in the filling. A loose pool that runs away from the apples needs attention before the topping goes on. Let excess liquid reduce with the lid off, stirring and checking so the bottom doesn't catch.
I would deal with that at the saucepan stage. Once the crumbs cover the fruit, it's harder to work on one layer without disturbing the other. Pouring everything into the dish and hoping the oven sorts it out leaves you with fewer choices.
There are good apple crumble recipes that start with raw fruit. Those usually specify their own cut size, topping and baking schedule. If you'd rather skip the saucepan, use a recipe written for that method. Taking out the stove step while keeping this recipe's short oven window can leave the fruit undercooked.
Do the apples need flour or cornflour?
#The card uses pre-cooked apples without an added filling thickener. Other recipes use flour or starch, particularly when working with juicier fruit. Those are different preparations, with amounts worked into their ingredient lists.
For this version, inspect the apples and reduce excess juice before assembly. I'd hold off on adding flour to a wet pan: the card doesn't include it in the filling, and that change would need its own amount and cooking instructions.
Stop rubbing the topping when you have crumbs
#Keep the butter cold for the rubbing-in method. Cut it into small pieces so you can work it through the flour without chasing one large lump around the bowl. Use your fingertips to rub and lift the mixture.
You're looking for a loose mixture with crumbs you can scatter. It doesn't need to look identical from one side of the bowl to the other. A few larger bits give you a different bite among the finer crumbs.
If you can still see patches of dry flour beside large pieces of butter, work on those areas. Stop when you have crumbs that you can scatter. You don't need to bring the mixture together like pastry dough.
Use the cold-butter method here even if another favourite topping uses melted butter. Follow that other recipe when you want its result; keep the ingredients and method together when you're choosing between them.
Scatter the mixture across the fruit so you can see where it has landed. Fill bare patches before adding more to the middle. You want each serving to have some topping; a thick pile in one place gives you a different bake from the thin layer beside it.
This version has no oats. Choose an oat-topped apple crisp recipe if that's the texture you want. The recipe names overlap between cooks and places, so check the ingredient list rather than relying on the label alone.
Check the dish before you fill it
#Choose your ovenproof dish while the apples are still in the saucepan. It's easier to choose another dish now than to lift a wet layer of fruit and crumbs out of one that's too small.
The full recipe uses a rectangular dish about 25 by 30 cm. Check its usable base as well as its rim: sloping sides and thick walls can make two dishes with similar advertised sizes feel quite different when you fill them.
Here's a useful example if you're making half a batch. A 25 by 30 cm base covers 750 square centimetres. A 15 by 25 cm base covers 375, which is half the area. With half the ingredients, that smaller rectangle gives you a sensible starting point for keeping a similar fruit depth.
Use that calculation to choose a dish, then check the bake itself. A different material, shape or oven can still change the cooking time. Start checking early when you change the batch size, and test the fruit before taking it out.
If you're choosing between two dishes, imagine serving from them. Can you reach the bottom with a spoon? Will the fruit sit in a manageable layer? Does the dish leave room above the filling? I'd choose on those grounds before worrying about how the dish will look on the table.
Set the filled dish on a baking tray to catch drips. Follow your bakeware's temperature and handling instructions, especially when working with chilled or frozen dishes.
Check beneath the topping before you serve
#Use the oven window in the card as a guide, then look for colour across the topping and bubbling fruit around the edges. Test an apple piece near the middle with a small knife. It should give easily rather than resist with a hard centre.
Try the fruit itself. If the knife slides through a gap, you haven't learnt much about the apple beside it. There's no need to make a row of holes, but check another piece if the first test was unclear.
The two layers can finish at different rates. A top that looks ready over firm fruit calls for a different response from tender apples under pale crumbs. Pause and identify which part needs more cooking.
| What you see | What to check next | A useful response |
|---|---|---|
| Golden topping, firm apple pieces | Test fruit near the centre | Shield the top loosely with foil and continue baking until the apples soften. |
| Tender fruit, pale topping | Look across the surface, not just at one corner | Continue uncovered, checking often so the crumbs don't burn. |
| Lots of loose juice under cooked fruit | Notice whether you're serving straight from the oven | Give the dish a short rest; next time, assess and reduce excess juice before assembly. |
| Dark crumbs at one edge | Check the rest of the topping and the fruit separately | Protect the browned area; don't use one dark edge as the doneness test. |
You can improve a batch while it's cooking, but a softer topping after storage won't become identical to a fresh one. Likewise, extra baking won't restore apple pieces that have already cooked down. Knowing that helps you decide when to keep working and when to serve what you have.
Make it fit around the rest of dinner
#Imagine you've served the main course and want to bake dessert while everyone eats. Prepare the components earlier that day and keep them covered and chilled, then assemble when you're ready for the oven. You avoid rubbing butter into flour while also passing dishes around the table.
Keeping the topping separate also lets you give the filling one last look before covering it. If you've prepared the fruit earlier, check for collected juice and account for a cold filling taking longer to heat through. Don't promise yourself dessert at a precise minute based only on the freshly prepared recipe's timing.
You can freeze raw crumble topping separately, too. Label the container with its contents and date. If you save only part of a batch, write down how much fruit it was meant to cover so you don't have to reconstruct the plan later.
For a whole crumble, a conservative freezer plan is to wrap it well, use it within a month and thaw it in the fridge before baking or reheating. Follow the dish manufacturer's handling instructions. Treat that month as a practical quality plan, not a reason to keep food that was stored badly before freezing.
Serve with custard, cream or a small scoop of ice cream if you like. Add it to individual bowls so anyone who wants the plain crumble can have it, and so you can store the remaining dessert separately from the accompaniment.
Leave yourself a useful next portion
#After serving, divide leftovers into smaller containers and refrigerate promptly. Keep your fridge at 4°C or below, and get leftovers into it within two hours; in conditions above about 32°C, use a one-hour limit. Don't wait for a large baking dish to become cold on the counter.
For a simple household storage plan, use the UK Food Standards Agency's recommendation to eat refrigerated leftovers within 48 hours, or freeze them sooner. Follow any shorter storage instructions for the cream or custard you serve alongside.
Reheat only the portion you want, until it's steaming hot through the centre. Check beneath the crumbs, where a cold patch is easier to miss. The Food Standards Agency advises reheating leftovers once, so portioning before storage saves you warming and cooling the whole dish repeatedly.
The topping may soften in storage. You can use an oven when you want to dry its surface a little, or a microwave when convenience matters more than crispness. In either case, check the filling as well as the surface. A warm bowl and a hot spoonful from the edge don't tell you enough about the middle.
If you plan to make the recipe again, note the apples and dish you used. Write down whether you wanted softer fruit or more distinct pieces. That gives you a specific choice to change next time, instead of adjusting the sugar, topping and cooking time all together.