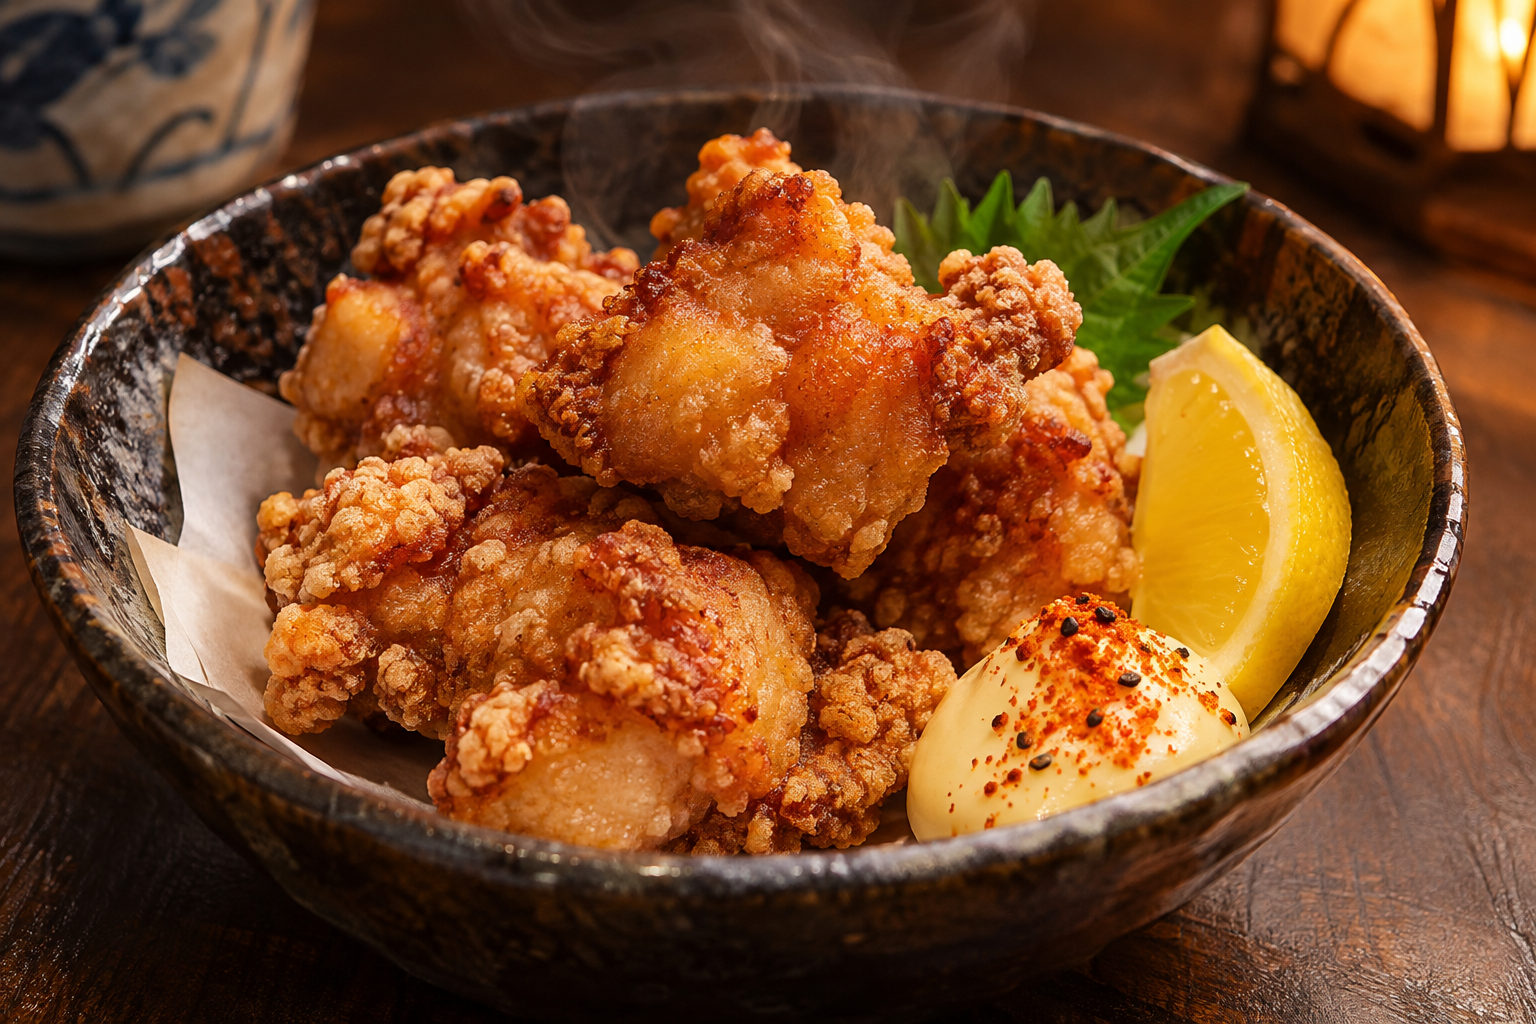
What Makes Authentic Japanese Karaage Different
#Japanese chicken karaage is not just fried chicken cut into bite-sized pieces. 
In Western fried chicken, the meat is usually plain or lightly brined, while all the seasoning sits in the thick flour breading or heavy batter. With authentic Japanese karaage (tori no karaage), the logic is completely flipped. The flavor lives deep inside the meat, while the crust is a whisper-thin, glass-like shell of pure starch.
Every great Tokyo izakaya follows three rules for karaage:
- They use boneless, skin-on chicken thighs, never skinless breast meat.
- They marinate the chicken in soy sauce, cooking sake, grated ginger, and garlic so the meat cures and absorbs umami before cooking.
- They coat the meat in katakuriko (Japanese potato starch) and fry it twice at two different oil temperatures.
The result is fried chicken that stays shatteringly crisp on the outside while squirting clear, savory juices the second you bite through the crust. Even when it cools down to room temperature inside an afternoon bento box, authentic karaage never turns soggy or greasy.
Here is how to make true izakaya-style chicken karaage in your home kitchen, including the science of starch and how to manage oil temperature without an expensive thermometer.
The Meat: Why Skin-On Chicken Thighs Are Essential
#If you try to make karaage with boneless, skinless chicken breast, you will be disappointed. 
Chicken breast has almost no intramuscular fat and very little connective collagen. When you drop small one-inch cubes of lean breast into 180°C frying oil, the meat fibers contract immediately, squeezing out moisture and leaving the interior dry, chalky, and stringy.
Chicken thighs are completely different. Thigh meat contains dark muscle fibers rich in myoglobin and collagen. As the chicken fries, that collagen breaks down into succulent gelatin, keeping the meat juicy even under intense heat.
More importantly, you want the skin left on the thighs. 
When you prepare each chunk of chicken, stretch the skin smoothly over the meat before coating it in starch. During the frying process, the fat under the skin slowly renders out into the oil, leaving behind a wafer-thin, super-crispy layer of fried poultry skin that bonds directly to the starch crust. That chicken skin provides half of the crunch and nearly all of the rich aroma.
How to Cut the Chicken Properly
#Do not cut your chicken thighs into tiny popcorn-chicken shreds. Tiny pieces dry out in the fryer, while massive chunks take so long to cook that the outer coating burns before the center is done.
- Lay each boneless thigh flat on your cutting board, skin-side down.
- Trim away any loose, dangling flaps of yellow fat or cartilage, but leave all the healthy white skin attached.
- Cut each thigh into roughly four to five equal pieces, about 1.5 to 2 inches (4 to 5 centimeters) across. Each piece should weigh around 35 to 40 grams.
- Uniform size is critical so that every piece cooks at the exact same rate in the oil.
The Marinade: Soy, Sake, Ginger, and Time
#The word karaage refers to a Japanese cooking technique where ingredients are seasoned with soy sauce and mirin or sake, lightly coated in dry starch, and deep-fried without a wet batter.
The marinade does more than add flavor; it tenderizes the meat.
The Marinade Ingredients
#For 600 grams of chicken thigh meat, you need:
- Japanese Dark Soy Sauce (Shoyu): Two tablespoons. This provides salt, depth, and the amino acids needed for the Maillard browning reaction during frying.
- Japanese Cooking Sake: Two tablespoons. Sake contains natural sugars and lactic acid, which break down tough muscle fibers and eliminate any gamey poultry smell.
- Toasted Sesame Oil: One tablespoon. Adds a subtle nutty fragrance and helps the seasonings cling to the meat.
- Fresh Ginger: One tablespoon, finely grated. Grate the ginger on a microplane or ceramic grater and make sure to pour all the spicy ginger juice into the bowl. Ginger cuts through the rich chicken fat and gives karaage its trademark refreshing bite.
- Fresh Garlic: Two cloves, grated into a smooth paste.
- Sea Salt and Black Pepper: Half a teaspoon each to round out the seasoning.
Notice that there is no sugar or sweet mirin in this marinade. Many Westernized recipes add sugar or sweet teriyaki sauces to their marinade, but sugar caramelizes and scorches at deep-frying temperatures. If your marinade contains too much sugar, your chicken crust will turn black before the meat cooks through. Keep it savory.
How Long to Marinate
#Massage the marinade into the chicken with your hands for about 60 seconds. You will feel the meat drink in the liquid.
Let the chicken sit at room temperature for 25 to 30 minutes. 
Do not marinate chicken karaage overnight in the refrigerator. Soy sauce is high in sodium. If you leave small bite-sized pieces of chicken in soy sauce for twelve hours, the salt will cure the meat like ham, drawing out internal water and making the cooked chicken tough and unpleasantly salty. Thirty minutes on the counter is the sweet spot: the flavors penetrate the surface layers, and the meat comes up to room temperature so it does not drop your frying oil temperature too drastically.
Katakuriko vs. Flour vs. Cornstarch
#The coating is where most home cooks make their biggest compromise, and it completely changes the texture of the dish.
In Western kitchens, fried chicken is coated in all-purpose wheat flour. Wheat flour contains glutenin and gliadin proteins, which form gluten when mixed with moisture. While gluten creates a sturdy, thick crust on Southern-style fried chicken, it absorbs a massive amount of oil and turns chewy or limp as it cools.
Authentic Japanese karaage is dusted with katakuriko.
What Is Katakuriko?
#Traditionally, katakuriko was made from the root of the wild katakuri (dogtooth violet) flower. Today, virtually all commercial katakuriko sold in Japan and international markets is 100 percent pure potato starch.
Potato starch is almost pure amylopectin and amylose. It has zero gluten. 
When potato starch hits hot oil, the individual starch granules absorb residual surface moisture, swell rapidly, and form a rigid, brittle, honeycomb-like structure. It creates a matte, pale, almost translucent coating that crunches like delicate spun glass under your teeth. Because there is no gluten to soak up oil, potato starch crusts feel light, clean, and grease-free.
Can You Substitute Cornstarch?
#If you cannot find Japanese katakuriko at your local Asian market, standard cornstarch is your best substitute. 
Cornstarch behaves similarly to potato starch and will give you a light, crispy crunch that is far superior to wheat flour. However, potato starch has larger granule sizes and a lower gelatinization temperature than cornstarch, which produces a noticeably lighter, more delicate shatter. If you have the choice, seek out real katakuriko.
Never use pure all-purpose flour unless you want Western chicken nuggets instead of Japanese karaage. If you like a slightly sturdier crunch, some Tokyo street food stalls use a 70/30 blend of potato starch and rice flour, which stays extraordinarily crunchy even under humid summer weather.
The Dredging Technique: Dry Coating, No Slurry
#How you apply the starch to the chicken is just as important as the starch you choose.
If you throw wet chicken dripping with marinade directly into a bowl of starch, the starch will immediately turn into a thick, gummy paste. That paste will fry into a hard, doughy armor.
Follow this exact dredging sequence:
- Place 80 grams of katakuriko into a wide, shallow bowl or pie dish.
- Take four or five pieces of chicken out of the marinade. Lightly shake off any excess dripping liquid.
- Stretch the chicken skin tightly over each piece so that the skin covers the top of the meat like a blanket.
- Roll the chicken in the potato starch, pressing gently so the starch adheres to every crevice.
- Pick up each piece and tap it firmly against your fingers to knock off all loose, powdery starch. You want a light, chalky, even film, not a thick white shell.
- Dredge only the pieces you are about to drop into the oil. If you dredge all the chicken 15 minutes in advance, the moisture from the marinade will bleed through the starch, turning it soggy before it even touches the pan.
The Science of the Double-Fry Method
#The secret to restaurant-quality karaage is frying the chicken twice at two distinct temperatures with a mandatory rest period in between.
If you try to cook chicken karaage in a single fry, you face an impossible culinary dilemma:
- If your oil is hot enough to make the potato starch crisp (180°C / 356°F), the delicate sugars in the soy sauce marinade will darken and burn before the chicken thigh meat cooks through to the center.
- If your oil is low enough to cook the meat gently without burning (160°C / 320°F), the starch will never get hot enough to expel its surface oil, leaving your chicken pale, greasy, and soft.
The two-stage double-fry solves this problem with basic thermodynamics.
Fry 1: The Gentle Cook (160°C / 320°F for 3 Minutes)
#The goal of the first fry is to cook the chicken meat through to roughly 90 percent doneness while allowing the potato starch to gelatinize and set into a pale, firm structure.
Drop your dredged chicken into the 160°C oil in small batches. Do not crowd the pot—adding too much cold chicken at once drops the oil temperature, causing the meat to stew in grease.
Let the chicken fry undisturbed for 90 seconds. Gently flip each piece with metal tongs or chopsticks and fry for another 90 seconds. 
At the end of three minutes, the chicken will look pale golden-yellow, almost blonde. It will not look fully crispy yet, and that is completely normal. Pull the chicken out immediately and place it on a wire cooling rack.
The Rest: Moisture Redistribution (4 Minutes)
#Do not skip the rest. This four-minute pause on the wire rack is where the real magic happens.
When meat cooks at high temperatures, internal juices are driven toward the cooler center. While the chicken sits on the wire rack, two critical things occur:
- Carryover Cooking: The intense thermal energy stored in the exterior of the meat continues to travel inward, gently finishing the cooking of the center without drying out the edges.
- Steam Release: Hot steam trapped beneath the crust escapes freely into the open air. If you kept the chicken in hot oil, that escaping steam would fight against the frying oil. By letting the steam vent on the rack, the crust dries out completely, preparing it for maximum crispness in round two.
Always rest fried chicken on a wire rack, never directly on a flat plate lined with paper towels. Paper towels trap the descending steam underneath the chicken, turning the bottom of each piece into a soggy sponge within two minutes.
Fry 2: The Flash Crisp (180°C / 356°F for 45–60 Seconds)
#Now, crank the heat under your pot until the oil reaches 180°C (356°F).
Drop the rested chicken pieces back into the bubbling oil. Because the chicken is already fully cooked on the inside, this second fry is strictly about the exterior shell.
The intense heat flash-vaporizes any remaining surface moisture and rapidly boils away any oil clinging to the potato starch. Within 45 to 60 seconds, the pale blonde crust will transform into a rich, deep golden-amber. 
Use your tongs to gently swirl the chicken in the oil so every side browns evenly. You will feel the crust become light and hard against your metal tongs. Pull the chicken out the second it turns amber and transfer it to a fresh wire rack.
Checking Oil Temperature Without a Thermometer
#You do not need a digital laser thermometer to make great karaage. Japanese chefs have used simple wooden chopsticks (saibashi) to test oil temperature for centuries.
Take a dry, clean, unlacquered wooden chopstick or the handle of a wooden spoon. Dip the tip straight down into the center of the hot oil and watch the wood:
- Below 150°C (Too Cold): Nothing happens. No bubbles form around the wood. Do not add chicken yet, or the starch will dissolve into the oil.
- 160°C to 165°C (Perfect for Fry 1): Tiny, steady, gentle bubbles slowly and consistently rise from the tip of the chopstick, resembling the carbonation in a freshly poured glass of sparkling water. This is your cue to begin the first fry.
- 180°C to 185°C (Perfect for Fry 2): Vigorous, energetic bubbles immediately surround the entire submerged tip of the chopstick, rising rapidly to the surface with an audible sizzle. This is the exact temperature for the second crisping fry.
- Above 195°C (Too Hot): The oil smokes, smells pungent, and large violent bubbles erupt instantly from the wood. Turn the heat down and wait three minutes before frying.
Traditional Serving and Table Etiquette
#In Japan, karaage is served piping hot directly from the second fry. 
The classic presentation is simple: arrange the golden nuggets in a rustic ceramic bowl or on a bamboo basket lined with Japanese paper. Always serve it with fresh lemon wedges. Squeezing a few drops of tart lemon juice over the hot chicken cuts through the richness and highlights the fresh ginger in the marinade.
If you visit an izakaya in Osaka or Tokyo, you will often see karaage served with two traditional accompaniments:
- Japanese Kewpie Mayonnaise: Unlike Western mayonnaise, Kewpie is made exclusively with egg yolks and rice vinegar, giving it a rich, custard-like texture and savory umami that pairs brilliantly with crunchy fried poultry.
- Shichimi Togarashi: A vibrant Japanese seven-spice blend containing red chili pepper, roasted orange peel, sesame seeds, ginger, nori, and hemp seeds. Dusting a pinch of shichimi over your mayo adds gentle heat and citrus brightness.
Pair your fresh chicken karaage with a bowl of steamed short-grain white rice, a crisp cabbage salad dressed with sesame vinaigrette, and an ice-cold draft lager or chilled mug of barley tea (mugicha).
How to Reheat Leftovers and Keep Them Crisp
#If you have leftover karaage, do not reheat it in a standard microwave. Microwaves heat water molecules from the inside out, turning the internal moisture into high-pressure steam that turns the delicate potato starch crust into rubbery mush.
The best way to reheat leftover karaage:
- Toaster Oven or Standard Oven: Preheat your oven to 200°C (400°F). Place the cold karaage on a wire rack set inside a baking sheet. Heat for 6 to 8 minutes. The dry circulating air crisps the potato starch shell while heating the chicken gently.
- Air Fryer: Place cold karaage in a single layer in the air fryer basket at 190°C (375°F). Heat for 3 to 4 minutes. Any residual oil trapped in the skin will sizzle, restoring that fresh-out-of-the-fryer crunch with zero effort.
With good chicken thighs, a splash of sake, and a dusting of potato starch, you can make fried chicken at home that easily rivals the best tavern in Tokyo.