If you want to skip the holiday stovetop scramble and make mashed potatoes a day or two before dinner, bake them as a casserole with cream cheese. You whip the potatoes with melted butter and cream cheese, spread them in a baking dish, and reheat them to a bubbling, golden-brown crust right when your roast rests.
Most people dread making mashed potatoes for a crowd because of bad timing. Peeling, boiling, and mashing ten pounds of steaming potatoes fifteen minutes before dinner fills the sink, crowds every stovetop burner, and leaves you sweating over a pot while guests arrive.
Yet reheating plain leftover mashed potatoes usually turns into a disaster. The starch tightens up in the fridge, water separates out, and reheating turns the texture either gluey or chalky.
The casserole method solves both problems. By stabilizing the potato starch with a high-fat dairy emulsion, you can assemble the entire dish 48 hours early. When baked, it emerges hot, velvety, and topped with browned parmesan cheese.
Here is how to prep, chill, and bake make-ahead mashed potatoes that taste even richer than last-minute mash.
Why Leftover Mashed Potatoes Turn Dry and Chalky
#To understand why make-ahead mashed potatoes fail, you have to look at potato starch.
Raw potatoes are full of tightly packed starch granules. When you boil them, water penetrates the granules and swells them until they burst and gelatinize into a soft, creamy network. That is what gives fresh mashed potatoes their fluffy texture.
As cooked potatoes chill down in the refrigerator, a process called starch retrogradation begins:
- Starch recrystallization: The dissolved amylose starch molecules lose energy, align together, and recrystallize into a rigid, firm matrix.
- Moisture weeping (syneresis): As the starch chains tighten, they squeeze out water molecules. You see this as a watery puddle pooling at the bottom of a leftover bowl.
- Surface evaporation: Exposed refrigerator air wicks moisture from the top layer, leaving a leathery skin that never melts back smoothly.
If you simply reheat chilled, butter-only mashed potatoes, the separated water boils off, leaving behind stiff, crumbly potato starch. To make potatoes truly make-ahead friendly, you have to physically coat and protect those starch granules before they enter the cold fridge.
The Potato Choice: Why Yukon Golds Win Every Time
#Your choice of potato dictates whether your casserole turns out fluffy and velvety or dense and heavy.
Russet potatoes are high in dry, fluffy starch. They make excellent baked potatoes, but their thin starch cell walls rupture easily under mechanical pressure. If you work russets into a make-ahead casserole and reheat them, they tend to turn watery and lose body.
Red potatoes and fingerlings are waxy, low-starch varieties. They hold their shape wonderfully in potato salads, but when riced or mashed, they turn gummy and paste-like almost immediately.
Yukon Golds sit right in the sweet spot of medium starch and natural buttery flavor:
- Creamy density: They contain just enough starch to absorb hot dairy without falling apart into soup.
- Rupture resistance: Their starch cells hold up under chilling and reheating without leaking excess water.
- Natural richness: Their golden flesh gives the finished casserole a vibrant color and mild, nutty sweetness that does not require artificial coloring.
Pick five pounds of firm, medium-sized Yukon Golds that are free of green patches or soft eyes.
Step 1: Boiling and Steaming Out Excess Moisture
#Great mashed potatoes start with controlling water. Water makes potatoes bland; dairy makes them rich.
Scrub your potatoes clean and peel them completely. Cut them into uniform two-inch chunks so they cook at an identical rate. If some chunks are tiny while others are huge, the small pieces will overcook and become waterlogged before the big ones soften.
Place the cut potatoes into a large pot and cover them with cold tap water by at least an inch. Always start with cold water. If you drop raw potatoes into boiling water, the exteriors cook and turn mushy while the centers remain hard and raw.
Add two tablespoons of coarse kosher salt to the water. Potatoes absorb seasoning while boiling; salting after mashing leaves the flavor sitting flat on the surface rather than running deep through the starch.
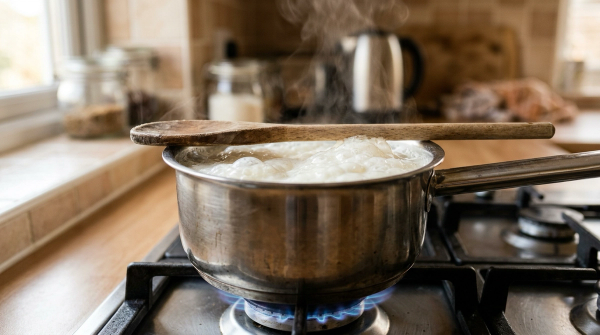
Bring the pot to a vigorous boil over high heat, then drop the burner to medium-high to maintain a steady rolling simmer. Cook for 15 to 20 minutes, testing with a thin paring knife. When the knife slides into the center of a potato chunk with zero resistance, they are done.
Drain the potatoes thoroughly in a colander, then return them immediately to the dry, hot pot over low heat. Shake the pot gently for 60 to 90 seconds. You will see clouds of white steam billow off the potatoes, and a dry, powdery white film will form across the bottom of the pot.
Steaming out this excess boiling water creates empty room inside the potato cells, allowing them to drink in hot melted butter and cream instead of tap water.
The Dairy Emulsion Secret: Cream Cheese and Butter
#This is the central trick that makes this casserole work days in advance. Ordinary milk and butter are not enough to stop starch retrogradation. You need an emulsion stabilizer with substantial fat content and milk proteins.
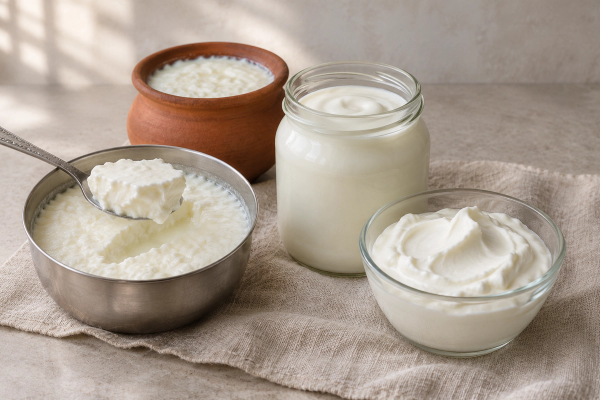
Cream cheese is the secret weapon:
- High fat buffer: Cream cheese contains roughly 33% milk fat, which wraps around individual starch granules and prevents them from recrystallizing when chilled.
- Lactic acidity: The subtle tang of cultured cream cuts through the heavy potato starch, keeping the flavor bright and balanced instead of cloying.
- No cream cheese flavor: In a five-pound batch of potatoes, eight ounces of cream cheese does not make the dish taste like cheesecake. It simply yields an ultra-plush, velvety mouthfeel.
Rice your hot, steamed potatoes using a handheld potato ricer or food mill directly into a large mixing bowl. Ricing extrudes the potato flesh through tiny perforations without crushing cell walls, giving you lump-free fluff without a trace of gluey gumminess. Never use a food processor or blender, which shears starch cells violently.
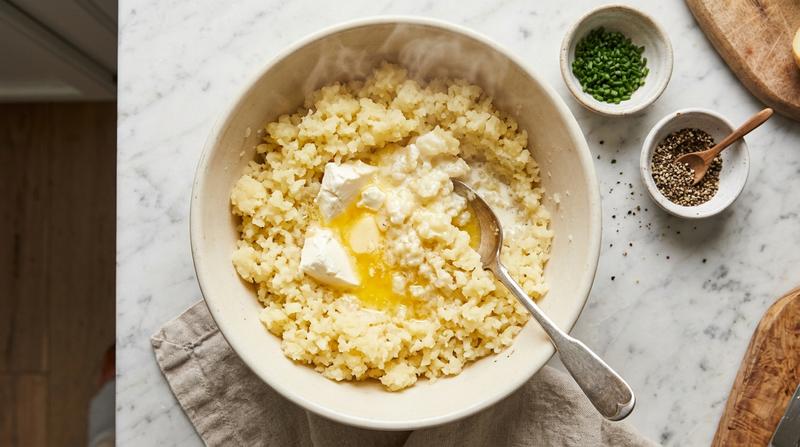
While the riced potatoes are piping hot, drop in eight ounces of softened cream cheese cut into cubes and one stick (half a cup) of unsalted butter cut into pieces.
The residual heat from the potatoes melts the fats immediately. Fold gently with a wide silicone spatula until the butter and cream cheese incorporate smoothly.
Warm one cup of heavy cream or half-and-half in a small saucepan until steaming, then pour it gradually into the bowl. Fold until the potatoes look glossy, supple, and slightly looser than standard stovetop mash. They need to be slightly loose because the starch will absorb additional moisture while chilling in the refrigerator.
Season with two teaspoons of kosher salt and a half-teaspoon of finely ground white or black pepper. Taste a spoonful and adjust seasoning now; potatoes absorb a surprising amount of salt.
Step 2: Seasoning and Assembling in the Casserole Dish
#Take a 9-by-13-inch ceramic or glass baking dish and coat the inside generously with two tablespoons of softened butter.
Spoon the warm mashed potato mixture into the prepared dish. Use the back of an offset spatula or large spoon to spread the potatoes evenly to the edges.
Do not smooth the top completely flat. Instead, use the tip of your spoon to create decorative swirls, peaks, and ridges across the surface. These ridges catch the heat of your oven broiler later, turning into deeply browned, crispy edges that contrast with the silky interior.
Dot the top surface with two additional tablespoons of butter cut into tiny cubes.
If you are baking the casserole on the same day, let it cool on the counter for 20 minutes before baking.
If you are making it ahead, let the dish cool to room temperature on your counter for 45 minutes. Never put a steaming hot casserole straight into the fridge; trapped condensation will drip down from the cover and create a soggy water layer on top.
Once cooled, press a sheet of plastic wrap directly onto the potato surface to seal out air, then wrap the entire baking dish tightly with aluminum foil. Refrigerate for up to 48 hours.
The Reheating Protocol: Cold-to-Hot Oven Schedule
#Reheating a dense, cold potato casserole straight from the refrigerator requires a two-stage baking schedule. If you blast a refrigerator-cold ceramic dish at 425°F immediately, the edges will burn before the dense center warms, and thermal shock could crack glass or ceramic bakeware.
Follow this simple timeline:
- Counter rest: Take the casserole out of the refrigerator 45 to 60 minutes before you plan to bake it. Let it sit on your kitchen counter to take the hard chill off the dish.
- Preheat the oven: Set your oven to 350°F (175°C) with a rack positioned in the center.
- Covered steam bake: Remove the plastic wrap, replace the aluminum foil cover, and slide the dish into the oven. Bake covered for 30 minutes. The trapped steam heats the dense core gently without drying the surface.
- Uncovered crisp bake: Remove the foil completely. Increase the oven temperature to 400°F (200°C) and bake uncovered for an additional 15 to 20 minutes, until the edges are vigorously bubbling and the internal temperature reads 165°F (74°C) on a digital probe.
The Golden Crust: Parmesan and Garlic Breadcrumbs
#The hallmark of a great casserole is the textural contrast between a melting interior and a crisp, savory lid.
Five minutes before the uncovered bake finishes, scatter half a cup of freshly grated Parmigiano-Reggiano over the swirled potato peaks. Parmesan melts into a golden, nutty lace that browns beautifully without turning greasy like cheddar can.
If you want an extra crunch, toss two tablespoons of panko breadcrumbs with a teaspoon of melted butter and a pinch of garlic powder, and sprinkle that over the parmesan.
Return the dish to the oven under the broiler on High for 2 to 3 minutes. Watch it closely through the oven window—the ridges will blister into a gorgeous mosaic of golden-brown crunch.
Pull the casserole out, let it rest for five minutes to settle, and shower the top with three tablespoons of freshly sliced chives or scallions before serving.
Make-Ahead vs Last-Minute Mash Comparison
#Looking at how the two approaches compare in a real holiday kitchen shows why this casserole format has become a staple for experienced hosts:
| Factor | Last-Minute Stovetop Mash | Make-Ahead Casserole |
|---|---|---|
| Holiday Stovetop Space | Consumes 2 large burners during peak prep | Zero burners needed; bakes in oven while roast rests |
| Host Stress Level | Frantic peeling, draining, and mashing at 5 PM | Done 24 to 48 hours early; slide into oven at 4:30 PM |
| Temperature at Serving | Often lukewarm after plating multiple sides | Piping hot and bubbling straight from the oven |
| Texture Consistency | Easily turns gummy if overworked while rushing | Consistently velvety due to fat-stabilized starch emulsion |
| Surface Contrast | Soft throughout with no textural variation | Silky interior paired with a crispy, browned cheese crust |
| Cleanup Timing | Huge pot, colander, and ricer cluttering the sink | Prep dishes washed days ago; only serving dish remains |
Common Make-Ahead Potato Mistakes and Quick Fixes
#Keep these practical checks in mind to ensure your casserole turns out flawless:
- Potatoes look broken or greasy: If the melted butter separates upon reheating, the oven was too hot too fast. Stir two tablespoons of warm whole milk or cream into the top and whisk gently off heat; the liquid re-emulsifies the fats in seconds.
- Overworking with an electric mixer: Hand-held beaters or food processors whip excess air and shear starch molecules, creating sticky paste. Stick to a simple ricer or sturdy hand masher.
- Putting hot potatoes directly in the fridge: Trapped steam inside plastic wrap will rain down on your potatoes, creating soggy, watery pockets. Always let the dish cool on the counter for 45 minutes before wrapping and chilling.
- Undersalting the boiling water: Adding salt only at the end leaves the potatoes tasting flat. Ensure the boiling water tastes salty like sea water so the potato starch seasons from the inside out.
Prepping your mashed potato casserole ahead of time frees up your kitchen, eliminates dinner-hour panic, and delivers a richer, crisper side dish than anyone expected. Once you try baking them ahead, you will never mash potatoes on holiday morning again.