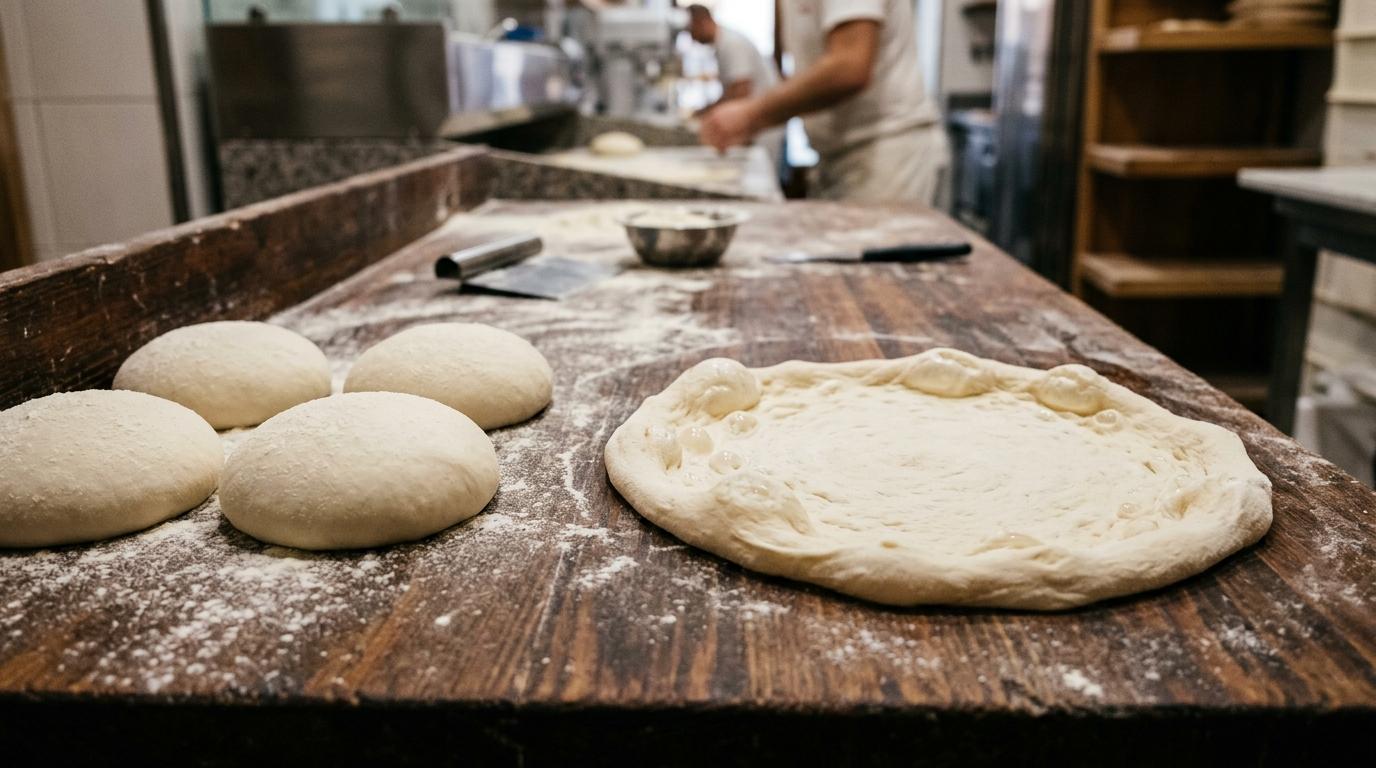
The 4 Pillars of True Neapolitan Dough: Flour, Water, Yeast, and Salt
#Authentic Neapolitan pizza dough requires only four basic ingredients: wheat flour, water, yeast, and salt. There is no oil, milk, sugar, or dough conditioner in the traditional dough crafted under the standards of the Associazione Verace Pizza Napoletana (AVPN).
The magic of Neapolitan pizza does not come from a long ingredient list; it comes entirely from fermentation, gluten development, and heat transfer. 
When you bite into a true Neapolitan pizza, the outer rim (the cornicione) is light as air, crisp on the surface, soft and pillowy inside, and covered in delicate charred "leopard spots." The center of the crust is paper-thin and supple enough to fold in half like a wallet (known in Naples as a portafoglio).
Most home bakers fail because they treat pizza dough like sandwich bread. 
They use warm water, heaps of commercial yeast, knead it for five minutes, and bake it an hour later in a standard 450°F (230°C) oven. The result is always the same: a dense, pale, chewy disk that tastes like cardboard.
With the right flour, proper baker's percentages, an extended 24-to-48-hour cold fermentation, and a simple baking steel technique, you can bake world-class Neapolitan pizza in a regular home kitchen. Here is the complete from-scratch masterclass.
Flour Science: Why Italian Tipo 00 Matters (And When Bread Flour Works Better)
#The flour you choose determines whether your dough will be light and extensible or dense and rubbery.
In Italy, wheat flour is classified by how finely it is ground, ranging from Tipo 2 (coarse whole wheat) to Tipo 00 (the finest, powder-soft grind). 
Authentic Neapolitan pizzaiolos use Italian Tipo 00 flour with a high protein content (typically 12% to 13%) and a strong gluten strength rating (W280 to W320). 
Brands like Caputo Pizzeria (blue bag) or Caputo Cuoco (red bag) are the gold standards. This fine grind allows the dough to absorb water rapidly, develop supple, stretchy gluten strands, and produce an ultra-tender crumb that puffs violently when exposed to intense heat.
However, there is a catch when baking in a home oven. 
Authentic Tipo 00 flour is un-malted. It is designed specifically for commercial wood-fired ovens running at 900°F (480°C), where raw radiant heat browns the crust in 60 to 90 seconds. 
In a standard domestic kitchen oven that tops out at 500°F or 550°F (260°C to 285°C), pure Tipo 00 dough takes 6 to 8 minutes to cook, losing moisture and turning pale white or grey rather than golden and charred.
If you are baking in a standard home oven without an outdoor 900-degree pizza oven, you have two great options:
- Option A: Use unbleached high-protein bread flour (like King Arthur Bread Flour, roughly 12.7% protein). Bread flour contains malted barley flour, which breaks down complex starches into simple sugars that caramelize beautifully at lower home oven temperatures.
- Option B: Use Italian Tipo 00 flour, but add 1% diastatic malt powder (or 1% honey/extra virgin olive oil) to your formula. This compensates for the domestic oven’s lower heat and guarantees rich, golden-brown crust color and leopard spotting.
Baker's Percentages: The Exact 65% Hydration Master Formula
#In professional pizza baking, all ingredients are measured in grams as a percentage of the total flour weight (baker's percentages). 
For a home oven, 65% hydration is the sweet spot. 
In a 900°F wood-fired oven, 60% hydration is standard because the pizza cooks in 60 seconds and retains moisture. In a home oven, the pizza spends 5 to 7 minutes baking, which dries out the dough. Increasing your water to 65% ensures your crust stays soft, moist, and airy inside rather than drying out like a cracker.
Here is the master recipe scaled for four 12-inch pizza dough balls (approximately 250 grams each):
- Flour (Tipo 00 or Bread Flour): 600 grams (100%)
- Water (Cold, roughly 60°F / 15°C): 390 grams (65%)
- Fine Sea Salt: 16 grams (2.7%)
- Instant Dry Yeast (IDY): 0.8 grams to 1.2 grams (roughly 1/4 teaspoon, 0.15% to 0.2%)
- Extra Virgin Olive Oil (Home Oven adjustment): 12 grams (2%)
Notice how tiny the yeast measurement is. 
Commercial bread recipes often call for an entire 7-gram packet of yeast for this much flour. 
True Neapolitan pizza uses a fraction of a gram of yeast. We rely on time and temperature—not massive piles of yeast—to build flavor and gas structure. Using too much yeast results in a dough that tastes sour, over-proofs rapidly, and causes that heavy, bloated feeling in your stomach after eating.
Mixing, Autolyse, and Kneading: Building Gluten Without Overworking
#Making pizza dough should not feel like an exhausting gym workout. You do not need to punch, slap, and knead the dough for twenty continuous minutes.
Follow this gentle, staged mixing method:
- Step 1: The Dissolution and Autolyse. Pour all 390g of cold water into a large mixing bowl. Add the 1g of yeast and stir until dissolved. Pour in about 70% of your flour (roughly 420g) and mix with your hand or a wooden spoon until a wet, shaggy batter forms. Let this rest untouched for 20 minutes. This short autolyse allows the flour proteins (glutenin and gliadin) to fully absorb water and begin forming gluten bonds naturally without mechanical work.
- Step 2: Incorporating Salt and Oil. Sprinkle the 16g of fine sea salt and drizzle the 12g of olive oil over the resting dough. Add the remaining 180g of flour. Mix with your hands inside the bowl, squeezing the dough between your fingers until all dry flour is absorbed and a cohesive, rough dough ball comes together.
- Step 3: Rest and Folds. Turn the shaggy dough out onto a clean, un-floured countertop. Cover it with the inverted mixing bowl and let it rest for 15 minutes. During this rest, the gluten relaxes and the dough hydrates itself.
- Step 4: The Slap and Fold. Uncover the dough. Knead it gently for just 2 to 3 minutes by tucking the edges under itself and rolling it against the counter until the surface becomes relatively smooth. It will still feel slightly tacky, which is normal for 65% hydration.
- Step 5: Smooth Bulk Ferment. Lightly grease a clean bowl with a drop of olive oil. Place the dough inside, cover tightly with plastic wrap or an airtight lid, and let it sit at room temperature for 2 hours to kick-start yeast activity.
Fermentation Strategy: 24 to 48-Hour Cold Proof vs Same-Day Room Temp
#Fermentation is where flour and water transform into culinary art.
There are two primary ways to ferment your dough:
- Strategy 1: The 24-to-48-Hour Cold Ferment (Recommended). After your dough sits at room temperature for 2 hours, move the sealed container directly into your refrigerator (at 38°F to 40°F / 3°C to 4°C). The cold temperature puts the yeast into slow motion, preventing the dough from over-rising. Meanwhile, natural enzymes (proteases and amylases) continue working in the cold, breaking down complex starches into sweet, fermentable sugars and softening the gluten matrix. This extended cold sleep creates complex aromas of toasted grain and wine, and makes the crust exponentially easier for your body to digest.
- Strategy 2: The Same-Day Room-Temperature Ferment (8 to 10 Hours). If you need pizza tonight, keep the dough at room temperature (roughly 68°F to 72°F / 20°C to 22°C) for 6 to 8 hours bulk fermentation, shape into balls, and let rest for 2 more hours before baking. This produces a good pizza, but it lacks the depth of flavor and airy cornicione of cold-fermented dough.
For peak Neapolitan texture, 48 hours of cold fermentation is the sweet spot.
Ball Shaping and Tension: Creating Tight, Pillowy Dough Rounds
#How you divide and shape your dough balls determines whether your final pizza will be round or a misshapen oval.
If using the cold fermentation method, remove your bulk dough from the refrigerator 4 to 5 hours before you plan to bake.
Follow these balling steps:
- Lightly dust your work surface with flour and tip the cold bulk dough out of the container. It will feel cool, silky, and bubbly.
- Using a bench scraper or kitchen knife, divide the dough into four equal pieces of roughly 250 grams each. Use a digital kitchen scale for accuracy.
- To shape each ball, cup your hands around the dough piece. Pull the edges downward and tuck them underneath, creating a smooth, taut outer skin on top.
- Place the dough ball on your un-floured wooden board. Cup your palm over the ball, resting the side of your hand against the wood, and roll the dough in tight circular motions. The friction against the wood seals the bottom seam and tightens the surface tension into a smooth, plump sphere.
- Transfer the shaped dough balls into a proofing box, rimmed baking sheet, or individual round plastic containers lightly oiled or dusted with semolina.
- Cover airtight and let the dough balls relax at room temperature for 3 to 4 hours. By baking time, the balls will have relaxed, expanded by about 50%, and feel soft as a warm down pillow.
Stretching Technique: How to Push Air into the Cornicione Without a Rolling Pin
#Never, under any circumstances, use a rolling pin on Neapolitan pizza dough. 
A rolling pin crushes the delicate carbon dioxide bubbles created over two days of slow fermentation, turning your crust flat, dense, and gummy.
Follow the traditional Neapolitan "slap and push" hand-stretching method:
- Step 1: The Flour Bath. Generously dust a wide shallow bowl or plate with a 50/50 mix of fine semola rimacinata (semolina flour) and Tipo 00 flour. Gently lift one relaxed dough ball with a bench scraper and lay it into the flour bath, coating both sides. The semolina acts like microscopic ball bearings, preventing the dough from sticking to your peel or stone.
- Step 2: Trapping the Air. Move the floured dough ball to your counter. Using the pads of your three middle fingers on both hands, press firmly into the dough starting 1/2 inch inside the edge. Work your way inward, pressing downward and slightly outward. You are deliberately pushing the trapped air bubbles from the center of the dough out into the outer rim. Never press down on the outer 1/2-inch rim; this is your future puffy cornicione.
- Step 3: Flipping and Expanding. Flip the dough over and repeat the pressing motion on the other side, widening the flat center disc while leaving the thick puffy rim untouched.
- Step 4: The Knuckle Stretch. Pick up the dough round and drape it over the backs of your closed fists (or flat palms). Gently pull your hands apart, rotating the dough in a circle like a steering wheel. Gravity will naturally stretch the center of the dough into a translucent 10-to-12-inch circle. The center should be thin enough that you can see light through it, while the outer rim remains thick, pillowy, and full of air.
The Home Oven Breakthrough: Baking Steel and Broiler Method
#This is the secret that bridges the gap between a 500°F home oven and a 900°F Neapolitan wood-fired brick oven.
A standard ceramic pizza stone does not work well for Neapolitan pizza because cordierite ceramic transfers heat slowly, resulting in a pale bottom.
Instead, invest in a 1/4-inch or 3/8-inch thick carbon Baking Steel. 
Steel has roughly 18 times higher thermal conductivity than ceramic stone. It stores a massive reservoir of thermal energy and dumps that heat directly into the wet dough base within seconds of contact, creating violent steam expansion (oven spring).
Here is the exact home oven procedure:
- Position your baking steel on the top oven rack, roughly 5 to 7 inches below your oven’s top broiler element.
- Preheat your oven to its absolute maximum temperature (500°F or 550°F / 260°C to 285°C) for a full 60 minutes before baking to thoroughly heat-saturate the steel.
- Just before stretching your pizza, switch your oven from Bake to the High Broiler setting. The intense overhead infrared broiler coils will heat the surface of the steel past 600°F (315°C).
- Assemble your pizza on a lightly dusted wooden peel: spread 2 to 3 tablespoons of crushed San Marzano tomatoes, fresh torn mozzarella di bufala or fior di latte (drained thoroughly of moisture), fresh basil leaves, and a drizzle of extra virgin olive oil.
- Slide the pizza directly onto the blazing-hot steel beneath the glowing broiler.
- Bake under the active broiler for 2 minutes. The steel will instantly blast the bottom crust into charred crispness, while the overhead broiler flame blisters the cheese and chars the puffy cornicione.
- Rotate the pizza 180 degrees using your peel and bake for another 2 to 3 minutes until leopard spots appear and the cheese is bubbling. Total cook time: 4 to 5 minutes.
Troubleshooting Guide: Pale Crust, Tough Chew, and Sticky Dough
#If your pizza does not turn out perfect on the first attempt, check these common fixes:
- Problem: Crust is pale white and tastes dry or cracker-hard.
Cause: Your oven temperature is too low, the dough spent too long baking without enough top heat, or you used un-malted Tipo 00 flour in a home oven.
Fix: Add 1% olive oil and 1% diastatic malt (or honey) to your dough formula, preheat your baking steel for a full 60 minutes, and bake directly under the active high broiler. - Problem: The dough tears easily in the center when stretching.
Cause: The dough was either stretched when cold straight from the fridge, or the gluten was over-stretched in one spot.
Fix: Ensure dough balls rest at warm room temperature for 3 to 4 hours before stretching so the gluten is fully relaxed and extensible. Keep your fingers flat on the counter. - Problem: The pizza is soggy and watery in the middle.
Cause: Too much wet tomato sauce or wet fresh mozzarella cheese.
Fix: Neapolitan pizza needs restraint. Use no more than 60 to 70 grams of crushed tomato sauce, and slice your fresh mozzarella hours ahead, letting it drain thoroughly in a sieve in the fridge. - Problem: The dough sticks to the pizza peel and will not slide into the oven.
Cause: Moisture seeped through the dough onto the peel, or you took too long topping the pizza.
Fix: Dust your peel with coarse semola rimacinata rather than fine flour. Assemble your toppings quickly in under 90 seconds, and give the peel a gentle back-and-forth shake every 20 seconds to confirm the pizza slides freely before heading to the oven.
Step-by-Step Summary Table: Neapolitan Pizza Dough Timeline
#| Stage | Action & Timing | Temperature | Key Visual / Texture Clues |
|---|---|---|---|
| Autolyse & Mix | Mix water, yeast, 70% flour; rest 20 min; add salt, oil, rest of flour | Cool room temp (65°F / 18°C) | Shaggy, sticky mass becoming cohesive |
| Short Knead | Rest 15 min; gentle folds for 2–3 min | Room temperature | Surface turns smooth and slightly tacky |
| Bulk Ferment | 2 hours room temp, then 24–48 hours in fridge | 38°F–40°F (refrigerator) | Dough expands, develops sweet aroma |
| Ball Shaping | Divide into 4 x 250g balls; roll into tight spheres | Cool dough out of fridge | Smooth, taut surface skin with sealed bottom |
| Proofing | Relax in proofing box for 3 to 4 hours | Room temp (70°F / 21°C) | Balls expand 50%, feel pillow-soft to touch |
| Hand Stretch | Dust in semolina; push air outward into rim | Room temperature | Translucent center with thick, puffy cornicione |
| High-Heat Bake | Launch on preheated baking steel under high broiler | 500°F–550°F + active broiler | Puffs violently, leopard spots in 4–5 min |
Mastering Neapolitan pizza dough is one of the most rewarding skills in cooking. Once you taste that airy, smoky cornicione fresh from your own oven, you will never order delivery pizza again.