There is a funny little switch that flips when your baby becomes mobile.
One week, they are happily lying on a play mat, staring at the fan. The next, they are pulling themselves up on the coffee table like they have urgent business across the room. Suddenly, the stairs look steeper. The kitchen feels more dangerous. The bathroom, balcony door, and even that small gap near the shoe rack start to look like problems.
The good news? Most baby gate installation mistakes are fixable. You usually do not need to redesign your home or buy the most expensive gate on the market. You need the right gate, in the right place, installed the way the manufacturer intended.
And then you need to check it regularly, because real homes are busy. Gates get pushed, leaned on, slammed, cleaned around, and tugged by little hands.
The one rule I would not compromise on is this:
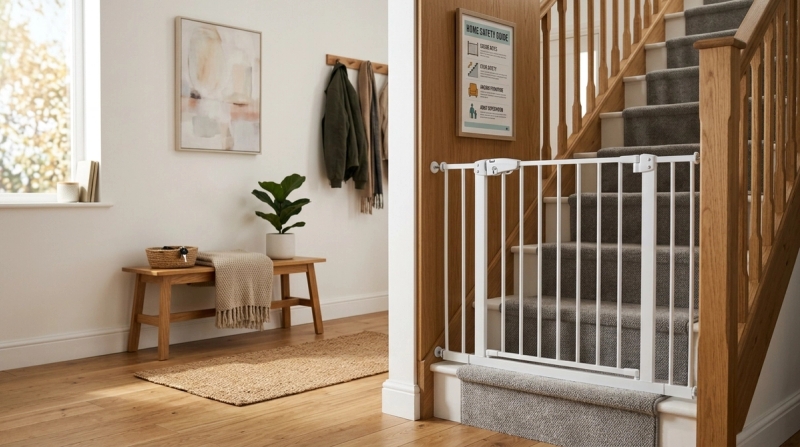
Use a hardware mounted baby gate at the top of stairs.
A pressure mounted baby gate can be useful in doorways and hallways, especially in rented homes. But it should not be used anywhere a loose gate could lead to a fall down steps.
This guide walks through the baby gate mistakes new parents should fix first, what to check before buying or drilling, and when it is better to call the manufacturer, landlord, carpenter, or a certified childproofing installer.
Quick Answer: Baby Gate Mistakes to Fix First
#If you only have 10 minutes today, start here.
- A pressure mounted gate at the top of stairsReplace it with a hardware mounted gate that screws into a secure surface.
- A gate that swings out over the stairsSet it so it opens toward the landing, not over the steps.
- A bottom trip bar at the top of stairsAvoid U-frame pressure gates at stair tops. That raised bar is easy to trip over, especially when you are carrying a baby.
- A gap under the gate that is too largeKeep the space between the floor and the bottom of the gate under 3 inches, unless your manual gives a stricter limit.
- A latch that does not close properly every timeA gate that looks closed but is not actually latched is one of the easiest things to miss.
- Drilling into weak surfacesDrywall alone, loose plaster, weak skirting boards, or the wrong wall plugs can make a gate unreliable.
- Keeping the gate once your child can climb itBaby gates are generally meant for young children up to around 24 months. If your child can climb the gate, the gate can become the danger.
Why Installation Matters as Much as the Gate Itself
#A baby gate is not just a small fence. It has to survive daily family life.
It will be pushed, shaken, opened with one hand, bumped by laundry baskets, leaned on by tired adults, and probably rattled by a determined toddler who thinks “no” is just the start of a negotiation.
A crawling baby may only bump into it. A toddler may lean their full weight on it, shake it, or try to climb it. Older siblings may swing it shut a little too hard. Adults may tug at it while holding groceries, a school bag, or the baby.
So baby gate safety is not just about buying a popular gate. It is about matching the gate to the place where it will be used.
A gate across a kitchen doorway has one job. A baby gate for stairs has a much more serious job, because if it fails, a child could fall.
That is why the installation method, latch direction, wall surface, floor gap, and swing path all matter.
Pressure Mounted vs. Hardware Mounted Baby Gates
#Before you install anything, check what type of gate you have. This one detail changes everything.
Pressure Mounted Baby Gate
#A pressure mounted baby gate stays in place using tension. It presses against two opposite surfaces, such as the sides of a doorway. Many have rubber pads and adjustable knobs that tighten the fit.
Best used for:
- Doorways between rooms
- Hallways
- Low-risk room dividers
- Temporary spaces, if the manual allows it
Do not use it for:
- The top of stairs
- Any raised edge where a loose gate could cause a fall
- Uneven or weak surfaces where the pads cannot sit flat
Pressure gates are convenient. They are especially tempting if you rent and do not want to drill holes. But they rely on friction. That is why they are not the right choice for the top of stairs, even if they feel tight when you first install them.
Hardware Mounted Baby Gate
#A hardware mounted baby gate is screwed into a secure structure, such as a wall stud, door frame, stair post, or masonry wall with the correct anchors. It does not rely only on pressure.
Best used for:
- Top of stairs
- Bottom of stairs, especially for long-term use
- Balcony access points
- Areas near raised level changes
- Wide or awkward openings, if the gate is designed for that setup
For the top of stairs, this is the safer category. Always follow the product manual. The correct screws, brackets, anchors, extensions, and placement can vary a lot from one model to another.
Common Baby Gate Installation Mistakes and How to Fix Them
#Stairs Need Different Rules Than Doorways
#A doorway gate mostly limits access.
A stair gate is there to prevent a fall.
That difference matters.
At the Top of Stairs
#Use a hardware mounted gate here. This is the place to be strict, even if drilling feels annoying.
Check that:
- The gate is approved by the manufacturer for stair-top use.
- It is fixed into a secure structure, not drywall alone.
- It opens away from the stairs, toward the landing.
- It has no raised bottom bar that adults can trip over.
- The latch fully engages every time.
- The gap under the gate is under 3 inches, unless the manual gives a smaller limit.
If the top of your staircase has a metal railing, glass panel, carved wooden post, narrow landing, or angled wall, pause before trying to “make it work.” This is exactly where many installation mistakes happen.
At the Bottom of Stairs
#A pressure mounted gate may be fine at the bottom of stairs if the manual allows it and the surfaces are strong, flat, and even.
Many families still choose a hardware mounted gate at the bottom because it tends to stay more secure over time.
At the bottom of stairs, make sure the gate does not sit on the edge of a step or create a tripping point in a busy walkway.
In Doorways and Hallways
#A pressure mounted gate can work well in a normal doorway, such as between the living room and kitchen, or near a bathroom area.
Still, do not treat it as “install and forget.”
Check that:
- The pads sit flat on both sides.
- The tension indicator, if included, shows it is secure.
- The gate does not slide when pushed.
- The latch is difficult for a toddler but still manageable for adults.
What to Check Before Buying a Baby Gate
#A lot of baby gate problems begin before the box is even opened.
Measure first, then buy. It is not exciting, but it saves a lot of frustration.
1. Measure the Opening at Three Heights
#Measure the width:
- Near the floor
- Around adult knee height
- Near the latch height
Walls are not always straight. Door frames can be uneven. Stair posts may narrow or flare. Buy a gate that fits the actual opening, not the number you guessed while scrolling online at midnight.
If the opening is wider than standard, check whether the brand allows extensions. Do not mix random extensions from another brand unless the manufacturer clearly says they are compatible.
2. Check the Floor Gap
#Before marking the wall, decide where the bottom of the gate will sit.
The gap between the floor and the bottom of the gate should be less than 3 inches, or smaller if the manual requires it.
Watch for:
- Uneven flooring
- Thick rugs
- Raised thresholds
- Stair nosing
- Skirting boards
- Slight slopes near bathrooms or balcony doors
A gate can look fine on one side and still have a bigger gap on the other if the floor is uneven.
3. Check the Swing Direction
#For stairs, the gate should not swing out over the steps. Many stair gates include a swing stop or one-way opening setting. Use it.
For kitchens and doorways, think about how the gate will feel in daily life. If it blocks the fridge, stove area, bathroom door, or main walkway, tired adults may start leaving it open.
A technically correct installation still fails if nobody wants to use it.
4. Check the Latch Height and Motion
#A good latch should be simple for adults and difficult for toddlers.
Many gates use a two-action latch, such as pressing or sliding while lifting. Test it with one hand, because parents are very often carrying something.
At the same time, make sure it is not so easy that your toddler can copy it after watching you a few times. Because they will watch. And they will try.
If the gate has auto-close, test it from different opening widths. Some gates close well from a wide swing but fail when opened only a little.
5. Check the Wall or Post Material
#This is especially important in apartments.
You may be dealing with:
- Hollow drywall
- Solid brick
- Reinforced concrete
- Wooden door frames
- Metal railings
- Glass balustrades
- Marble or granite surfaces
- Skirting boards that stick out from the wall
Each surface needs the right hardware. The screws in the box may be right for wood, but not for concrete or brick.
If the manual does not cover your wall type, ask the manufacturer or a qualified installer before drilling.
India-Aware Apartment Notes for Renters and Flat Owners
#Many families in India set up baby gates in flats with concrete walls, tiled floors, compact kitchens, and balcony doors close to the living room.
The basic safety rules are the same, but the installation details can be different.
Concrete and Brick Walls
#In many flats, walls are solid brick or reinforced concrete, not hollow drywall. Standard screws may not grip properly by themselves.
For a hardware mounted gate, you may need:
- A masonry drill bit
- Correctly sized wall plugs, often called rawlplugs
- Screws that match the plug and bracket
- Careful drilling so the plaster does not crumble too much
If you are not comfortable drilling into concrete, call a professional. A bracket can look neat and still not be secure enough. It needs to hold when someone pushes or pulls on the gate.
Rental Homes
#If you rent, ask before drilling. But do not solve a stair-top problem by using a pressure gate in the wrong place.
Depending on your staircase and gate model, you may be able to use approved banister adapter kits. These can create a secure mounting surface without drilling into certain posts.
The important word is approved. Do not tie a gate to a railing with rope, cable ties, or homemade straps.
Tiled and Marble Surfaces
#Smooth surfaces can be slippery for pressure pads. If the gate uses pressure, make sure the pads do not slide when the gate is pushed.
For hardware mounting into tile, marble, or granite, be careful. These surfaces can crack if drilled badly. This is a good time to call an experienced installer instead of guessing.
Balconies
#A gate near a balcony door can help limit access to a balcony door or balcony area, but it must be installed securely and used consistently.
Follow the manual carefully, especially if the opening has tile, metal, glass, or an uneven threshold.
The Skirting Board Problem Parents Notice Too Late
#Skirting boards, also called baseboards, can make a gate sit crooked.
Here is the common problem: the lower pressure pad rests on the skirting board, while the upper pad rests on the wall. That means the gate is not vertical. It may feel tight at first, then slowly shift with daily use.
For pressure gates, this can reduce stability. For hardware gates, it can make the brackets misalign and put stress on the latch.
Possible fixes include:
- Manufacturer-approved wall cups
- Baseboard adapters
- Properly sized shims
- A mounting board fixed securely into the wall structure
- Choosing a different gate model that fits the opening better
Avoid stacking cardboard, cloth, tape, or random packing material behind a gate. It can compress or slip over time, and then the gate is not as secure as it looked on day one.
Latch, Lock, and Close Checks That Matter
#A baby gate only helps when it actually closes and latches.
After installation, test the latch the way it will be used in real life.
- Open it fully and let it close, if it has auto-close.Does it click shut?
- Open it halfway.Some gates close from a wide swing but not from a smaller opening.
- Open it just a little.This is where tired adults often leave it. If the product claims auto-close, make sure it still catches.
- Push gently after closing.Do not slam or aggressively stress-test it. Just confirm that it is latched.
- Try it with one hand.If every adult in the home finds it annoying, someone may start leaving it open.
- Watch older children.If a sibling can open it, teach them to close it every time. If that does not work, consider whether the latch is right for that spot.
Mistakes Around Kitchens, Bathrooms, and Nursery Zones
#Not every gate is for stairs. Many parents use gates to keep a crawling baby away from high-risk rooms.
Kitchen Gate Mistakes
#Common kitchen mistakes include placing the gate too close to a hot cooking area, leaving it open during meal prep, or choosing a latch that an older toddler can copy too easily.
A gate can help keep a baby out of the kitchen, but it does not replace supervision, safe storage, or keeping hot pans, knives, and appliances out of reach.
Bathroom Gate Mistakes
#Bathrooms often have cleaning supplies, medicines, buckets, slippery floors, and sharp edges.
If you use a gate to block bathroom access, make sure adults can still move through easily and that the gate does not become a trip hazard in a narrow passage.
Nursery Zone Mistakes
#Some parents use a gate at the nursery door during playtime. This can be useful, especially if you need to keep pets out or create a safer play zone.
Just check that the gate does not pinch fingers, catch clothing, or block adults from entering quickly when needed.
Also check the gate height. Once your child tries to climb it, the setup needs to change.
The 10-Minute Monthly Baby Gate Safety Check
#Baby gates loosen with normal life. They get bumped, leaned on, cleaned around, shaken, and slammed.
Add this quick check to your monthly routine.
1. The Wobble Test
#Gently shake the gate.
- Hardware mounted gates should not feel loose at the brackets.
- Pressure mounted gates should not slide or shift.
- If the gate moves, stop relying on it until it is fixed.
2. The Screw and Bracket Check
#Look at every bracket.
- Are screws backing out?
- Is the wall cracking?
- Is the wood splitting?
- Are the wall plugs pulling loose?
- Are adapters still tight?
If anything looks weak, fix it before using the gate as a safety barrier again.
3. The Latch Check
#Open and close the gate several times.
- Does it latch every time?
- Does the auto-close still work?
- Is the latch sticky, loose, or misaligned?
- Can your toddler now operate it?
If the latch hesitates, check the manual for adjustment instructions. Do not modify the latch in a way the manufacturer does not recommend.
4. The Floor Gap Check
#Recheck the space under the gate.
Rugs shift. Mats get added. Pressure gates move. Small changes can affect the gap.
Keep the gap under 3 inches, unless your manual gives a stricter number.
5. The Climbing Check
#If your child is trying to climb, swing on the gate, or use nearby furniture to get over it, the gate may no longer be safe for that setup.
Baby gates are generally intended for children up to around 24 months, but development matters more than age. If your child can beat the gate, it is time to reassess.
When to Skip DIY and Call a Professional
#Many parents can install a standard doorway gate themselves. But some homes are not standard, and it is better to ask for help than improvise.
Call the manufacturer, a qualified carpenter, or a certified childproofing installer if:
- The gate is for the top of stairs and the mounting surface is unusual.
- You have glass balustrades.
- You have ornate wrought-iron railings.
- The staircase wall meets the post at an odd angle.
- The opening is extra wide and needs a multi-panel system.
- The wall is concrete, brick, marble, granite, or tiled, and you are not sure how to drill it safely.
- You cannot find a secure stud, frame, post, or masonry anchor point.
- The gate does not sit level after installation.
- The latch does not close consistently.
- Your rental rules limit drilling, but the location still needs a secure gate.
A professional installation is especially worth it for a baby gate for stairs. That is not the place for guesswork.
Before You Drill: A Short Checklist
#Use this before making holes in a wall, frame, or post.
- Have I read the product manual?
- Is this gate approved for the location where I want to use it?
- Is it a hardware mounted gate for the top of stairs?
- Have I measured the opening at three heights?
- Will the gate open away from the stairs?
- Is there a trip bar, and if so, is it away from stair tops?
- Is the floor gap under 3 inches?
- Am I drilling into a secure surface?
- Do I need masonry plugs, wood screws, or a mounting adapter?
- Will skirting boards make the gate sit crooked?
- Can every adult open and close the latch correctly?
- Have I checked whether drilling is allowed in my rental home?
If you cannot answer these confidently, pause. Check the manual, contact the manufacturer, or get help.
Final Thought
#The best baby gate is not just the one with the highest ratings. It is the one that fits your home, suits the risk level of the spot, and is installed the way it was meant to be installed.
Start with the stairs. Check the latch. Measure the floor gap. Fix any pressure gate being used where only a hardware mounted gate belongs.
Then add a quick monthly check, because babies grow fast. They push, pull, shake, copy, climb, and somehow find the one weak spot you missed.
If something feels uncertain, do not guess. Read the manual, contact the brand, ask your landlord when needed, or bring in a certified childproofing installer.
That small pause can prevent the most common baby gate installation mistakes from becoming everyday risks.