If you’re hand-washing bottles, a dedicated baby bottle brush is usually the most useful tool. If you already use a dishwasher, a dishwasher basket is a smart add-on for nipples, caps, rings, valves, and other tiny parts. A regular kitchen sponge is usually the weakest choice because it’s shared, damp, and hard to keep truly clean for baby items.
The safest routine is simple: clean bottles after feeds, take every part apart, keep small pieces together, let everything air dry fully, and sanitize daily when official guidance says your baby needs it.
Baby Bottle Brush vs Dishwasher Basket vs Regular Sponge
#A baby bottle brush and a dishwasher basket are not really competing products. They do different jobs.
A baby bottle brush helps you scrub the bottle properly, especially the base and sides where milk film can sit. A dishwasher basket keeps small parts secure during a machine wash, so nipples and valves do not fall through the rack or end up collecting dirty water.
A regular kitchen sponge may feel convenient, but it is usually used for plates, oily containers, pans, cups and counters. That makes it a poor main tool for infant feeding items.
If you are buying just one thing for a small kitchen, start with a dedicated baby bottle brush and a clean drying setup. If you already use a dishwasher, add a dishwasher basket.
Why a quick rinse is not enough
#Milk is not like water. Breast milk and formula can leave behind fat and protein residue. Sometimes you can see it as a cloudy film. Sometimes you only notice it later when the bottle smells sour.
Proper bottle cleaning needs three things:
- Taking every part apart, so soap and water can reach the little corners.
- Friction, either from a bottle brush or the dishwasher’s water spray.
- Complete drying, because damp bottle parts packed away together can start to smell musty.
This is where parents often get confused between cleaning and sanitizing. Cleaning means removing milk, dirt and buildup using soap, water and scrubbing or dishwasher washing. Sanitizing means using heat or another approved method to reduce germs even more after the items are already clean.
No tool replaces the basics: wash your hands, take parts apart, clean thoroughly, air dry fully and follow the bottle manufacturer’s instructions.
When a baby bottle brush makes the most sense
#A baby bottle brush is the most practical first buy for many parents, especially in homes where dishwashers are not part of the daily routine.
Choose a dedicated bottle brush if:
- You hand-wash bottles at the sink.
- You want a simple, low-cost setup.
- You wash bottles soon after feeds.
- Your bottles are tall, narrow or hard to reach inside.
- You use nipples, collars, valves, vents or anti-colic parts that need careful cleaning.
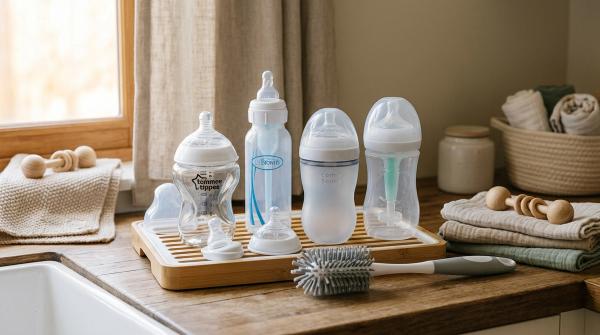
Look for a brush with a long handle, firm but not overly harsh bristles, a smaller nipple brush or detail cleaner, and a shape that reaches the bottom corners of your bottles. A stand or hanging loop helps the brush dry properly.
The most important rule is to keep this brush only for baby feeding items. Do not use it for oily pans, lunch boxes, chai cups, sink cleaning or regular plates. Once it becomes a general-use brush, it is no longer really a baby bottle brush.
Also check it regularly. If the bristles are flat, frayed, smelly, stained or still look dirty after washing, replace it.
When a dishwasher basket makes the most sense
#A dishwasher basket for baby bottles is useful if a dishwasher is already part of your daily routine.
Small bottle parts can move around a lot during a dishwasher cycle. Nipples, rings, caps, valves and vent pieces may fall through the rack, flip over or collect water. A basket keeps them together and helps water circulate around them.
Use a dishwasher basket if:
- Your bottle parts are marked dishwasher-safe.
- You already run dishwasher loads.
- You want to reduce hand-washing time.
- You have many tiny parts that are easy to lose.
- You prefer doing one bigger cleanup at the end of the day.
Usually, small parts go inside the basket, and the basket goes on the top rack. Always check both the dishwasher instructions and the bottle manufacturer’s instructions, because materials and heat limits can vary.
A dishwasher basket is not a sanitizer by itself. It is just a holder. The dishwasher does the actual washing. If your machine has a sanitize or heated dry cycle, use it only if the bottle manufacturer says the parts can handle it.
Why a regular sponge is not ideal
#A regular kitchen sponge is not the best tool for baby bottles.
It is usually shared across too many kitchen jobs and often stays wet for long periods. It may also hold food particles, oil, soap residue or grime from other dishes.
Even if you rinse it well, it is difficult to keep it truly baby-only. If you are stuck once and have no other option, use the cleanest dedicated tool you have and wash carefully. But for daily bottle cleaning, a baby bottle brush is easier to keep separate and much better at reaching inside bottles.
Drying matters more than most parents think
#Cleaning is only half the routine. Drying is the part many people rush, especially when the baby is crying, someone needs the counter space or you just want to finish the kitchen work.
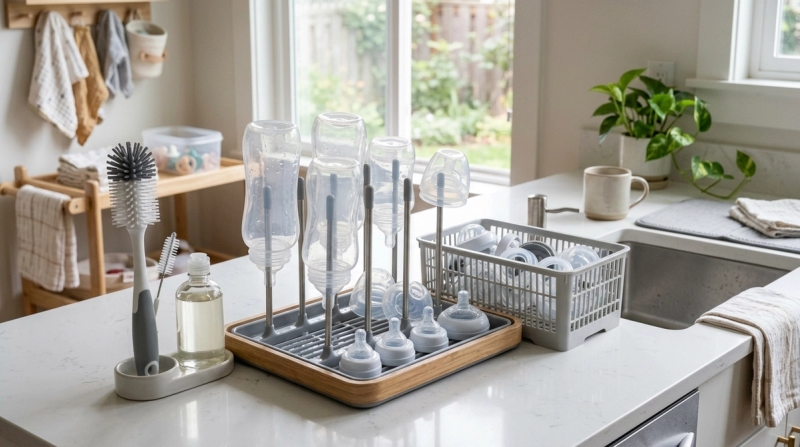
After washing, place bottle parts on a clean bottle drying rack or clean drying mat. Let everything air dry fully before storing.
Try not to wipe the inside of bottles and nipples with a regular kitchen towel. Towels can transfer lint or germs, and many kitchen towels are used for more than one job.
A good drying setup should keep parts off the kitchen counter, allow airflow around bottles and nipples, be easy to wash, fit your counter space and stay away from sink splashes.
In a small kitchen, a compact drying rack, foldable rack or clean drying mat can work better than a large bottle tree. The design matters less than the result: clean parts should dry fully and stay clean while drying.
Step-by-step baby bottle cleaning checklist
#1. Wash your hands
#Wash your hands with soap and water before touching bottles, nipples or clean parts.
2. Take the bottle apart completely
#Separate the bottle body, nipple, ring or collar, cap, valve, vent and any anti-colic insert. Do not wash the bottle while it is still assembled.
3. Rinse soon after feeding
#Rinse each part under running water to remove leftover milk. This helps prevent sour smells and sticky buildup, especially in hot weather.
If hand-washing, use a clean basin or container for baby feeding items rather than placing parts directly in the sink.
4. Choose your cleaning method
#For hand-washing, fill a clean basin with hot, soapy water. Scrub inside the bottle with a dedicated baby bottle brush. Use the smaller nipple brush or detail cleaner for nipples and tiny parts. Pay attention to threads, rims, bases and corners, then rinse everything well.
For dishwasher cleaning, check that bottles and parts are dishwasher-safe. Place small parts in the dishwasher basket, usually on the top rack. Position bottle bodies so water can reach inside and drain out properly.
5. Sanitize when needed
#Sanitize daily if your baby is under 2 months old, was born prematurely or has a weakened immune system, in line with CDC guidance. Always clean first, then sanitize. Sanitizing does not work well if milk residue is still stuck to the bottle.
Common sanitizing methods include boiling or using a dishwasher sanitize cycle, if the items and machine support it. Follow the bottle manufacturer’s instructions.
6. Air dry fully
#Place all parts on a clean bottle drying rack or drying mat. Let them dry completely. Do not pat the inside dry with a shared dish towel.
7. Store clean, dry parts safely
#Once everything is fully dry, store bottle parts in a clean, covered area. Avoid sealing damp parts in a box or container.
8. Clean the cleaning tools too
#Wash and dry the baby bottle brush, basin and drying rack regularly. A brush that stays wet all day can become part of the problem instead of part of the solution.
India-aware notes for heat, monsoon and small kitchens
#Bottle cleaning has to fit real homes. In India, that often means heat, humidity, limited counter space and a busy shared kitchen.
In hot weather, milk residue can smell sour faster. If you cannot wash the bottle immediately, take it apart and rinse the pieces soon after the feed. This makes the proper wash easier later.
During monsoon, humidity can slow drying. Nipples, caps and silicone valves may stay damp much longer than expected. Keep the drying rack in a well-ventilated area, avoid sink splashes, and do not store parts while they are still wet.
In small kitchens, choose tools that earn their space. A simple setup can be one dedicated baby bottle brush, one clean basin for baby feeding items, one compact drying rack or mat, and one covered storage box or clean cabinet space for dry parts.
In shared kitchens, clearly separate the baby bottle brush. Label it if needed so nobody uses it on oily cookware or regular utensils.
Budget check: what should you buy first?
#If you are trying to keep costs sensible, buy in this order:
- Dedicated baby bottle brush
- Clean drying rack or drying mat
- Dedicated wash basin
- Dishwasher basket, only if you use a dishwasher
- Sanitizing setup, if your baby’s age or health situation makes daily sanitizing important
A regular sponge should not be on the main list for baby bottles. It is cheap, but it does not offer the same reach, separation or control as a dedicated baby bottle brush.
So, which one should new parents use?
#If you hand-wash bottles, choose a baby bottle brush. It is practical, affordable and does the scrubbing work properly.
If you use a dishwasher, add a dishwasher basket for baby bottles. It keeps nipples, rings, caps, valves and tiny parts secure during the cycle.
If you are thinking of using a regular kitchen sponge, skip it for daily baby bottles. It is too shared and too damp to be your main cleaning tool.
The best everyday setup is not complicated: a dedicated brush, a clean basin, a drying rack or mat, and a sanitizing plan when official guidance says your baby needs it.