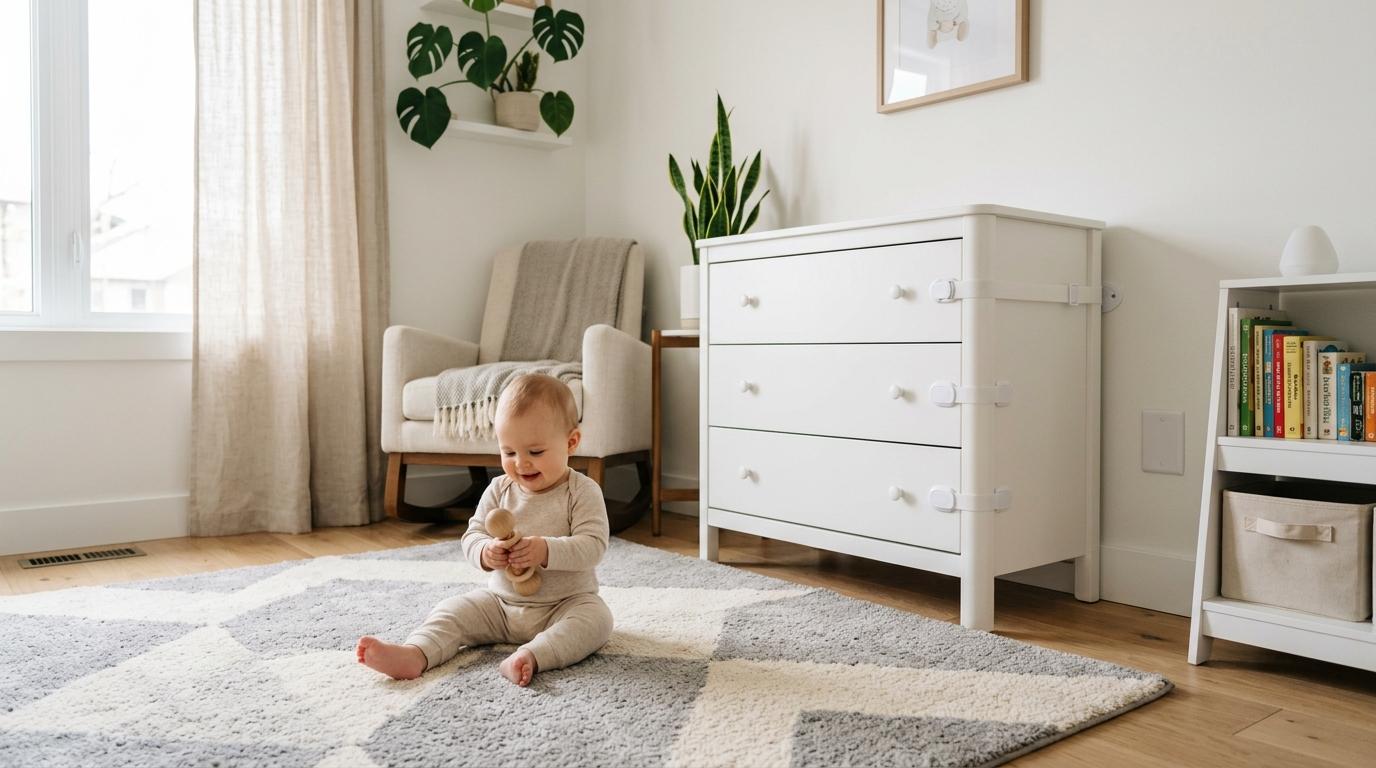
A good babyproofing starter kit does not have to be huge, expensive, or confusing. If you are just getting started, focus on three basics first: furniture anchors, cabinet locks, and outlet covers.
That means anchoring heavy furniture and TVs, locking cabinets that hold cleaners, medicines, knives, tools, or other unsafe items, and covering the outlets your baby can reach. If possible, start before your baby begins crawling, often around 4 to 6 months, so you are not trying to fix the whole house in a panic over one weekend.
Babyproofing can feel surprisingly emotional at first. One day your home feels normal. The next day, the coffee table has sharp corners, every drawer looks interesting, and your baby somehow finds the one phone charger you forgot to move.
The good news is that you do not need to babyproof every inch of your home at once. Start with the biggest everyday risks: furniture tip-overs, unsafe cabinets, and reachable electrical outlets. Once those are handled, you can keep improving room by room.
This guide keeps things practical: what to buy first, what you can skip, how to install and check everything, plus a few extra notes for apartments and Indian homes.
The Three-Part Babyproofing Starter Kit
#Your first babyproofing kit should include:
- Furniture anchors for babyproofing
- Cabinet locks for baby
- Outlet covers for babyproofing
These three products cover some of the most common home hazards without making your home feel like a padded playroom. You can use them in living rooms, bedrooms, kitchens, bathrooms, nurseries, and shared family spaces.
Quick Comparison: Anchors vs Locks vs Outlet Covers
#Why Start Before Crawling?
#It is much easier to babyproof before your baby is already on the move. Once babies start rolling, scooting, crawling, pulling up, or cruising along furniture, your home can feel different almost overnight.
Starting early gives you time to:
- Read the instructions properly.
- Measure and install anchors the right way.
- Test cabinet locks before you depend on them.
- Look at hazards from your baby’s floor-level view.
- Fix one room at a time instead of rushing.
Many parents and caregivers begin around 4 to 6 months, before crawling starts. If your baby is already mobile, do not worry. Start today with the highest-risk spots: heavy furniture, unsafe cabinets, and reachable outlets in the rooms your baby uses most.
1. Furniture Anchors for Babyproofing
#Furniture anchors are one of the most important parts of a babyproofing starter kit. The U.S. Consumer Product Safety Commission, through its Anchor It! safety campaign, warns that furniture and TVs can tip over if they are not properly secured.
This is not just a nursery issue. Babies may pull up on a dresser, open drawers and try to climb them like steps, tug at a TV stand, or grab onto a bookshelf. A piece of furniture can feel perfectly stable to an adult but become unsafe when a child pulls from the front.
What to anchor first
#Start with:
- Dressers
- Wardrobes
- Bookshelves
- TV units
- Freestanding cabinets
- Changing tables
- Tall storage units
- Any furniture with drawers a child could open or climb
A simple rule: if it is tall, heavy, top-heavy, or tempting to climb, anchor it.
What to buy
#Look for:
- Furniture anchor kits made for child safety
- Nylon strap anchors
- Metal L-brackets
- Hardware that suits your furniture and wall type
- Clear instructions from the manufacturer
Always follow the manual for both the anchor kit and the furniture. Different walls need different hardware, and not every anchor works on every surface.
What to skip
#Skip adhesive-only anchors for heavy furniture. Adhesive may be useful in a few small situations, but it should not be trusted for a dresser, wardrobe, TV unit, or bookshelf.
Also avoid guessing where to drill. If the product needs to be fastened into a stud or solid support, take the time to find it properly.
Apartment note: “But I rent”
#This is where many apartment families hesitate. Drilling into walls feels permanent, and rental rules can be stressful.
Still, anchoring heavy furniture is not decoration. It is a safety step. If you rent, check your lease, speak with your landlord if needed, and use the right hardware for your wall type. Small holes are usually easier to repair than people imagine, but the priority is safe installation.
For childproofing an apartment, start with the furniture in the rooms your baby uses every day. You do not have to do the whole apartment at once.
Furniture anchor safety checks
#After installation:
- Pull gently on the furniture to check that it does not shift forward.
- Make sure straps are tight, not loose or twisted.
- Check that screws are fully seated.
- Recheck anchors after moving furniture.
- Recheck if you notice wobbling, wall damage, or loosened screws.
- Keep heavier items in lower drawers when possible.
Anchors reduce risk, but they do not replace supervision. Keep drawers closed, avoid placing tempting items on top of furniture, and do not let children climb.
2. Cabinet Locks for Baby
#Cabinet locks help keep babies away from things they should not touch. You do not need to lock every single cabinet in your home. Start with the cabinets and drawers that hold real hazards.
Lock these cabinets first
#Prioritize cabinets and drawers that contain:
- Cleaning products
- Laundry products
- Medicines
- Sharp kitchen tools
- Small objects
- Batteries
- Tools
- Bathroom products
- Matches, lighters, or similar items
If something would worry you in a baby’s hand or mouth, lock it away or move it higher and out of reach.
What to buy
#Good first options include:
- Magnetic cabinet locks, which are usually hidden inside the cabinet.
- Strap locks, useful for some appliances, toilets, or cabinets with unusual handles.
- Screw-mounted locks, when you need a stronger hold and the cabinet material allows it.
Magnetic locks are popular because they do not change how the outside of the cabinet looks. They also help keep the door from opening wide enough for little hands to reach inside.
What to skip
#Avoid weak locks that pop open easily or leave a big gap. A gap may let a child pinch fingers or reach inside.
Be careful with adhesive-only locks in hot, humid, or high-use areas. Adhesive can loosen over time. If you use adhesive locks, install them on a clean, dry surface and follow the curing time in the instructions before relying on them.
A useful “yes” cabinet
#One simple trick that helps is leaving one safe low drawer or cabinet unlocked. Fill it with harmless things like safe containers, plastic bowls, or wooden spoons. This gives your baby something to explore while the unsafe cabinets stay locked.
Just keep checking the “yes” cabinet. Small objects can accidentally get tossed in by older kids, guests, or adults.
Cabinet lock safety checks
#Once installed:
- Open and close the cabinet several times.
- Tug gently to make sure the lock catches.
- Make sure adults can open it quickly when needed.
- Recheck adhesive locks often.
- Replace broken, loose, or missing parts.
- Keep the magnetic key out of a child’s reach.
A cabinet lock only works if it is engaged every time. Build the habit early, even when your baby is “not that fast yet,” because they will be soon.
3. Outlet Covers for Babyproofing
#Low electrical outlets are right at baby level. Babies notice small holes, switches, cords, and plugs, often before we expect them to. Outlet covers help reduce access to sockets, especially in nurseries, bedrooms, and living rooms.
What to buy
#Good first choices include:
- Sliding outlet cover plates
- Outlet covers that fit tightly
- Covers designed for the outlet style in your home
Sliding plates replace the existing wall plate. They slide closed when the plug is removed, which makes them harder to forget.
What to skip
#Avoid loose plug caps that are easy to remove or leave on the floor. Small loose pieces can become a hazard if your baby finds them.
If you use any plug-style cover, check the fit carefully and keep unused pieces away from children.
Do not forget cords and power strips
#Outlet covers are only one part of electrical safety. Also look for:
- Loose charging cables
- Power strips on the floor
- Dangling lamp cords
- Extension cords across walking or crawling paths
- Plugs that are half-pulled out
Move cords behind furniture where it is safe, use cord management products when needed, and keep power strips out of reach. Follow the safety instructions for any electrical product you use.
Outlet cover safety checks
#After installation:
- Confirm the cover fully blocks the socket when not in use.
- Make sure the plate sits flat against the wall.
- Check that screws are secure.
- Test that the sliding cover returns to the closed position.
- Recheck outlets after travel, guests, cleaning, or furniture changes.
First-Week Babyproofing Checklist
#You do not need a perfect home by Monday. Really, you don’t. Start with one room, usually the living room, bedroom, or nursery. Then move outward.
Day 1: Do a floor-level scan
#Get down on your hands and knees. Look at the room from your baby’s height.
Check for:
- Coins
- Batteries
- Small toys
- Loose caps
- Dangling cords
- Sharp corners
- Low outlets
- Wobbly furniture
- Open drawers
- Cleaning products within reach
This one step shows you a lot of things adults miss.
Day 2: Anchor the heavy furniture
#Install furniture anchors on the highest-priority pieces first:
- Dresser
- Bookshelf
- TV unit
- Wardrobe
- Tall storage unit
Follow the manual. Use the correct hardware. If you are unsure about your wall type, ask a qualified person for help.
Day 3: Secure cabinets and drawers
#Lock cabinets with cleaners, medicines, sharp tools, and small objects. Move the most dangerous items higher if possible, then lock the cabinet too.
Test every lock before you call it done.
Day 4: Cover outlets and manage cords
#Install outlet covers in the room your baby uses most. Then check cords, chargers, and power strips.
Do not leave extra outlet caps or small parts loose on the floor.
Day 5: Check water and bathroom access
#If your home has buckets, tubs, or low water containers, empty them after use and store them safely. Keep bathroom doors closed when not in use, especially in homes where buckets are common.
Install locks where needed, and make sure every caregiver follows the same routine.
Day 6: Look at heat, flame, and kitchen access
#Check the kitchen from baby height. Look for low drawers, floor-level cooking areas, stove knobs, matches, lighters, hot appliances, and reachable utensils.
Use cabinet locks, move unsafe items higher, and block kitchen access if needed.
Day 7: Recheck everything
#Do one calm walkthrough.
Ask:
- Are all anchors tight?
- Are cabinet locks catching?
- Are outlet covers secure?
- Are cords out of reach?
- Are bathroom buckets empty and stored safely?
- Do grandparents, babysitters, and household helpers know the system?
Babyproofing works best when everyone uses the same routine.
Apartment Babyproofing: What to Buy First
#For apartment families, space is often tight, rooms are shared, and furniture may be moved more often. Start with flexible safety products, but do not skip anchoring.
Prioritize:
- Furniture anchors for tall or heavy furniture
- Outlet covers for low sockets
- Cabinet locks for kitchen and bathroom storage
- Cord management for chargers and power strips
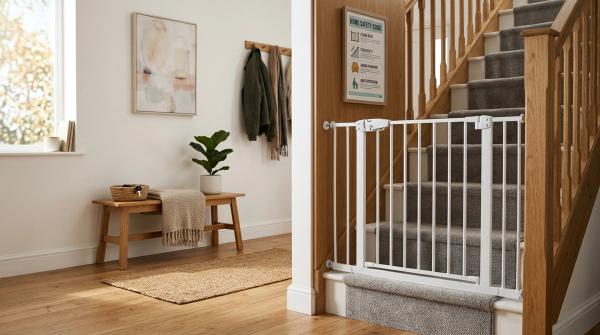
- Safety gates if you need to block a kitchen, bathroom, balcony door, or stair area
Keep original outlet plates if you replace them, so you can reinstall them when you move. For adhesive cabinet locks, remember that removal can affect some finishes, so test carefully and follow the instructions.
If drilling is a concern, talk to your landlord before installing anchors. But rental status should not be treated as a reason to leave heavy furniture unsecured.
Indian Household Context: What to Add to the Starter Kit
#Many Indian homes have safety situations that generic babyproofing lists may not mention. If you live in an Indian or South Asian household, add these checks to your first-week babyproofing checklist.
Bathroom buckets and stored water
#Buckets are common in Indian bathrooms. Keep them empty when not in use and store them upside down or out of reach. Keep bathroom doors closed when the bathroom is not being used.
Make sure every caregiver follows this rule, including grandparents, guests, and household help.
Inverter and battery areas
#Some homes have inverter units, battery setups, or utility corners. Treat these areas as no-access zones for babies and toddlers.
Use a locked room, locked cabinet, or another secure barrier. Keep wires, switches, and heavy equipment out of reach.
Pooja rooms, diyas, and matchboxes
#If your home has a pooja area, check for floor-level diyas, incense, matchboxes, oil, and small items. Move them higher or keep the area closed when not supervised.
If the pooja room is at floor level, consider a gate or door latch that keeps babies out.
Floor-level cooking
#Some homes use floor-level cooking or low cooking setups. This needs extra attention because a crawling baby may reach utensils, flames, hot vessels, or ingredients.
Keep babies out of the cooking area during use. Store sharp tools, matches, and hot items away from edges.
Low switchboards and outlets
#Indian homes may have low switchboards, mixed socket types, or switches next to sockets. Use outlet covers that fit your outlet style, and keep babies from playing with switches connected to appliances.
If you are unsure what product fits your electrical setup, ask a qualified electrician.
What to Skip in a Babyproofing Starter Kit
#Not every product marketed as a baby safety product belongs in your first cart. Start with the basics and skip products that do not match your actual home.
Consider skipping, at least at first:
- Large bundles with products you do not need.
- Adhesive-only anchors for heavy furniture.
- Loose outlet caps that do not fit tightly.
- Weak cabinet latches that leave large gaps.
- Decorative safety products that are hard to install correctly.
- Products without clear instructions.
A smaller kit installed well is much more useful than a large kit installed halfway.
How to Check Your Babyproofing Products Safely
#Installation is not the final step. Babies grow fast, and homes change often.
Do a quick check:
- After installing anything new.
- After moving furniture.
- After deep cleaning.
- After guests visit.
- After your baby starts a new movement stage, such as crawling or pulling up.
- Once a month as a routine habit.
Look for loose screws, peeling adhesive, cracked plastic, missing keys, blocked exits, or locks that adults are no longer using properly.
Always follow the product manual. If a product seems damaged, loose, or unreliable, stop relying on it until it is repaired or replaced.
When Babyproofing Is Not Enough
#Babyproofing lowers risk, but it cannot remove every hazard. Active adult supervision still matters.
If your child is injured, has a serious fall, touches something dangerous, gets burned, has a deep cut, or may have swallowed a harmful substance, contact emergency services or your pediatrician promptly. Follow your local emergency guidance.
Do not wait for a babyproofing product to “prove” whether something is serious. If you are worried, get help.