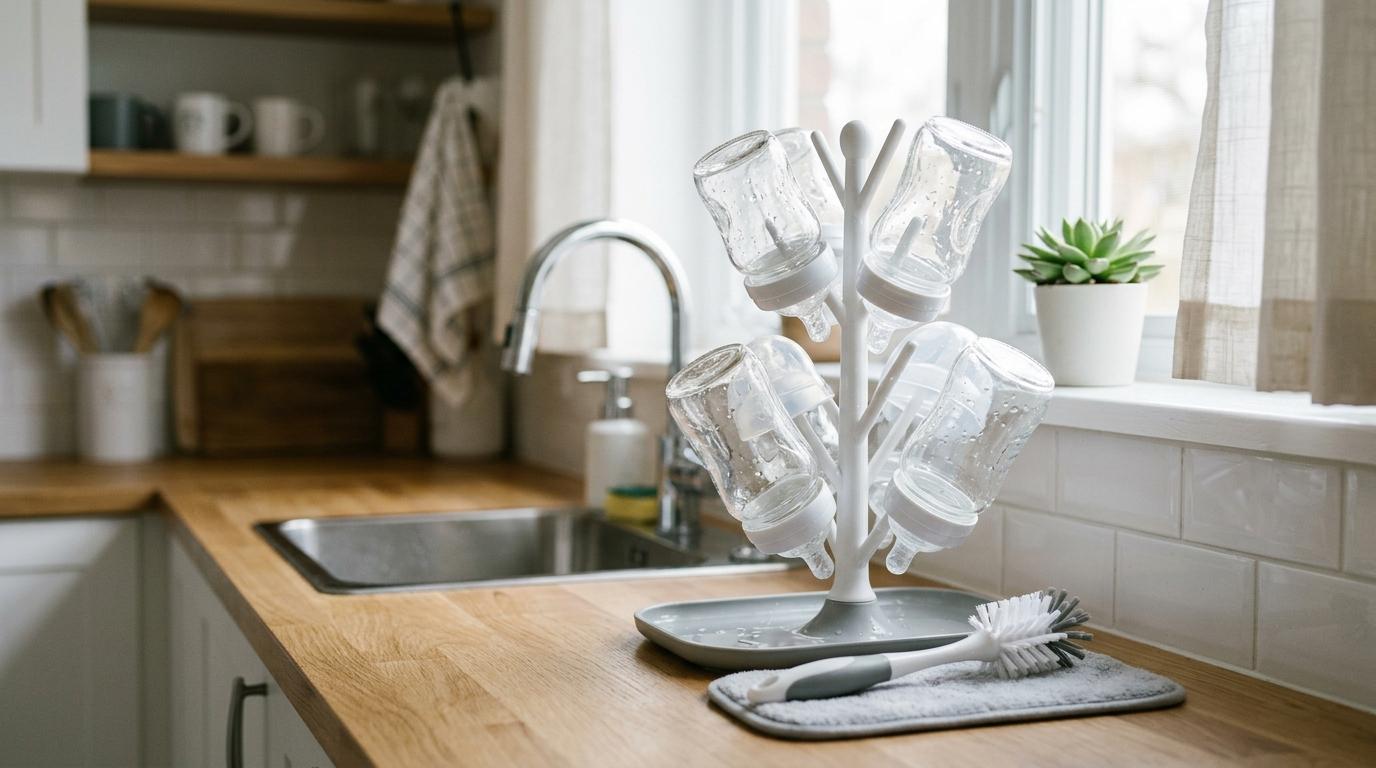
You don’t have to buy a baby bottle drying rack. Lots of parents get by without one. But if you’re washing bottles every single day, along with nipples, caps, pump parts, pacifiers, and all those tiny pieces that disappear when you need them, a dedicated drying space can make life easier.
A bottle drying rack, or even a clean raised drying mat, usually works better than a regular dish rack if you hand-wash bottles often. If you mostly use a dishwasher, and your bottle or pump parts are dishwasher-safe, then a dishwasher basket for baby bottles may be all you need.
The real answer depends on your kitchen, your feeding routine, and how many baby items you wash in a day. Not every baby product needs to be bought immediately, and this is definitely one of those “depends on your life” items.
Why drying baby bottles needs a bit of thought
#Washing bottles is only half the job. After that, every part needs to dry properly on a clean surface.
That sounds simple, but baby feeding items are awkward. Bottles are narrow. Nipples trap water. Pump valves are tiny. Bottle collars roll away. Pacifiers land exactly where you don’t want them to. And if everything is piled together while damp, it can take ages to dry.
A regular dish rack is made for plates, cups, bowls, and cookware. Baby items are different. They’re smaller, lighter, and easier to lose between the wires. One nipple can fall into the cutlery section. A valve can sit in a little puddle. A cap can get buried under a steel plate and show up only when you’ve already searched the whole kitchen.
This doesn’t mean every parent needs to rush out and buy a special rack. It just means your drying setup should do three things well:
- Keep clean baby items away from dirty dishes and food residue.
- Let air move around bottles and small parts.
- Give everything enough time and space to dry fully.
If your current setup already does that, great. You may not need anything extra.
But if your counter turns into a wet mess of bottle parts by afternoon, a dedicated rack starts to feel less like a fancy add-on and more like basic sanity support.
Baby bottle drying rack vs dish rack vs dishwasher basket
#The best option is not always the most expensive or the cutest one. It’s the one you’ll actually use every day without creating more work.
When a baby bottle drying rack makes sense
#A baby bottle drying rack is most useful if you’re washing several baby feeding items every day.
That could include:
- Formula bottles
- Bottles used for expressed breast milk
- Pump flanges, valves, and connectors
- Nipples, caps, and collars
- Pacifiers
- Baby spoons
- Medicine syringes
- Snack cups and small feeding containers later on
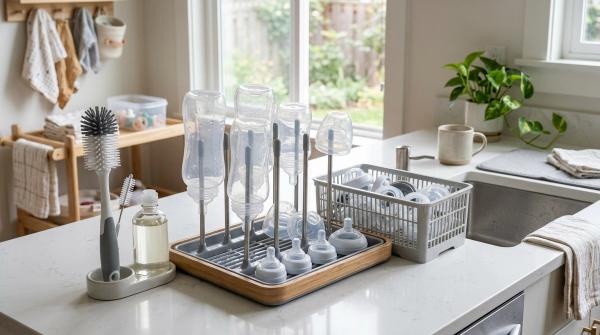
The biggest benefit is organization. A good rack gives each item a place. Bottles can stand upside down. Nipples and caps don’t get lost. Pump parts don’t end up beside greasy utensils. Everything is easier to see, grab, and put away.
At 2 a.m., when the baby is crying and you’re trying to find one clean nipple with half-open eyes, you’ll appreciate anything that makes the process faster.
When choosing a rack, look for simple, practical features:
- Pegs or prongs that hold bottles upside down
- Space for small parts like nipples, caps, valves, and pacifiers
- A removable drip tray or easy-drain base
- Enough spacing for airflow
- A design that is easy to wash
- A place nearby for your bottle brush
You don’t need the biggest rack unless you’re washing a lot of bottles daily. For many families, a compact rack is better. It takes up less space, is easier to clean, and doesn’t become another permanent thing sitting on the counter.
When a regular dish rack is enough
#A regular dish rack can work perfectly fine if your bottle use is light and you can keep baby items clean and separate.
It may be enough if:
- Your baby takes only an occasional bottle
- Most bottles and parts go in the dishwasher
- You usually have only one or two bottles drying at a time
- Your dish rack has a clean, open area for baby items
- You’re careful not to place baby parts near greasy pans or dirty utensils
The issue with regular dish racks isn’t that they’re unsafe by default. It’s just that they weren’t designed for tiny feeding parts.
Small pieces can fall through gaps. Nipples can stay wet if they lie flat. Bottle collars can get mixed with regular utensils. And if your dish rack is already crowded, baby items may not dry as well as they should.
If you use a regular dish rack, try this:
- Wash baby items separately from heavily soiled dishes.
- Place small parts on a clean, unused towel or raised drying mat.
- Keep the drying area away from sink splashes and food prep.
- Let everything air-dry fully before storage.
- Avoid towel-drying inside bottles or nipples.
This can be a very reasonable setup, especially in the beginning when you’re still figuring out how many bottles you actually use.
When a dishwasher basket may be the easiest option
#If you have a dishwasher and your bottle instructions allow it, a dishwasher basket for baby bottles can be a really practical choice.
The basket keeps small parts together during the wash cycle. Nipples, collars, caps, and valves are less likely to fall to the bottom of the dishwasher. For parents who already run the dishwasher daily, this can reduce a lot of hand-washing.
It may also mean you don’t need a big bottle drying rack on the counter.
A few things to remember:
- Always check the bottle, nipple, pump part, and dishwasher manuals.
- Use the top rack if the instructions recommend it.
- Use hot water and heated dry only if allowed.
- Don’t overload the basket.
- If parts are still damp after the cycle, let them air-dry fully before storing.
A dishwasher basket is not useful for every home. Some kitchens don’t have dishwashers. Some parents prefer hand-washing. Some baby items may not be dishwasher-safe. But if it works with your setup, it can be one of the simplest options.
Safety-first drying and storage checklist
#No matter what you use — a baby rack, regular dish rack, clean towel, drying mat, or dishwasher basket — the basics stay the same.
- Wash your hands firstBefore touching clean bottles or feeding parts, wash your hands with soap and water.
- Use a clean drying surfacePlace washed parts on a clean, unused towel, clean paper towel, drying mat, or dedicated drying rack.
- Keep clean items away from messDon’t dry baby items beside dirty dishes, food prep areas, sink splashes, or greasy cookware.
- Air-dry fullyLet bottles, nipples, collars, caps, and valves dry completely before putting them away.
- Don’t towel-dry inside bottlesAvoid wiping inside bottles, nipples, or small parts with a kitchen towel. Towels can transfer lint or germs.
- Don’t stack damp parts tightlyGive each piece a little space so air can move around it.
- Clean the rack or mat regularlyA drying rack still needs washing. Clean the rack, drip tray, and mat with soap and water. Empty standing water often.
- Clean the bottle brush tooIf you use a bottle brush, rinse it well after use, let it air-dry, and replace it when it starts looking worn or dirty.
- Use the dishwasher safely if allowedFollow the manufacturer’s instructions for bottle parts, pump parts, nipples, and dishwasher settings.
- Store only when dry Once everything is fully dry, store baby feeding items in a clean, protected place.
Small apartment and India-aware counter-space tips
#In many Indian homes, kitchen counters are already working overtime. There’s the gas stove, pressure cooker, mixer jar, water purifier, spice box, lunch boxes, regular utensils, and maybe a tea corner too.
So when someone says, “Just add a bottle drying rack,” it’s fair to think, Where exactly?
Choose vertical over wide
#A vertical bottle drying rack usually takes less counter space than a wide mat-style rack. It lets bottles stand upright without spreading across half the kitchen.
This works well if you wash bottles several times a day but don’t have much free counter space.
Try a clean silicone drying mat
#A raised silicone drying mat is useful if you want something flexible. You can place it near the sink while washing bottles, then clean and store it once everything is dry.
It’s also easier to move before cooking.
Make one small baby-only corner
#You don’t need a fancy feeding station. A small clean corner near the sink is enough.
Keep these items together if possible:
- Bottle brush
- Baby bottle cleaning soap or mild dish soap
- Drying rack or mat
- Clean box, shelf, or cabinet space for dry parts
The goal is simple: less searching, less dripping, and less mixing with regular kitchen stuff.
Don’t dry bottles beside the stove
#Indian cooking often means tadka, frying, steam, oil splatter, and masala residue. Clean baby bottles should stay away from that.
If possible, choose a side counter, shelf, or protected area instead of drying bottles right next to the burner.
Watch the drip tray
#If your rack has a drip tray, empty it often. Standing water gets unpleasant quickly, especially in warm or humid kitchens.
Choose a rack or mat that is easy to lift, wash, and dry.
Start small
#If you’re not sure how many bottles you’ll use, don’t buy the biggest rack immediately.
Start with a compact setup. You can always upgrade later if you find yourself washing bottles all day.
This is especially helpful if you plan to breastfeed directly but still want a few bottles ready.
Who should buy, skip, or wait?
#Buy a baby bottle drying rack if:
#- You’ll hand-wash bottles every day.
- You’re formula feeding or using several bottles daily.
- You’re pumping and washing pump parts often.
- Your regular dish rack is always crowded.
- Tiny bottle parts keep falling, staying wet, or getting lost.
- You want one clear place for clean baby feeding items.
A dedicated rack isn’t just about neatness. It can make a repetitive daily job feel much less annoying.
Skip it if:
#- You use the dishwasher for almost all bottles and parts.
- Your bottle and dishwasher manuals support hot wash and heated dry.
- You already have a clean drying setup that works.
- You only use bottles occasionally.
- Your kitchen has very little counter space and a rack would become clutter.
In this case, a dishwasher basket may be a smarter buy.
Wait if:
#- You’re still building your new parent checklist.
- You don’t know your feeding routine yet.
- You plan to nurse directly and use bottles only sometimes.
- You live in a small apartment and want to avoid extra gear.
- You want to see how many bottles you actually wash in a day.
While you decide, a clean unused towel, paper towel, or silicone drying mat can work. If the bottle pile starts growing, then get a rack.
How to dry baby bottles without overthinking it
#If you’re wondering how to dry baby bottles safely, here’s the simple version:
- Wash your hands.
- Wash bottle parts as per the product instructions.
- Rinse everything well.
- Place parts on a clean, unused towel, drying mat, or bottle drying rack.
- Keep small parts separated.
- Let everything air-dry fully.
- Store dry parts in a clean place.
That’s it.
You don’t need a complicated setup. You need clean hands, a clean surface, good airflow, and enough drying time.
Final verdict
#For most parents who hand-wash bottles every day, a baby bottle drying rack is useful and worth considering. It keeps small parts organized, helps bottles dry properly, and gives baby feeding items their own clean space.
If you already use a dishwasher and your bottle instructions allow it, a dishwasher basket for baby bottles may be the better and more space-saving choice.
If bottle use is occasional, a regular dish rack plus a clean unused towel or drying mat can be enough. Just make sure everything stays clean, separated, and fully air-dried.
The best choice is the one that fits your real kitchen and your real routine — not just the one that looks nice on a baby shopping list.