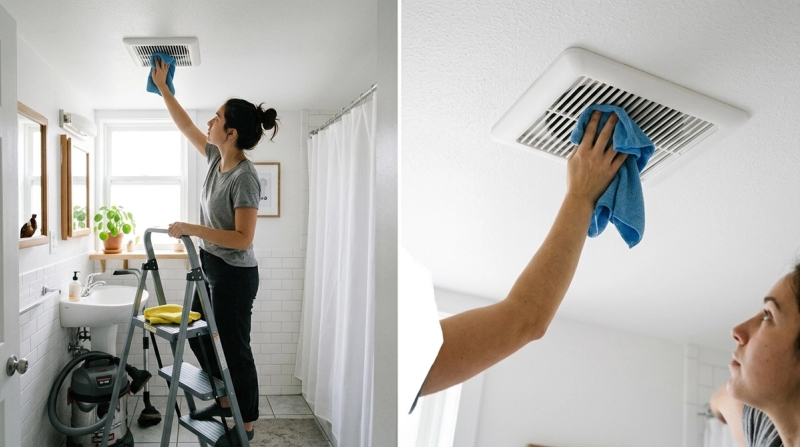
A bathroom fan is easy to ignore until it starts rattling, humming, or leaving the room smelling damp after every shower. The good news is that a lot of common fan problems come down to dust and moisture buildup — and you can often fix that with a careful clean.
Here’s the short version of a safe bathroom fan cleaning checklist:
- Turn off power at the circuit breaker.
- Remove the grille cover.
- Wash and dry the cover.
- Vacuum dust from the fan housing and blades.
- Wipe sticky buildup with a lightly damp cloth.
- Let everything dry.
- Reattach the cover and test the fan.
Regular bathroom exhaust fan cleaning can improve bathroom ventilation, reduce a noisy bathroom fan, and help clear that stubborn damp bathroom smell that lingers after bathing.
Why Bathroom Fan Cleaning Matters
#Your bathroom exhaust fan has one main job: move moist air out of the room.
Every hot shower, bucket bath, wet towel, and damp floor adds moisture to the bathroom. If that humid air sits around for too long, the space can start to smell musty. Over time, it can also encourage mildew, peeling paint, and general dampness.
But as the fan pulls air out, it also pulls in dust, lint, hair, and tiny particles from towels and clothes. Once that dust mixes with bathroom humidity, it can turn into a sticky layer inside the fan.
That buildup can:
- Block airflow through the grille
- Make the fan work harder
- Cause rattling, buzzing, or humming
- Leave moisture behind in the room
- Make a damp bathroom smell worse
- Shorten the life of the fan
EPA moisture guidance recommends controlling indoor moisture and using bathroom and kitchen exhaust fans that vent outdoors. EPA also suggests keeping indoor relative humidity below 60%, and ideally between 30% and 50%.
In simpler terms: a clean, working exhaust fan helps your bathroom dry out faster and feel fresher.
How Often Should You Clean a Bathroom Fan?
#For most homes, a full clean every six months is a good routine.
You may need to clean the fan more often if:
- The bathroom is used several times a day
- People take long, hot showers
- You live in a humid or coastal area
- It is monsoon season and the bathroom stays damp
- The grille looks grey, fuzzy, or clogged
- The fan suddenly sounds louder
- Steam takes too long to clear
- The bathroom smells musty even after the fan runs
If you rent, you do not need to dismantle the whole fan. Even washing the grille and vacuuming visible dust can make a noticeable difference.
Safety First: Before You Touch the Fan
#Before doing anything, turn off power to the bathroom fan at the circuit breaker.
Do not rely only on the wall switch. A switch can be wired oddly, fail, or be turned on by someone else while you are working. If you are not sure which breaker controls the fan, ask your landlord, building maintenance team, or an electrician.
Also keep these safety rules in mind:
- Use a sturdy stepladder, not a chair or bucket
- Keep water away from the motor and wiring
- Do not spray cleaner inside the fan housing
- Do not force parts that feel stuck
- Stop if you see damaged wires, burn marks, or loose electrical parts
- If you rent, do not remove the motor unless maintenance clearly allows it
Cleaning the cover and reachable dust is a simple maintenance job. Electrical repair is not.
Tools You’ll Need
#You do not need special equipment. Gather these before you start:
- Sturdy stepladder
- Vacuum cleaner with brush attachment
- Crevice tool, if available
- Microfiber cloths
- Mild dish soap
- Warm water
- Soft toothbrush or small cleaning brush
- Flashlight or headlamp
- Flathead screwdriver, only if needed for the cover
Avoid harsh chemicals, dripping-wet cloths, and spraying anything directly into the fan.
Bathroom Fan Cleaning Checklist, Step by Step
#1. Turn Off the Power
#Go to your electrical panel and switch off the breaker for the bathroom fan.
Then go back to the bathroom and flip the fan switch to check it. If the fan still turns on, you switched off the wrong breaker. Try again or get help if you are unsure.
2. Remove the Grille Cover
#Stand carefully on your ladder. Hold the grille cover with both hands and gently pull it down.
Most bathroom fan covers drop down a few centimetres and then stop. Inside, you will usually see two V-shaped metal springs holding the cover in place.
Squeeze the spring arms together and slide them out of their slots. Do the same on the other side. The grille should then come away from the ceiling.
If your cover has screws, remove them carefully and keep them in a small bowl or cup so they do not get lost.
3. Wash the Grille
#The grille usually holds the most visible dust. Because bathroom dust mixes with moisture, a dry cloth often just smears it around.
Wash the grille like this:
- Fill a sink or bucket with warm water and a little dish soap.
- Soak the grille for a few minutes.
- Scrub between the slats with a soft cloth or toothbrush.
- Rinse with clean water.
- Set it aside and let it dry completely.
Do not put the cover back while it is wet. You do not want water dripping into the fan housing.
4. Vacuum the Fan Housing
#Use a flashlight to look inside the ceiling opening. You may see dust on the fan blades, inside the metal housing, and around the corners.
Use the brush attachment on your vacuum to remove loose dust. Go slowly and gently.
Focus on:
- The inner edges of the fan housing
- Dusty corners
- The fan blades or wheel
- The area around the motor, without pressing hard
Do not bend or push the fan blades. Even a small bend can make the fan vibrate or become noisier.
5. Wipe Sticky Dust from Reachable Areas
#Vacuuming removes loose dust, but sticky buildup may still cling to the blades or housing.
Use a lightly damp microfiber cloth to wipe only the parts you can reach safely. The cloth should be damp, not wet. If water drips or squeezes out of it, it is too wet.
Do not spray water, vinegar, soap solution, or cleaner into the fan. Keep the motor dry.
If you cannot reach the blades comfortably, do not force it. It is better to leave a little dust than damage the unit or hurt yourself.
6. Check the Grille Springs
#Before putting the cover back, check the metal springs attached to the grille.
They should be:
- Firmly attached
- Not bent out of shape
- Sitting evenly on both sides
A loose or crooked spring can cause rattling. Sometimes a “noisy fan” is really just a cover that is not sitting flat against the ceiling.
7. Reattach the Cover
#Once the grille is fully dry:
- Hold it near the fan opening.
- Squeeze one V-shaped spring and slide it into its slot.
- Repeat on the other side.
- Push the grille gently upward until it sits flat against the ceiling.
It should feel secure, not loose or tilted.
8. Turn the Power Back On and Test
#Go back to the electrical panel and turn the breaker on.
Switch on the fan and listen. A freshly cleaned fan often sounds smoother and less strained. You may also notice stronger airflow at the grille.
If the fan does not turn on, switch the breaker off again and check that the cover is not blocking anything. If it still does not work, contact maintenance or a qualified professional.
Quick Airflow Check
#After cleaning, try this simple test.
Turn the fan on and hold one square of toilet paper near the grille. If the fan gently holds the paper against the grille, it is pulling air.
If the paper falls immediately, the fan may still be clogged, weak, blocked, or not venting properly.
This is not a professional airflow test, but it is a useful basic check at home.
How to Fix a Noisy Bathroom Fan
#A noisy bathroom fan is often caused by dust, vibration, or a loose cover. Cleaning may help, but the type of sound matters.
Cleaning often helps buzzing or humming. It usually will not fix grinding, squealing, burning smells or a fan that does not spin.
How to Fix a Damp Bathroom Smell
#A damp bathroom smell usually means moisture is staying in the room too long. Cleaning the fan can help if dust is blocking airflow, but your daily habits matter too.
Run the Fan During and After Bathing
#Turn the fan on before or during your shower. Leave it running for a while after you finish so it can pull humid air out of the room.
In very humid weather, especially during monsoon season, you may need to run it longer than usual.
Keep the Grille Clear
#Do not block the fan grille with:
- Hanging clothes
- Towels
- Storage racks
- Decorative covers
- Plastic bags or temporary hooks
Even a clean fan cannot work well if air cannot reach it.
Dry Very Wet Surfaces
#If your bathroom has poor natural ventilation, wipe down very wet floors, counters, or walls after use. This is especially helpful in small apartment bathrooms where moisture has nowhere to go.
Check Whether the Fan Vents Outdoors
#EPA moisture guidance recommends exhaust fans that vent outdoors. If a bathroom fan only pushes moist air into a ceiling cavity or enclosed space, it may not remove moisture properly.
Renters usually should not inspect ducting themselves. If the bathroom stays damp even after cleaning and regular fan use, ask your landlord or maintenance team to check the ventilation route.
Homeowners can have a professional confirm whether the duct is connected correctly and venting outside.
Renter-Friendly Bathroom Fan Maintenance
#If you rent, keep it simple and safe.
You can usually:
- Wipe the outside of the grille
- Remove and wash the grille if it clips off easily
- Vacuum visible dust near the opening
- Report weak suction
- Report unusual noise
- Report burning smells or a fan that does not spin
Avoid:
- Removing the motor
- Disconnecting wires
- Opening sealed parts
- Climbing into ceiling spaces
- Modifying ducts or vents
If the fan is noisy or not working properly, record a short video. It makes maintenance requests clearer and can save a lot of back and forth.
Homeowner Maintenance Notes
#If you own your home, add the bathroom fan to your seasonal maintenance list.
Every six months:
- Clean the grille
- Vacuum the fan housing
- Wipe accessible fan blades
- Listen for new noises
- Check that airflow feels reasonable
Once in a while, check the exterior vent if it is safely accessible. The outside flap should open freely and should not be blocked by leaves, dust, nests, or debris.
If the vent is on a roof or high wall, do not take risks. Hire someone who can inspect it safely.
In areas with heavy rain or monsoon weather, also watch for signs that an outside vent is damaged or letting moisture back into the duct.
When Cleaning Is Not Enough
#Cleaning helps with dust, minor noise, and weak airflow caused by clogged grilles. But it will not fix every ventilation problem.
Call a professional, landlord, or building maintenance team if:
- The fan does not turn on
- The fan turns on but does not spin
- You hear grinding, squealing, or metal-on-metal noise
- There is a burning smell
- The fan trips the breaker
- The bathroom stays damp after cleaning and regular use
- You suspect the fan is not venting outdoors
- You see damaged wiring or scorch marks
A bathroom fan may look simple, but it is still an electrical appliance. Clean what is safe to clean, and know when to stop.
Simple Monthly Mini-Checklist
#You do not need to deep clean the fan every month. A quick check can prevent heavy buildup.
Once a month:
- Look at the grille for dust
- Listen for new rattles or humming
- Check whether steam clears after bathing
- Notice any damp or musty smell
- Wipe the outside cover if it looks dirty
Every six months, do the full bathroom fan cleaning checklist.
Final Takeaway
#Bathroom exhaust fan cleaning is a small job, but it can make the whole bathroom feel fresher.
A clean grille and dust-free fan housing can improve airflow, reduce noise, and help clear humid air after showers. Start with safety: turn off the breaker, clean only the parts you can reach, keep water away from the motor, and stop if anything looks damaged.
For renters, surface cleaning and timely maintenance requests are usually enough. For homeowners, a simple six-month cleaning routine can help the fan work better and last longer.
A clean fan will not solve every moisture problem, but it gives your bathroom ventilation the best chance to do its job.