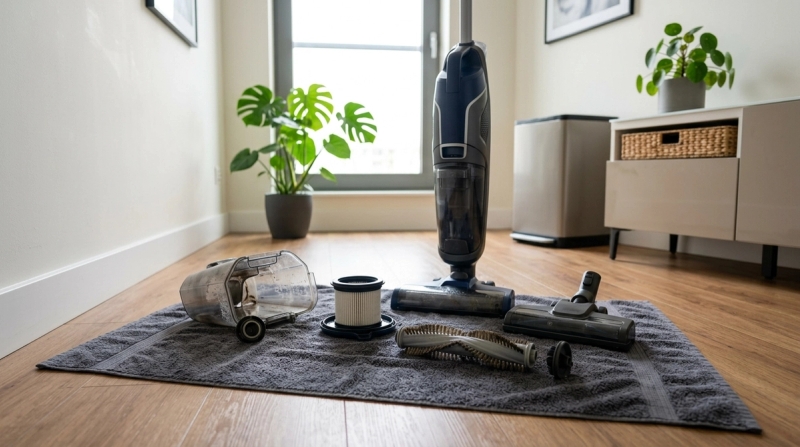
A wet-dry vacuum is brilliant when it’s working properly. It picks up spills, dust, muddy footprints, pet hair, and everyday floor mess without much fuss. But when it starts smelling musty, losing suction, making odd noises, or leaving streaks behind, it can quickly become frustrating.
Most of the time, the fix is not complicated. A simple wet-dry vacuum maintenance checklist can keep the machine fresh and working well for longer.
The basic routine is this: empty the dirty water tank after every use, rinse it out, clean the filter when needed, remove hair from the brush roll, and let everything dry before putting the vacuum away. These small habits prevent most common problems.
Why Wet-Dry Vacuum Maintenance Matters
#A wet-dry vacuum handles some unpleasant stuff. Dirty water, dust, food spills, pet fur, bathroom grime, kitchen mess, muddy shoe prints, and general floor dirt all pass through the same machine.
So it’s only fair that the vacuum needs a little cleaning too.
If dirty water is left sitting in the tank, it can start smelling by the next day. If the filter is clogged or damp, suction drops. If hair is wrapped around the brush roll, the vacuum may leave streaks, drag across the floor, or make a rough grinding sound.
The good news is that most maintenance is basic cleaning. You’re mainly looking after the parts that get dirty first:
- Dirty water tank
- Tank lid
- Filter
- Brush roll
- Nozzle
- Hose
- Attachments
- Seals and gaskets
Before doing anything, always check your own user manual. Different models have different filter types, tank designs, and cleaning instructions.
Safety First: Before You Clean the Vacuum
#Before you start cleaning your wet-dry vacuum, take a minute to make sure it’s safe.
- Switch it off and unplug it. If it’s cordless, turn it off and remove the battery if your model allows it.
- Keep water away from electrical parts. Never wash the motor body, battery area, charger, plug, adapter, or charging dock.
- Check the manual. Some filters are washable, some are not. Some brush rolls can be rinsed, while others should only be wiped.
- Let parts dry fully. Damp filters and wet tanks are two of the biggest reasons for bad smells.
- Do not attempt electrical repairs yourself. If the cord, charger, battery, plug, or motor seems damaged, contact the brand service centre or a qualified technician.
- Use the right wet or dry setup. Some machines need different filters, bags, or modes depending on whether you are picking up wet spills or dry dust.
Wet-Dry Vacuum Maintenance Checklist
#Step-by-Step After-Use Cleaning Checklist
#Use this routine after wet cleaning, spill pickup, or a proper floor-cleaning session. Once you get used to it, it only takes a few minutes.
1. Switch Off, Unplug, and Remove the Tank
#Turn the vacuum off first. Unplug it from the socket or remove it from the charging dock.
If your cordless model has a removable battery and the manual says to remove it before cleaning, do that too.
Then detach the dirty water tank carefully. Don’t rush this part. Dirty water can spill more easily than you expect.
2. Empty the Dirty Water Tank Right Away
#Do not leave dirty water sitting in the tank overnight. Empty it into a toilet or suitable drain, depending on what you cleaned and what your building allows.
Try not to pour thick sludge, hair clumps, food bits, or large debris into a small washbasin. Apartment drains can clog quickly, and that’s a mess nobody wants.
3. Rinse the Dirty Water Tank
#Rinse the tank with clean water. Swirl the water around so it reaches the corners and edges.
If dirt is stuck inside, use a soft cloth or soft brush if your manual allows it. For light odor, a tiny amount of mild dish soap can help. Rinse thoroughly afterward so no foam or residue remains.
Avoid strong cleaners unless the manufacturer specifically says they are safe.
4. Clean the Tank Lid, Float, and Seals
#Many wet-dry vacuums have a float or water-level sensor that stops the tank from overfilling. If this area gets coated with dirty residue, the vacuum may cut suction early or behave strangely.
Gently rinse or wipe:
- Tank lid
- Float area
- Water-level sensor area
- Rubber seals
- Gaskets
- Rim of the tank
Don’t force small parts. If your manual shows a particular cleaning method, follow that.
5. Remove and Clean the Brush Roll
#Take out the brush roll according to your model’s instructions.
Check for:
- Hair wrapped around the roller
- Thread or string near the ends
- Mud stuck to the bristles
- Pet fur packed into the roller
- Grit near the side caps
- Debris stuck inside the roller slot
Use scissors or the cleaning tool that came with the vacuum to cut hair away. Be gentle. Pulling too hard can damage bristles or loosen small parts.
If the brush roll is washable, rinse it under clean water. Shake off the extra water and leave it somewhere airy to dry.
6. Clean the Nozzle and Suction Path
#The floor head and nozzle collect a lot of hidden dirt. Wet grime can dry into a crusty layer, which later causes streaks or weak suction.
Wipe the nozzle opening and visible suction path with a damp cloth. Remove trapped hair, grit, food pieces, and lint.
This small step makes a big difference the next time you clean.
7. Clean the Filter
#Filter cleaning depends on the model. Some filters are washable sponge or mesh filters. Some HEPA-style filters can be rinsed only a limited number of times. Some filters should not be washed at all.
A safe general routine is:
- Remove the filter as shown in the manual.
- Tap loose dust into a bin.
- Rinse only if the filter is washable.
- Do not scrub delicate filter material.
- Let the filter air-dry fully before reinstalling it.
Do not use a hair dryer, heater, stove, iron, or direct high heat to dry the filter faster. Heat can damage the filter and reduce its performance.
8. Dry Everything Fully
#This is the step people often skip. It is also one of the main reasons a wet-dry vacuum starts smelling bad.
Leave the dirty water tank open. Keep the filter, brush roll, lid, and washable parts in a place with good airflow.
In humid weather or during monsoon, drying can take much longer. Don’t close the tank while it is still damp, and don’t reinstall a filter that feels “almost dry.” Almost dry is still damp enough to cause odor.
9. Reassemble Only When Dry
#Once all the parts are fully dry, put the vacuum back together.
Check that:
- The filter is seated properly
- The tank clicks into place
- The brush roll spins freely
- The lid and seals are aligned correctly
- Nothing feels loose, crooked, or jammed
If something does not fit smoothly, stop and check the manual before using the vacuum again.
10. Store It Properly
#Store the vacuum upright if that is how your model is designed to be stored. Keep it in a dry place, away from bathroom steam, rainwater, balcony dampness, or floor splashes.
For small apartments, it’s tempting to tuck the machine into a closed cupboard immediately. That’s fine only after everything is dry. The main rule is simple: don’t trap moisture inside the vacuum.
How to Clean the Dirty Water Tank Without Leaving Smell
#The dirty water tank is usually the biggest source of bad smell. It collects dirty mop water, dust, skin cells, food residue, hair, pet mess, and floor grime. If that mixture sits for too long, the smell can cling to the plastic.
Here’s an easy way to clean the dirty water tank:
- Empty the tank immediately after use.
- Rinse it with clean water.
- Add a little mild dish soap if needed.
- Shake gently with the lid closed, if your tank design allows it.
- Rinse until there is no foam left.
- Wipe the rim, lid, float area, and seal.
- Leave the tank open to air-dry.
If your manual says not to use soap, stick to plain water. Some brands recommend only water for regular rinsing.
Vacuum Filter Cleaning: What Beginners Should Know
#The filter may look like a small part, but it has a big job. It controls airflow and helps keep dirt away from internal parts.
When the filter is clogged, suction drops. The motor may sound strained, and the vacuum may not pick up as well as it used to.
Washable Filters
#If your filter is washable, rinse it under running water until the water looks clearer. Do not twist, wring, or scrub it hard unless the manual says that is safe.
Let it dry fully before putting it back. Many filters need around 24 hours in normal weather. During monsoon or very humid days, they may need even longer.
Non-Washable Filters
#If the manual says the filter is not washable, do not rinse it. Tap out loose dust gently and replace the filter as recommended by the brand.
Washing a non-washable filter can damage it and reduce suction.
Wet and Dry Mode Filters
#Some wet-dry vacuums use different filters, bags, or setups for wet pickup and dry pickup.
For example, a dry dust bag may need to be removed before wet cleaning. Other models may require a specific wet filter.
Using the wrong setup can cause clogging, odor, moisture damage, or weak suction. Always check your model’s instructions before switching between wet and dry cleaning.
Brush Roll Cleaning: Hair, Threads, and Streaky Floors
#The brush roll touches the floor directly, so it picks up a lot: hair, lint, pet fur, thread, wet dust, mud, and sticky residue.
When the brush roll is clean, the vacuum glides better and cleans more evenly. When it’s clogged, it can drag dirt around instead of lifting it. That’s when you start seeing streaks on the floor.
Clean the brush roll whenever you notice buildup. In homes with pets or long hair, that may mean after every use.
Pay special attention to the roller ends. Hair often wraps tightly around the side caps, where it’s easy to miss. If the brush roll sounds noisy, feels stuck, or stops spinning smoothly, check those ends first.
Let the brush roll dry fully before reinstalling it. A damp roller closed inside the floor head can start smelling stale very quickly.
Troubleshooting Common Wet-Dry Vacuum Problems
#Problem 1: My Wet-Dry Vacuum Smells Bad
#Likely causes:
- Dirty water was left in the tank
- Damp filter was put back too soon
- Brush roll was stored wet
- Dirt is trapped in the nozzle or hose
- Tank lid or float area is dirty
- Vacuum was stored in a closed, humid space
What to do:
- Empty and wash the dirty water tank.
- Rinse the tank lid and float area.
- Clean the brush roll.
- Check the nozzle and hose for trapped debris.
- Wash the washable filter, or replace it if needed.
- Let every part dry fully before reassembling.
During monsoon home cleaning, parts can take much longer to dry. Give them extra time and keep them in a ventilated area.
Problem 2: My Wet-Dry Vacuum Has Weak Suction
#Likely causes:
- Dirty water tank is full
- Float or water-level sensor has activated
- Filter is clogged
- Filter is damp
- Hose or nozzle is blocked
- Tank is not seated correctly
- Seal or gasket is dirty, loose, or misaligned
What to do:
- Empty the dirty water tank.
- Check that the float moves freely, if your model has one.
- Clean and dry the filter.
- Inspect the nozzle, hose, and attachments.
- Refit the tank properly.
- Wipe the seals and check for damage.
If suction is still weak after basic cleaning, do not open the motor body. Contact the manufacturer or service support.
Problem 3: The Vacuum Leaves Dirty Streaks on the Floor
#Likely causes:
- Brush roll is dirty
- Roller is too wet
- Hair is wrapped around the brush roll
- Dirty water tank is full
- Clean water tank is empty, if your model has one
- Floor head is coated with residue
What to do:
- Remove and rinse the brush roll.
- Clean the floor head and suction opening.
- Empty the dirty water tank.
- Refill the clean water tank if needed.
- Check that all parts are installed correctly.
Most streaking comes from dirty contact parts, not from a major fault in the machine.
Problem 4: The Brush Roll Is Noisy
#Likely causes:
- Hair is wrapped around the roller ends
- Grit is stuck near the side caps
- Brush roll is not seated properly
- Debris is trapped in the floor head
- Roller slot is dirty
What to do:
- Switch off and unplug the vacuum.
- Remove the brush roll.
- Cut away hair, thread, or string.
- Wipe the side caps and roller slot.
- Reinstall the roller correctly.
- Check that it rotates freely.
If the noise continues or the roller does not spin, check the manual and contact service if needed.
Problem 5: The Battery Does Not Last as Long
#Likely causes:
- Clogged filter is making the motor work harder
- Brush roll is tangled with hair
- Suction path is blocked
- Vacuum is being stored or charged in poor conditions
- Battery is aging naturally over time
What to do:
- Clean the filter, brush roll, tank, and nozzle.
- Make sure the brush roll spins freely.
- Wipe charging contacts only if they are accessible and safe to clean dry.
- Follow the manual for charging and storage.
Do not open or repair the battery pack yourself.
Apartment and India-Aware Maintenance Notes
#Wet-dry vacuums are especially useful in apartments. They handle kitchen spills, dusty corners, bathroom splash zones, balcony dirt, and daily floor cleaning quite well.
But Indian homes can bring a few extra challenges: monsoon dampness, hard water, compact storage, and mixed flooring.
Monsoon Dampness
#During monsoon, filters and brush rolls may stay damp for much longer than usual. A filter that dries in a day during summer may need extra time in humid weather.
What helps:
- Dry parts in a ventilated area.
- Keep the tank open until fully dry.
- Avoid putting the vacuum straight into a closed cupboard.
- Keep a spare filter if your manual allows it and you use the vacuum often.
Do not reinstall a filter just because it feels mostly dry. If it still feels cool, soft, or damp, wait longer.
Hard Water Marks
#Many homes have hard water. Over time, it can leave white mineral marks in tanks and on washable parts.
What helps:
- Rinse tanks after use instead of letting water dry inside.
- Wipe visible white deposits with a soft cloth.
- Use only cleaning methods approved in your manual.
- If your brand allows diluted vinegar for descaling, use it carefully and rinse well.
Avoid strong acids, bathroom descalers, bleach, or abrasive powders unless the manufacturer specifically approves them.
Small Storage Spaces
#In apartments, the vacuum often ends up in a utility corner, kitchen cabinet, balcony area, or narrow closet. That’s okay, but only if the machine is dry before storage.
What helps:
- Dry the dirty water tank before closing it.
- Keep filters and brush rolls out until fully dry.
- Do not seal damp parts in plastic bags.
- Keep the charger and plug away from wet floors.
- Avoid storing the vacuum where bathroom steam or rainwater can reach it.
Mixed Flooring
#Many homes have a mix of tiles, stone, laminate, vinyl, and sealed wooden flooring. Follow your vacuum manual for suitable floor types and water usage.
If a floor is sensitive to moisture, use the correct mode and avoid leaving standing water behind.
Monthly Deep-Clean Routine
#A monthly deep clean helps remove the buildup that quick rinsing may miss.
- Remove the dirty water tank, brush roll, filter, and washable attachments.
- Wash the tank more thoroughly with water and mild soap, if allowed.
- Clean the tank lid, float area, rim, and seals.
- Inspect the brush roll for worn bristles, hidden hair, or stuck grit.
- Check the nozzle and hose for blockages.
- Rinse washable filters as recommended.
- Wipe the exterior with a slightly damp cloth, avoiding electrical areas.
- Dry all parts fully.
- Reassemble carefully.
- Run a quick check before the next cleaning session.
This routine can reduce bad smells, weak suction, clogs, and avoidable vacuum maintenance costs.
What Not to Do
#A few habits can shorten the life of your wet-dry vacuum or make it unpleasant to use.
- Do not leave dirty water in the tank overnight.
- Do not reinstall a damp filter.
- Do not use wet mode with the wrong filter or dust bag setup.
- Do not pull tangled hair aggressively from the brush roll.
- Do not wash the motor body, battery, charger, plug, or power cord.
- Do not use harsh chemicals unless your manual allows them.
- Do not ignore a burning smell, sparking, damaged cord, or swollen battery.
- Do not open the motor or battery housing for DIY repair.
Quick 5-Minute After-Use Routine
#If you remember only one routine, make it this one:
- Switch off and unplug the vacuum.
- Empty the dirty water tank.
- Rinse the tank and lid.
- Remove hair from the brush roll.
- Rinse the brush roll if needed.
- Check the nozzle for debris.
- Clean the filter if it is dirty and washable.
- Leave all parts open to dry.
- Reassemble only when fully dry.
- Store in a dry, ventilated space.
Small habits make the biggest difference, especially with appliances that deal with dirty water.