Quick answer
#Cordless vacuum maintenance is mostly about keeping airflow clear. Empty the bin, clean or replace filters as the manual says, remove hair from the brush roll, wipe seals, keep vents clear, and store the vacuum somewhere dry. These small habits help maintain suction, reduce smells, protect the motor, and avoid avoidable replacement costs.
Cordless vacuums are useful in apartments because they are light, easy to grab, and good for quick daily cleaning. But they also need more regular care than many people expect because they usually have smaller dust bins, compact filters, motorised floorheads, and rechargeable batteries.
This checklist covers cordless vacuum filter cleaning, brush roll cleaning, bin care, battery care, storage, and India-aware notes for fine dust, monsoon humidity, tiled floors, power cuts, and service support.
Quick maintenance schedule
#Why cordless vacuum maintenance matters
#A cordless vacuum depends on clear airflow. Dust travels through the floorhead, wand, bin, filter, and exhaust path. If one part gets blocked, the whole vacuum feels weaker.
Most problems are not major failures. They are usually simple things like:
- A dust bin filled past the max line
- A filter put back while still damp
- A HEPA filter washed by mistake
- Hair wrapped tightly around the brush roll
- Fine dust sitting on rubber seals
- A vacuum stored in a damp corner during monsoon
- Battery vents covered with dust or cloth
The good news is that most of this is easy to avoid. You do not need to overthink it. You just need to be regular.
Step-by-step cordless vacuum maintenance checklist
#1. Empty and clean the dust bin
#The dust bin is the first thing to check when suction drops. Cordless vacuums usually have smaller bins than plug-in vacuums, so they fill faster than expected.
Do this after every use:
- Switch off the vacuum.
- Remove the bin or open the bin release.
- Empty it over a dustbin.
- Tap it gently to remove fine dust.
- Check the inlet where dirt enters the bin.
- Wipe the bin rim and outside with a dry cloth.
Do not wait for the bin to overflow. The max line is a limit, not a target. If your home is near a main road, construction site, open balcony, or dusty lane, empty the bin earlier.
Also, avoid wet debris unless your vacuum is clearly made for wet and dry cleaning. A normal dry cordless vacuum is not meant for wet spills. Moisture makes dust clump inside the bin, wand, and filter area. It can also lead to bad smells.
2. Clean the filters properly
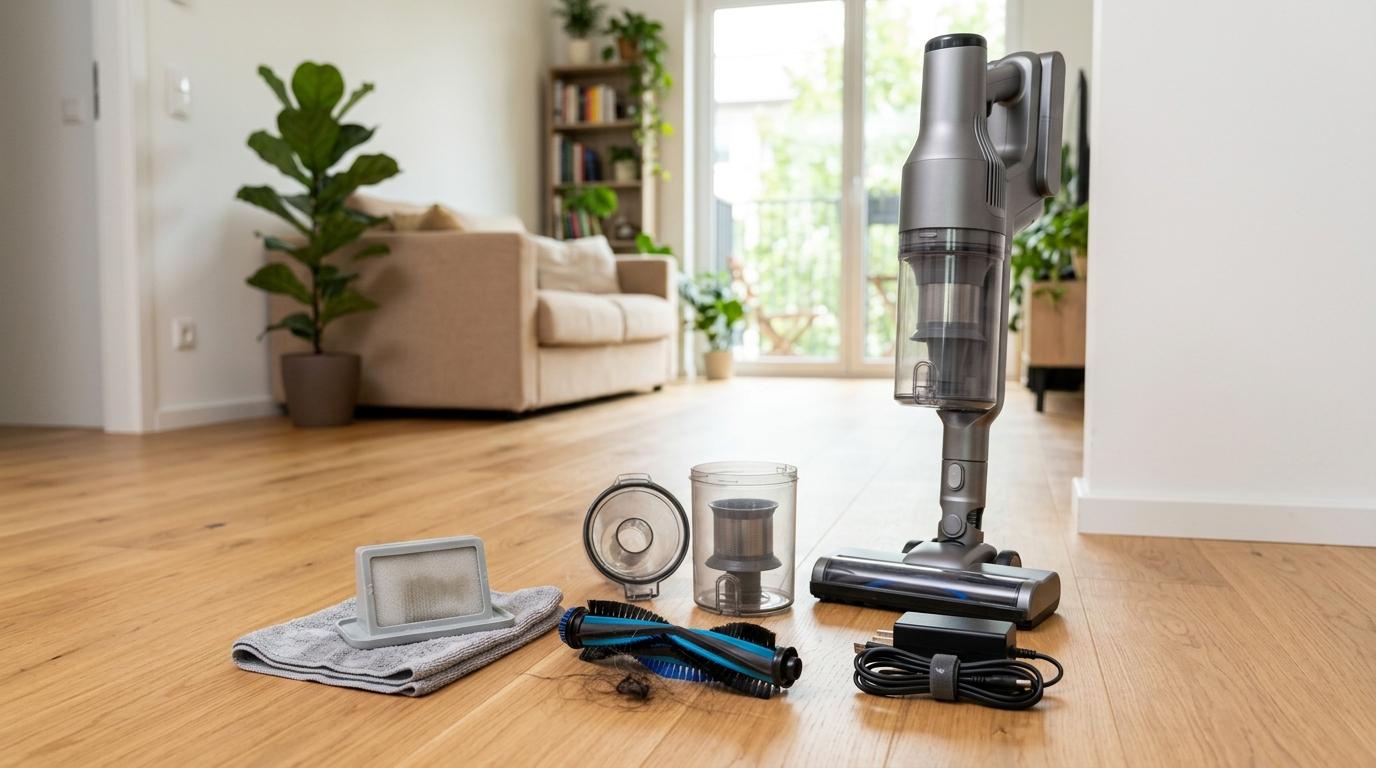
#Filters are one of the most important parts of cordless vacuum maintenance. They catch fine dust and help protect the inside of the machine.
Source-aware note: manufacturer guidance varies. Dyson support says washable cordless vacuum filters should be washed at least monthly to help maintain suction, while Bosch support highlights regular cleaning of the dust box, filter, brush, and sensors for long-term performance. Always follow your own product manual.
If your filter is washable
#- Remove the filter as shown in the manual.
- Tap off loose dust first.
- Rinse it under cold water if the manual allows washing.
- Avoid detergent unless the manual says it is allowed.
- Do not scrub it harshly.
- Shake off extra water.
- Leave it to air dry fully before putting it back.
Many filters need at least 24 hours to dry. In humid weather, especially during the Indian monsoon, it can take longer. If the filter feels even slightly damp, wait. It is better to delay vacuuming than to run the machine with a damp filter.
If your filter is not washable
#- Do not rinse it.
- Tap it gently over a dustbin.
- Wipe the filter housing with a dry cloth if needed.
- Replace the filter as per the manual, or when suction does not improve after cleaning.
What about HEPA filters?
#HEPA stands for high-efficiency particulate air. The U.S. EPA defines HEPA as a type of pleated mechanical air filter. In a vacuum, a HEPA filter can help capture fine particles, but a vacuum should not be treated as a medical solution for allergies or asthma.
Do not wash a HEPA filter unless your manual clearly says it is washable. Some HEPA filters get damaged by water. Once damaged, they may not filter properly.
3. Clean the brush roll
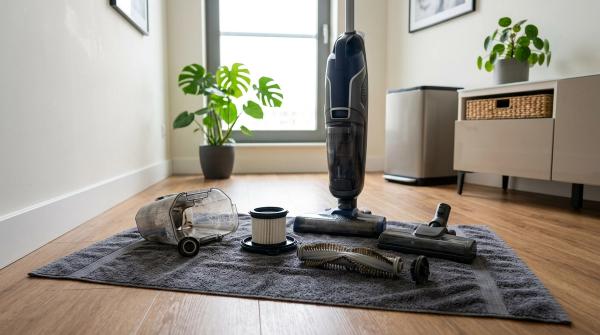
#The brush roll does a lot of the hard work. Hair, pet fur, threads, and fibres can wrap around it quickly. Even on tiled floors, the roller can collect dust along the edges and around the axle.
Basic brush roll cleaning steps:
- Switch off the vacuum.
- Remove the floorhead if needed.
- Open the brush roll cover as per the manual.
- Slide out the brush roll if your model allows it.
- Cut tangled hair and threads carefully with scissors.
- Pull loose fibres away gently.
- Wipe the brush chamber with a dry cloth.
- Check the floorhead neck for stuck debris.
- Refit the brush roll properly.
Do not force anything open. Some floorheads need a coin, a release tab, or a screwdriver-style slot. If it does not open easily, check the manual first.
4. Check the wand, inlet, and air path
#If the bin is empty and the filter is clean but suction still feels low, check the air path. Blockages often hide in simple places.
Check these areas:
- Floorhead opening
- Bend where the floorhead meets the wand
- Wand tube
- Bin inlet
- Filter housing
Small things can create big problems. Paper bits, snack crumbs, hair clumps, fabric threads, and tiny stones can get stuck at narrow points.
Use a torch if needed. Avoid pushing sharp objects inside the vacuum. If something is stuck, remove parts gently and only as the manual allows.
5. Wipe rubber seals and gaskets
#Rubber seals help keep the airflow tight. If dust builds up around them, suction may drop even when everything else looks clean.
Places to check:
- Bin lid seal
- Bin release flap
- Filter housing edge
- Connection between bin and body
- Wand and floorhead joints
Use a dry microfiber cloth. If your manual allows a slightly damp cloth for exterior cleaning, make sure moisture does not enter electrical parts. Let everything dry before using the vacuum again.
6. Clean sensors, if your vacuum has them
#Some cordless vacuums have dust sensors, floor sensors, or automatic suction sensors.
If your model has visible sensors:
- Turn the vacuum off.
- Use a soft, dry cloth.
- Wipe gently.
- Do not spray cleaner directly on the vacuum.
- Check the manual for exact sensor locations.
If your vacuum does not mention sensors, do not worry. Just keep the bin, filter, brush roll, and air path clean.
Vacuum battery care
#The battery is usually one of the most expensive parts of a cordless vacuum. Good battery care mostly comes down to heat control, clean vents, correct charging, and safe handling.
Battery care checklist:
- Follow your product manual for charging instructions.
- Use the original charger or a manufacturer-approved charger.
- Keep battery vents clear of dust.
- Do not cover the vacuum while it is charging.
- Avoid storing it in direct sunlight.
- Avoid hot balconies, closed cars, or areas near cooking heat.
- Do not charge it near wet areas.
- Do not open or repair the battery yourself.
- If the battery looks swollen, smells odd, gets very hot, or behaves strangely, stop using it and contact authorised service support.
Many modern cordless vacuums have battery management systems, but charging advice still varies by brand and model. Some are meant to stay on the dock between uses. Others may have different instructions for long-term storage. The manual is still the safest source.
Storage tips for small apartments
#Small homes need smart storage. A cordless vacuum should be easy to grab, but it should not be placed where it keeps falling over or getting kicked.
Better storage ideas:
- Use the wall mount if your wall type and rental agreement allow it.
- If drilling is not possible, use a stable floor stand.
- Keep it away from bathrooms and damp utility corners.
- Do not leave it leaning loosely against a wall.
- Keep attachments in a box, drawer, or pouch.
- Store spare filters and parts in a dry place.
For renters, a no-drill stand is often easier than a wall mount. In very small flats, you can store the main unit, wand, floorhead, and tools separately, as long as they stay clean and dry.
India-aware notes for dust, monsoon, tiles, power cuts, and service
#Cordless vacuums are useful in Indian homes, but local conditions can be rough on them. Fine dust, marble or tile floors, humidity, and power cuts all affect maintenance.
Fine dust from roads and construction
#In many Indian cities, fine dust enters through windows, balconies, shoes, and open doors. This dust clogs filters faster than visible crumbs.
If your house gets dusty quickly, check the filter more often than once a month. You may not need to wash it every time, but tapping out loose dust helps. Also check the bin inlet, because fine dust can pack there.
Monsoon humidity
#Humidity makes dust sticky. During monsoon, be extra careful after washing filters or rollers.
Let washed parts dry fully in a ventilated area. Do not reinstall a filter just because it looks dry outside. Touch it and check the folds or foam layers if you can. Sometimes the inside is still damp.
A damp filter or roller can cause smell, weak suction, and dust clumping.
Tiled and marble floors
#Tile, marble, and other hard floors are common in Indian homes. Fine dust settles along grout lines, corners, and room edges.
Helpful habits:
- Clean the roller often so it does not smear dust.
- Do not press the vacuum too hard into the floor.
- Let suction and the floorhead do the work.
- Check the floorhead neck for trapped hair and dust.
- Clean corners slowly, because dust gathers there.
Power cuts and charging
#If your area has frequent power cuts, charging may get interrupted. After a power cut, check whether the charging light has resumed normally.
Keep the charging dock in a dry, stable place. Do not place it where people kick it, pull the cable, or cover it with cloth.
Service support and spare parts
#Before buying a cordless vacuum, especially an expensive one, check service support in your city. Also check the availability and cost of:
- Filters
- Brush rolls
- Batteries
- Chargers
- Dust bins
- Floorheads
A vacuum that is easy to clean and has available spares is much easier to live with. Hidden maintenance cost is real, especially with premium models.
Signs your cordless vacuum needs cleaning, not repair
#If cleaning does not solve it, contact the brand’s authorised service support.
Replacement guide: when to clean, replace, or service
#Mistakes that quietly increase maintenance costs
#Avoid these:
- Washing filters that are not marked washable
- Putting back damp filters or rollers
- Vacuuming wet spills with a dry-only vacuum
- Ignoring hair wrapped around the brush roll
- Using the vacuum when the bin is overfilled
- Storing it in damp corners during monsoon
- Blocking battery vents while charging
- Opening the battery pack yourself
- Buying a model without checking filter and battery availability
These are small mistakes, but they can lead to service visits or early part replacements.
A simple 10-minute monthly routine
#If you remember only one routine, use this one.
- Empty the bin.
- Tap out loose dust.
- Remove the filter.
- Wash it only if the manual says it is washable.
- If washed, leave it to dry fully.
- Remove hair from the brush roll.
- Check the floorhead neck and wand.
- Wipe rubber seals.
- Clear dust from vents.
- Put everything back only when it is fully dry and fitted properly.
For dusty homes, do a quick bin, filter, and brush check more often. It takes only a few minutes and can save trouble later.
Related AllBlogs reads
#- Robot Vacuum vs Cordless Vacuum vs Wet-Dry Vacuum: What Should You Buy for a Small Apartment?
- Wet-Dry Vacuum Cleaner Buying Checklist: What Apartment Homes Should Check Before Buying
- Plug-In Watt Meter vs Smart Plug: What Should You Buy?
- Second-Hand Appliance Buying Checklist: Test Before You Pay