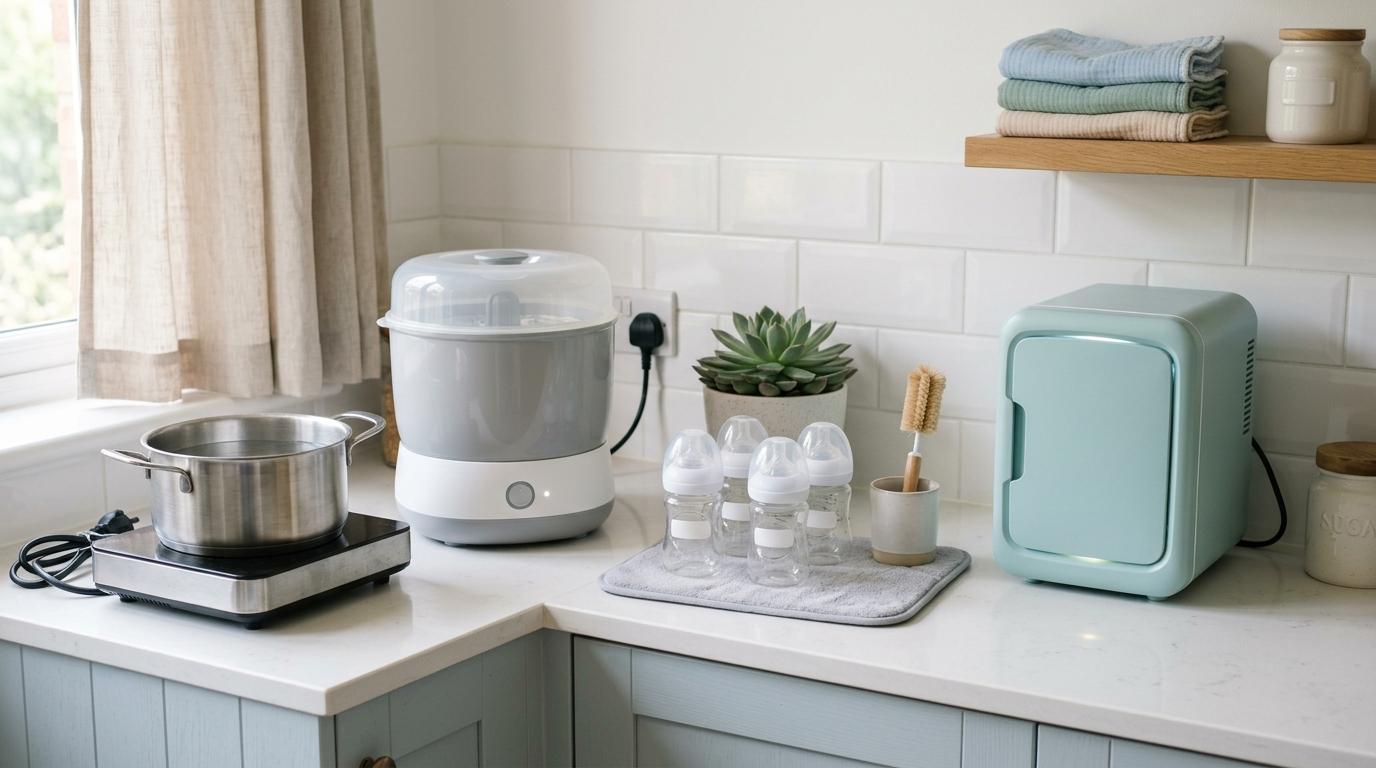
If you’re trying to choose between a bottle sterilizer vs boiling, here’s the honest answer: there isn’t one perfect method for every family.
For many parents, an electric steam sterilizer is the easiest day-to-day option. Boiling is cheap, dependable, and works even when the power goes out. A UV sterilizer for baby bottles can be useful if you want bottles to come out dry and don’t want to deal with steam, hot water, or limescale.
But before we compare anything, let’s get one thing very clear.
Sterilizing does not replace washing.
Every bottle, nipple, ring, cap, valve, insert, and pump part needs to be cleaned first. Milk and formula leave residue behind, and germs can sit in those tiny corners around the nipple, threads, and bottle rings. Sanitizing works properly only after that residue is removed.
Newborn feeding already comes with enough mental load. Bottles. Nipples. Brushes. Drying racks. Sterilizers. Pump parts. Then every relative, friend, and online group has a different opinion.
One person says boiling is best. Someone else says steam is safer. Another parent swears by UV. And then someone says the dishwasher is enough.
The truth is much simpler: safe bottle care is about a routine you can actually follow.
Wash well. Sanitize when needed. Dry safely. Store clean.
That’s it.
This guide compares boiling, electric steam sterilizers, UV sterilizers, dishwasher sanitizing, and cold-water sterilising, with practical notes for Indian homes too.
First: Cleaning and Sanitizing Are Not the Same
#This is the part that matters most.
Cleaning removes milk, formula, grease, and visible dirt. Sanitizing reduces germs after the item has already been cleaned.
Most parents casually say “sterilizing bottles,” and that’s perfectly fine. Some health guidelines use the word “sanitizing,” while others say “sterilising.” The exact wording changes by country, but the basic idea is the same.
You cannot properly sanitize a dirty bottle.
If milk residue is stuck inside a nipple hole, under a ring, or around the bottle threads, boiling, steam, UV, or a dishwasher cycle may not work as well as you think.
So before worrying about which sterilizer to buy, focus on the cleaning routine.
Cleaning Before Sanitizing Checklist
#Before using any baby bottle sterilizer, boiling pot, UV machine, dishwasher, or cold-water solution, do this first:
- Wash your hands with soap and water.
- Take the bottle apart completely — bottle, nipple, ring, cap, valve, insert, everything.
- Rinse soon after feeding so milk doesn’t dry and stick.
- Use a clean basin for handwashing, not the kitchen sink directly.
- Wash with hot soapy water using a bottle brush kept only for baby items.
- Clean the nipple carefully, including squeezing water through the nipple hole.
- Rinse well under clean running water.
- Sanitize after washing, if your baby needs it or your routine includes it.
- Air-dry fully on a clean towel or drying rack used only for baby feeding items.
A simple routine helps a lot: rinse after feeds, wash in batches, sanitize once a day if needed, then let everything dry properly.
Not perfect. Just consistent.
Who Needs Daily Sanitizing?
#Health guidance is designed to be safe, not to make parents panic.
Daily sanitizing is especially recommended if your baby:
- Is younger than 2 to 3 months.
- Was born premature.
- Has a weakened immune system.
CDC-style guidance emphasizes daily sanitizing for higher-risk babies, while NHS/Start for Life is more cautious and advises sterilising feeding equipment for the first 12 months because milk can allow germs to grow quickly.
So yes, different countries give slightly different advice.
If you’re unsure, ask your pediatrician and follow the guidance used where you live.
A practical middle path for many families is:
- Wash bottles after every feed.
- Sanitize once daily in the early months.
- Sanitize more carefully if your baby is premature, unwell, or immunocompromised.
- Keep everything dry and clean between uses.
Bottle Sterilizer vs Boiling vs UV: Quick Comparison
#Option 1: Boiling Baby Bottles
#Boiling is the classic answer to how to sterilize baby bottles. It’s simple, inexpensive, and doesn’t require a special appliance.
Many parents still prefer it because it feels straightforward: water, heat, done.
How boiling works
#After washing all bottle parts:
- Place bottles, nipples, rings, and caps in a large clean pot.
- Cover everything fully with water.
- Make sure there are no trapped air bubbles inside the bottles.
- Bring the water to a boil.
- Boil for 5 minutes, following CDC-style guidance.
- Let the water cool enough to handle safely.
- Remove items with clean tongs.
- Place everything on a clean surface to air-dry.
Pros of boiling
#- No special equipment needed.
- Very low cost.
- Works during power cuts.
- Easy to understand.
- Useful as a backup even if you own a sterilizer.
Cons of boiling
#- Takes time.
- Needs a stove and a large pot.
- Hot water can be risky when you’re tired or rushing.
- Frequent boiling may wear out plastic bottles or silicone nipples faster.
Best for
#Boiling is a good choice if you want a low-cost method, use only a few bottles, or need something dependable during power cuts.
It’s also nice if you don’t want one more gadget taking up space in the kitchen.
Option 2: Electric Steam Sterilizers
#A steam sterilizer uses hot steam to sanitize cleaned bottles and feeding parts. For many families, this is the easiest everyday option.
You wash the bottles, load the machine, press a button, and move on.
And when you have a newborn, anything that reduces thinking is a gift.
How steam sterilizers work
#Most steam sterilizers work like this:
- Add the recommended amount of water to the base.
- Load the cleaned bottle parts.
- Close the lid.
- Start the cycle.
- Let the machine complete the full process.
The machine heats the water and fills the chamber with steam.
Always follow your specific model’s instructions. Water quantity, loading method, and cycle time can vary.
Pros of steam sterilizers
#- Convenient for daily use.
- Faster than boiling for many families.
- No need to stand near the stove.
- Many models switch off automatically.
- Good when you have several bottles to sanitize at once.
Cons of steam sterilizers
#- Needs electricity.
- Takes up counter or storage space.
- Bottles may come out wet unless there’s a drying function.
- Hard water can leave white limescale on the heating plate.
- Needs regular cleaning and descaling.
Best for
#A steam sterilizer is often the most practical choice for families who bottle-feed regularly.
If your main question is bottle sterilizer vs boiling for convenience, steam usually wins. If your main concern is cost, boiling still makes a lot of sense.
Option 3: UV Sterilizers for Baby Bottles
#A UV sterilizer for baby bottles uses ultraviolet light instead of heat and water. Many models also include a drying function, which is one of the biggest reasons parents choose them.
Dry bottles are easier to store. They also feel cleaner somehow, even though the real safety still depends on proper washing and sanitizing.
And yes, it is nice not to have water droplets everywhere.
How UV sterilizers work
#You place cleaned bottle parts inside the chamber. If the unit has drying, it usually dries the items first and then exposes them to UV light.
Placement matters a lot.
UV light works best on surfaces it can directly reach. If parts are stacked badly or hidden behind each other, some areas may not get enough exposure.
Also, UV does not remove milk residue. So once again: wash first.
Pros of UV sterilizers
#- No water needed.
- No limescale from hard water.
- Can leave bottles dry if drying is included.
- No boiling water to handle.
- Can be useful for some other baby items, depending on manufacturer guidance.
Cons of UV sterilizers
#- Usually more expensive.
- Cycles can take longer, especially with drying.
- Needs electricity.
- Bottle parts must be arranged carefully.
- Repeated UV exposure may discolor some clear plastics or silicone over time.
Best for
#UV may suit families who want dry bottles, have the budget, and have enough counter space.
It may not be ideal if your area has frequent power cuts, your kitchen is small, or you want the cheapest method.
Option 4: Dishwasher Sanitizing
#If you have a dishwasher with hot water and a heated dry or sanitize setting, it can be helpful for newborn bottle cleaning.
But not all dishwashers are the same, and not all bottles are dishwasher-safe. So check both the dishwasher manual and the bottle instructions first.
How to dishwasher sanitize baby bottles
#- Check that bottles and parts are dishwasher-safe.
- Place bottles on the top rack.
- Put nipples, rings, caps, and small parts in a closed dishwasher basket.
- Use a hot water cycle.
- Use heated dry or sanitize setting if available.
- Wash your hands before removing clean items.
Pros of dishwasher sanitizing
#- Can clean and sanitize in one routine if the right cycle is used.
- Saves handwashing time.
- Useful when you have many bottles and small parts.
- Reduces time spent standing at the sink, which genuinely matters.
Cons of dishwasher sanitizing
#- Not every home has a dishwasher.
- Small parts can fall if they aren’t secured.
- Some plastics may warp with high heat.
- Detergent smell or residue may bother some families.
- Water can collect in bottle parts if they’re loaded badly.
Best for
#Dishwasher sanitizing works well if you already have a dishwasher, your bottles are dishwasher-safe, and your machine has a suitable hot cycle or sanitize setting.
In many Indian kitchens, this may be less common than boiling or a compact steam sterilizer. But if you already have one, it can be very useful.
Option 5: Cold-Water Chemical Sterilising
#Cold-water sterilising uses sterilising tablets or liquid mixed with water in a clean container. NHS/Start for Life includes this as an accepted method when the instructions are followed properly.
Some parents think of it as old-fashioned, but it can be very practical, especially during travel or power cuts.
How cold-water sterilising works
#You prepare the solution as directed, fully submerge washed feeding parts, and keep everything under the liquid for the required time.
Many products require at least 15 minutes, but always follow the product label. Don’t guess the timing, and don’t make the solution stronger thinking it will work better.
The solution usually needs to be changed regularly, often every 24 hours, depending on the product instructions.
Pros of cold-water sterilising
#- No electricity needed.
- No stove needed.
- Useful while travelling.
- Helpful during long power cuts.
- No heat exposure for bottles and nipples.
Cons of cold-water sterilising
#- Requires tablets or liquid.
- Needs a dedicated clean container.
- Some parents notice a mild smell.
- Instructions must be followed carefully.
- The container needs a clean, safe place to sit.
Best for
#Cold-water sterilising is a good backup method, especially during travel, power cuts, or days when boiling or using a machine just isn’t convenient.
It can also work well if your kitchen is small and you don’t want another appliance.
India-Aware Notes: Power Cuts, Hard Water, and Small Kitchens
#Choosing a bottle cleaning method in India is not only about hygiene. It’s also about what actually works in your home.
Your electricity, water quality, kitchen space, and daily routine all matter.
If your area has power cuts
#Electric steam and UV sterilizers need a complete cycle. If the power goes out halfway, treat the cycle as incomplete.
Restart the full cycle when power comes back, or use another method like boiling or cold-water sterilising.
Even if you buy a sterilizer, it’s still useful to know how to boil bottles safely.
If your water is hard
#Many Indian homes have hard water. In a steam sterilizer, hard water can leave a white layer on the heating plate. This is usually limescale.
It’s mostly an appliance maintenance issue, not a hygiene disaster. Clean or descale the machine as instructed by the manufacturer.
Some parents use filtered or RO water in the sterilizer to reduce scaling, but check the appliance manual first.
If your kitchen is small
#A large UV sterilizer can feel bulky in a compact kitchen. Steam sterilizers are usually smaller, but they still need counter or shelf space.
Boiling may be simpler because it uses a pot you already have. Cold-water sterilising needs a container, but that container also needs a clean place to sit.
The best method is the one you can repeat without stress, clutter, or skipped steps.
Which Method Should You Choose?
#Here’s a simple way to decide.
Choose boiling if:
#- You want the lowest-cost method.
- You don’t want to buy an appliance.
- You’re comfortable using the stove.
- You need a power-cut backup.
- You only use a few bottles.
Choose a steam sterilizer if:
#- You sanitize daily.
- Your baby uses several bottles a day.
- You want a quicker routine.
- You have space for a small appliance.
- You don’t mind drying bottles afterward.
Choose UV if:
#- You want dry bottles.
- You prefer not to use water or steam.
- You have the budget and space.
- You’re comfortable arranging parts carefully.
- You understand that washing first is still required.
Choose dishwasher sanitizing if:
#- You already have a dishwasher.
- Your bottles are dishwasher-safe.
- Your machine has hot water, heated dry, or a sanitize setting.
- You want to reduce handwashing work.
Choose cold-water sterilising if:
#- You travel often.
- You need a no-electricity method.
- Your area has frequent power cuts.
- You want a backup to boiling or steam.
- You don’t want heat exposure for bottle parts.
A Simple Daily Routine for New Parents
#If your baby needs daily sanitizing, try this routine:
- After each feed, rinse bottle parts.
- Wash with hot soapy water when you can.
- Keep washed parts in a clean area.
- Once a day, sanitize using boiling, steam, UV, dishwasher, or cold-water method.
- Let everything air-dry fully on a clean surface.
- Store dry items in a clean, closed place.
If your baby is older and healthy, and your pediatrician hasn’t advised daily sanitizing, careful washing after each feed may be enough.
Still, many parents continue occasional sanitizing for peace of mind, especially after illness, travel, or when a bottle was left unwashed for too long.
And if that happens, don’t beat yourself up. It happens in real life. Clean it properly, sanitize if needed, and move on.
Common Mistakes to Avoid
#- Sanitizing without washing first. This is the biggest one.
- Leaving milk residue in nipples, caps, or rings.
- Putting baby bottles directly in a dirty kitchen sink.
- Touching clean nipples with unwashed hands.
- Storing bottles while they’re still wet in a closed container.
- Assuming a half-finished steam or UV cycle is enough.
- Ignoring cracks, tears, cloudiness, or worn nipples.
- Using bottles or nipples past their safe condition.
Bottle hygiene doesn’t need to be dramatic. It doesn’t need to be perfect either.
It just needs to be steady, clean, and sensible.
Final Takeaway
#If you want the easiest daily method, a steam sterilizer is often the most practical choice.
If you want the cheapest and most dependable backup, boiling works well.
If you want dry bottles and have the space and budget, a UV sterilizer may be worth considering.
But the safest choice is not just the machine you buy.
It’s the routine you follow.
Wash first. Sanitize when needed. Dry safely. Store clean.
That simple rhythm matters much more than buying the most expensive baby bottle sterilizer.