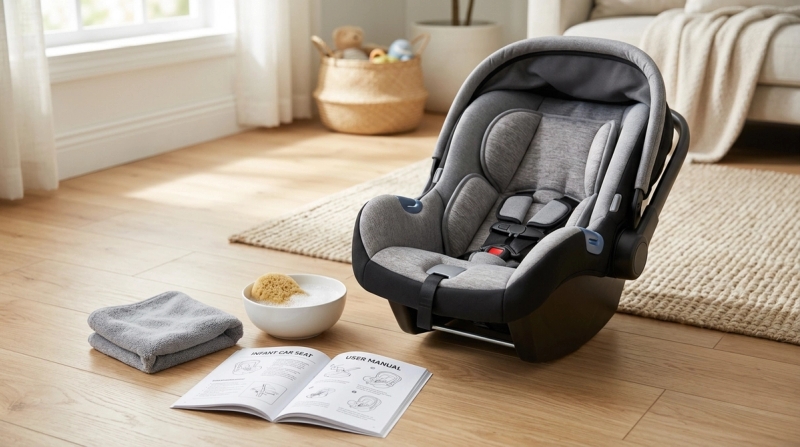
Baby car seats collect crumbs, milk, sweat, sand, diaper leaks and sticky snack residue. Cleaning is normal, but a car seat is safety equipment, not regular laundry. The safe answer: follow your car seat manual first, spot-clean harness straps gently, wash covers only as approved, clean buckles without oils or harsh cleaners, and air-dry every part fully before using the seat again.
This guide is for everyday parents who want the seat clean without weakening the parts that protect a child in a crash.
Quick Safety Cleaning Table
#Your car seat manual is always the final authority. If your manual says something different from this guide, follow the manual.
Before You Start
#Keep the setup simple:
- Car seat manual, printed or digital
- Phone for photos before removing parts
- Vacuum or handheld vacuum
- Soft cloths or microfiber towels
- Mild soap
- Small bowl of warm water
- Soft toothbrush for plastic shell crevices, not harness straps
- Shaded, well-ventilated drying space
Do not start this right before an appointment or airport run. A safe clean often takes longer than expected because every part must dry completely.
Step 1: Read the Manual First
#Before removing the cover, unthreading anything or wiping parts, read the manual. Look for instructions for the cover, harness straps, buckle, chest clip, shell, foam inserts, infant support and dryer rules.
If you no longer have the paper manual, check the manufacturer’s website using the model name and model number. The model label is usually on the side, back or bottom of the seat.
NHTSA recommends following manufacturer instructions and registering car seats so families can receive recall notices. That matters because cleaning, replacement parts and recall guidance are model-specific.
Step 2: Take Photos Before Removing Parts
#Before taking the seat apart, photograph:
- Harness routing from the front and back
- Buckle position
- Chest clip position
- Cover hooks, loops, snaps and tabs
- Infant insert placement
- Any labels or adjustment paths you may forget
A clean car seat is only safe if it goes back together correctly. Photos help you reassemble without guessing.
Step 3: Vacuum Crumbs and Loose Dirt
#Start with dry mess. Vacuum under the cover, around the buckle slot, cup holders, harness slots, plastic edges and recline areas.
If your manual allows it, gently tip the seat to shake loose crumbs. Do not use knives, pins or sharp tools to dig into tight areas. For plastic crevices, use a soft cloth or soft toothbrush. Do not brush the harness webbing.
Step 4: Wash the Car Seat Cover Only as Approved
#Remove the cover only as the manual explains. Do not force elastic loops, tabs or hooks. If something feels stuck, stop and recheck the instructions.
Depending on the model, the manual may allow hand-washing, gentle machine washing, cold or lukewarm water, or air-drying only.
Avoid bleach, fabric softener, strong stain removers, heavy-duty wash cycles, unapproved hot water and high-heat drying. A faint stain is better than a shrunken or damaged cover.
Do not reinstall the cover while damp. Damp fabric can trap moisture against the shell and padding.
Step 5: Clean Car Seat Straps Safely
#Parents often ask: Can you wash car seat straps? Usually, no. Harness straps are safety webbing. Machine washing, soaking, heat, bleach, steam and harsh cleaners can affect fibers or protective treatments even if the straps look fine afterward.
To clean car seat straps:
- Mix a small amount of mild soap with water.
- Dip a soft cloth into the mixture.
- Wring it out well so it is damp, not dripping.
- Gently wipe the dirty area.
- Wipe again with a clean damp cloth to remove soap residue.
- Let the straps air-dry completely.
Graco’s public harness cleaning guidance uses the same general idea: damp cloth, mild soap and air-drying. If straps still smell or look deeply contaminated after gentle cleaning, contact the manufacturer instead of using stronger cleaners.
Step 6: Clean the Baby Car Seat Buckle
#A sticky buckle can become a safety problem if it does not latch properly. Check whether your manual allows buckle removal.
If removal is allowed:
- Remove it exactly as directed.
- Hold it upside down to release loose crumbs.
- Swish it in warm water if the manual allows.
- Press the release button several times while cleaning.
- Shake out extra water.
- Air-dry fully.
- Test for a clear click and proper release.
Do not put soap, oil, WD-40, sanitizer, perfume, disinfectant spray or lubricant into the buckle unless the manufacturer specifically approves it.
Step 7: Wipe the Plastic Shell
#With the cover off, wipe the shell with mild soap and water. Clean cup holders, belt paths, harness slots, buckle slots, recline areas and crumb-catching edges. Wipe again with clean water to remove residue.
Do not hose down the whole seat or pressure-wash it. Water can get trapped inside hidden areas and create odor, rust or moisture problems.
Step 8: Air-Dry Everything Fully
#The cover, straps, buckle, shell and padding must be fully dry before reassembly. Do not use a hair dryer, heater, heat gun, iron, open flame or high-heat dryer.
If you need to travel before the seat is dry, use another correctly installed car seat instead of reassembling a damp one.
India-Aware Drying Tips: Heat, Dust and Monsoon
#In Indian homes, drying can be the hardest part.
During monsoon or high humidity:
- Dry the cover indoors under a fast ceiling fan.
- Use cross-ventilation or an AC room when possible.
- Spread parts out instead of folding them.
- Turn thick seams and padded sections so they dry evenly.
- Avoid dark balconies, closed bathrooms and cupboards.
During peak summer:
- Use bright shade for fabric.
- Keep the plastic shell shaded and ventilated.
- Avoid hot terrace floors, car bonnets and metal railings.
- Bring parts inside once dry.
In dusty areas, dry covers indoors so damp fabric does not collect balcony or construction dust.
Reassemble and Check Before the Next Ride
#Use your photos and manual to put everything back together. Check that the cover sits flat, straps are not twisted, the buckle is in the correct slot, the chest clip is secure, harness tightening feels smooth, the buckle clicks clearly, foam is not missing and safety labels are still readable.
After reinstalling the seat in the car, check the installation again. Cleaning often means the seat was moved, loosened or fully removed.
When to Replace Parts or Call the Manufacturer
#Contact the manufacturer or an authorized support contact if:
- Harness straps are frayed, cut, stiff, torn or badly worn
- Straps were accidentally soaked, bleached, machine-washed or heat-dried
- The buckle sticks, fails to click or releases unpredictably
- The chest clip is cracked or loose
- Foam padding is broken, crumbling or moldy
- The cover has shrunk and no longer fits correctly
- Safety labels are unreadable
- Mold has spread into straps, foam or hard-to-clean areas
- You are unsure how to reassemble the seat
Do not buy random replacement straps, buckles, covers or padding from marketplaces unless the manufacturer confirms the part matches your exact model.
Simple Maintenance Routine
#You do not need a deep clean every week. Instead:
- Remove crumbs after messy rides.
- Wipe spills quickly with a damp cloth.
- Let damp spots air-dry.
- Check the buckle area for food bits.
- Vacuum weekly or as needed.
- Spot-clean straps gently.
- Do a full manual-based clean after vomit, urine, stool, milk buildup or heavy dirt.
Small, regular cleaning is safer than rare, aggressive cleaning.
Related AllBlogs Reads
#If you are reviewing your baby travel setup, these existing AllBlogs guides pair well with this article:
- Car Seat Buying Checklist for New Parents
- Infant Car Seat vs Convertible Car Seat: What Should New Parents Buy First?
- Baby Car Seat Heat Checklist: Sunshades, Fans and Safe Cooling
- Baby Gear Recall Checklist: What New Parents Should Check Before Buying