The Core Distinction: How Salting Techniques Change Meat Structure
#For decades, domestic cooking advice regarding holiday roasts and Sunday poultry was dominated by the wet brine. Enthusiastic cooks were instructed to purchase massive food-safe plastic buckets, mix gallons of lukewarm water with cups of salt and sugar, submerge a fifteen-pound turkey, and wrestle the sloshing container into an already crowded refrigerator. When carved, the meat released copious liquid, leading many to believe the technique was an unassailable triumph of home economics.
Modern culinary food science has revealed that this celebratory juiciness was largely an optical illusion. Submerging raw protein in a bath of saltwater forces water into the meat through capillary suction and cellular swelling. However, that absorbed liquid is entirely unflavored tap water. It dilutes the natural savory profile of the protein, turns poultry skin into a waterlogged, rubbery sheet, and requires extensive clean-up that introduces substantial foodborne cross-contamination risks across the kitchen.
Dry brining, occasionally referred to by food scientists as pre-salting or curing, replaces the saltwater bath with a measured application of dry salt followed by an extended, uncovered rest in the refrigerator. Rather than introducing external water, dry brining works in partnership with the meat's own natural juices. Over several hours, salt draws native moisture to the surface, dissolves into a concentrated saline syrup, and diffuses back into the interior muscle fibers. Once inside, the salt chemically alters the protein architecture, locking moisture in place while the circulating refrigerator air dries the exterior skin into a translucent, paper-thin sheet primed for explosive Maillard browning.
Understanding the biochemical mechanics of dry brining transforms how home cooks approach every cut of meat, from weeknight chicken thighs and thick-cut ribeyes to whole holiday turkeys. By examining how muscle cells interact with sodium ions, how moisture moves across cellular membranes, and how heat drives moisture loss during roasting, cooks can discard cumbersome brine buckets forever.
The Biophysics of Meat: Muscle Fibers, Water Retention, and Protein Coils
#To grasp why salting ahead works, one must first examine the physical anatomy of muscle tissue. Raw lean meat is not a solid block of protein; it is composed of approximately 75 percent water, 20 percent protein, 3 percent lipid fats, and roughly 2 percent minerals and carbohydrates. The overwhelming majority of that water is held within the muscle cells themselves, suspended in the narrow spaces between muscle filaments.
At the microscopic level, muscle tissue is organized in hierarchical bundles. Long, cylindrical muscle cells called muscle fibers are bound together by thin sheets of connective tissue. Inside each individual muscle fiber reside thousands of myofibrils—parallel, thread-like structures made of two primary contracting proteins: actin and myosin. In living muscle, actin and myosin slide past one another to generate movement. In culinary science, these two proteins dictate whether a roasted breast or seared steak feels luscious or chalky.
Under natural conditions, water is held within the myofibrillar matrix by capillary forces and electrostatic attraction between the polar water molecules and charged amino acid chains. However, this resting equilibrium is exceptionally fragile:
- Heating triggers involuntary protein contraction: As raw meat is exposed to heat in an oven, pan, or smoker, its internal temperature rises. When the core passes 120 degrees Fahrenheit (49 degrees Celsius), myosin begins to unfold and denature.
- Longitudinal and transverse contraction squeezes cellular channels: Between 140 degrees Fahrenheit and 165 degrees Fahrenheit (60 degrees Celsius to 74 degrees Celsius), the denatured protein filaments coagulate and shorten aggressively. They pull tightly together both lengthwise and crosswise.
- Moisture is forcibly expelled as cooking purge: This muscular contraction acts exactly like a hand wringing out a wet bath sponge. The shrinking protein matrix physically squeezes water out of the cells. The expelled moisture pools in the roasting pan as pan juices or evaporates into the dry air of the oven.
- Unseasoned poultry experiences massive moisture deficit: A standard, unbrined chicken breast or turkey roast cooked to a safe internal temperature of 165 degrees Fahrenheit routinely loses between 20 percent and 25 percent of its total starting weight in squeezed-out water.
Preventing this catastrophic loss of native moisture requires chemically altering the protein filaments before heat is applied. This is where sodium chloride performs its culinary miracle.
Stage 1 vs Stage 2: The Osmotic Timeline on the Wire Rack
#When dry salt is sprinkled onto the surface of cold raw meat, it initiates a predictable, two-phase biochemical sequence driven by fundamental laws of solution physics: osmosis followed by passive diffusion. Understanding this timeline prevents cooks from aborting the process prematurely.
Stage 1: Osmosis and Surface Moisture Extraction (0 to 30 Minutes)
#Immediately after application, dry salt crystals sit on the exterior of the meat. Meat surfaces naturally carry a microscopic film of free moisture released by cut muscle cells. The salt crystals begin to dissolve in this tiny moisture layer, creating an exterior solution with an extraordinarily high solute concentration.
This creates a severe osmotic gradient across the semipermeable cell membranes of the exterior muscle tissue. By the laws of osmosis, water always flows across a membrane from an area of low solute concentration (inside the meat cells, where natural salinity is roughly 0.9 percent) toward an area of high solute concentration (the surface, where dissolving salt crystals approach saturation). 
Within 10 to 15 minutes, tiny droplets of water bead up across the exterior of the meat. The surface appears noticeably wet, slick, and glossy. An inexperienced cook seeing this puddle of liquid often assumes the salt is dehydrating the cut and rushes to blot the moisture away with paper towels. Doing so removes the salt before it has completed its work, permanently interrupting the cycle.
Stage 2: Complete Dissolution and Passive Inward Diffusion (30 Minutes to 48 Hours)
#As more cellular water is drawn outward, the liquid volume becomes sufficient to completely dissolve every granular salt crystal on the surface. The beads of water transform into a concentrated, viscous natural brine syrup made entirely of the meat's own moisture and sodium chloride.
At this juncture, the driving physical force shifts from osmosis to passive diffusion. In a liquid solution, dissolved solute molecules naturally migrate from regions of high concentration toward regions of lower concentration until uniform equilibrium is established. Because the interior of the muscle contains far less salt than the concentrated surface syrup, the sodium (Na+) and chloride (Cl-) ions begin their journey downward into the interior muscle fibers.
Simultaneously, the high salt concentration in that surface syrup begins to break down surface proteins, drawing the liquid back into the cells alongside the traveling ions. By the 45-minute mark, the visible beads of surface water have vanished. The meat surface looks dry once again, but the salt is now moving steadily through the deep interior of the meat, traveling inward at an average rate of roughly 1.5 millimeters to 2.5 millimeters per hour depending on fiber orientation and temperature.
| Phase Interval | Visual Surface Appearance | Dominant Physical Mechanism | Molecular Ion Position | Textural Impact on Meat |
|---|---|---|---|---|
| 0 to 15 Minutes | Dry crystals resting on raw meat | Initial crystal hydration | Concentrated on exterior surface | Zero internal change |
| 15 to 35 Minutes | Beads of water pooling across surface | Osmotic moisture extraction | Saturated in surface droplet solution | Temporary surface fluid loss |
| 35 to 60 Minutes | Wet sheen reabsorbed, surface looks matte | Transition from osmosis to diffusion | Penetrating outer 1 to 2 millimeters | Surface protein denaturation starts |
| 2 to 8 Hours | Taut skin, dry touch, slight color darkening | Passive capillary diffusion | Dispersed through outer 5 to 10 millimeters | Myosin dissolution underway |
| 12 to 24 Hours | Translucent skin, parchment texture, deep red beef | Deep equilibrium migration | Uniformly dispersed through core of cut | Maximum water-holding capacity achieved |
| 24 to 48 Hours | Hardened dry pellicle, glossy translucent poultry | Continuous surface evaporation | Complete cellular equilibrium across dense roasts | Prime browning readiness and moisture retention |
The Chemistry of Myosin Denaturation: Expanding Water-Holding Capacity
#Once sodium and chloride ions diffuse into the muscle fibers, they fundamentally remodel the cell's internal architecture through a process known as protein solubilization or partial denaturation.
Myosin, the thick structural filament responsible for contracting muscle, is sensitive to ionic strength. In its native state, myosin molecules are held tightly together in rigid filaments by electrostatic bonds between positively and negatively charged amino acid side chains. When sodium chloride diffuses into the cell at concentrations above 0.5 percent by weight, the ions dissociate into free sodium cations (Na+) and chloride anions (Cl-):
- Chloride ions selectively bind to positive charges: Negatively charged chloride ions exhibit a strong affinity for the basic amino acid residues along the myosin backbone. As chloride ions bind to these sites, they neutralize positive charges and dramatically increase the net negative electrical charge of the entire protein filament.
- Electrostatic repulsion forces filaments apart: Because identical electrical charges repel one another, adjacent myosin filaments push apart. The tightly packed myofibrillar bundle expands transversely.
- Partial protein dissolution creates a gel matrix: As the filaments separate, parts of the myosin molecules dissolve into the surrounding fluid, transforming the normally rigid cellular scaffold into a loose, sponge-like protein gel network.
- Capillary channels widen to trap intracellular water: The physical spaces between the filaments widen significantly. When cooking heat is later applied, this loosened, gelled protein matrix is physically incapable of contracting into the tight, rope-like knots that normally squeeze out juice. Instead, the denatured proteins trap water molecules within their porous matrix, holding them fast even as the core temperature surpasses standard doneness thresholds.
In rigorous culinary testing, meat seasoned with a measured dry brine retains approximately 30 percent to 40 percent more of its native moisture after roasting than untreated meat. Every drop of juice retained in the finished dish is original, concentrated meat juice containing dissolved glutamates, peptides, and natural fats, delivering an intense savory flavor that cannot be replicated by any external marinade.
The Wet Brining Illusion: Why Added Water Dilutes Real Flavor
#To understand why professional culinary institutions have largely retired wet brines for whole poultry and premium roasts, one must examine the deceptive physics of soaking meat in a bucket of water.
A traditional wet brine consists of a 5 percent to 8 percent salt solution by weight (roughly one cup of table salt per gallon of water), frequently supplemented with sugar, peppercorns, bay leaves, and citrus peels. When raw poultry is submerged in this liquid for 12 to 24 hours, the meat absorbs substantial volume, gaining between 6 percent and 10 percent of its initial raw weight in liquid.
Proponents of wet brining point to this weight gain as undeniable proof of superior juiciness. However, rigorous chemical analysis reveals several severe culinary drawbacks:
- The added moisture is unflavored tap water: The six to ten percent weight gain is not chicken broth or beef essence; it is pure tap water. When bitten into, a roasted wet-brined chicken releases a flood of liquid that tastes diluted and watery, washing away the nuanced roasted notes of the meat and fat.
- The texture becomes spongy and ham-like: Over-saturation with water causes the muscle cells to swell unnaturally. The finished meat loses its distinct grain, taking on an elastic, rubbery texture reminiscent of low-grade commercial deli meat.
- Aromatic molecules cannot penetrate muscle: Home cooks frequently add expensive spices, herbs, and garlic to wet brines, hoping to infuse deep flavor. However, aromatic flavor molecules—such as limonene from citrus, eugenol from cloves, and caryophyllene from black pepper—are large, fat-soluble organic compounds. They are chemically incapable of penetrating the tightly bound, water-based muscle fibers of raw meat. They remain stuck exclusively on the outer millimeter, wasting expensive ingredients.
- Skin becomes thoroughly waterlogged: When a whole bird is submerged in gallons of water, the subcutaneous tissues and skin absorb massive amounts of fluid. This waterlogging represents an insurmountable barrier to achieving crisp skin during cooking.
The Physics of Crisp Skin: Pellicle Formation and the Maillard Hurdle
#The single greatest culinary advantage of dry brining whole poultry, duck, or pork loin with the rind attached is the creation of shatteringly crisp skin. Achieving crisp skin is not a matter of high heat alone; it is a battle against the fundamental thermodynamics of water vaporization.
The Thermal Barrier of Water Evaporation
#Crisp poultry skin is created when three distinct physical processes occur simultaneously under high heat: the collagen in the dermis melts into tender gelatin, the subcutaneous fat renders out of the tissue, and the remaining skin protein dehydrates until it forms a rigid, glassy, brittle matrix. For rapid browning and flavor development, the surface must undergo the Maillard reaction—a complex chemical cascade between amino acids and reducing sugars.
The Maillard reaction requires surface temperatures of at least 280 degrees Fahrenheit (138 degrees Celsius) to initiate rapidly, and reaches its peak between 300 degrees Fahrenheit and 350 degrees Fahrenheit (149 degrees Celsius to 177 degrees Celsius). 
Here lies the insurmountable problem with wet skin: under standard atmospheric pressure, liquid water cannot be heated past its boiling point of 212 degrees Fahrenheit (100 degrees Celsius). As long as free liquid water is present on the surface of meat or poultry skin, every single calorie of thermal energy transmitted by the oven is consumed by the latent heat of vaporization—the massive 2,260 Joules per gram required to convert liquid water into steam. 
On wet-brined poultry, the oven spends the first 45 minutes simply boiling water off the skin. The skin remains pinned at 212 degrees Fahrenheit, steaming and turning flaccid and rubbery. By the time the surface moisture finally boils away and the skin temperature rises high enough to trigger Maillard browning, the delicate breast meat underneath has spent far too long in the oven, rendering it overcooked, chalky, and dry.
The Pellicle: Refrigerator Air as a Dehydrator
#Dry brining overcomes this thermodynamic trap by utilizing the domestic refrigerator as a convective drying chamber. Modern frost-free refrigerators work by continually running refrigeration coils that condense ambient moisture from the air and drain it outside the cabinet, maintaining an internal relative humidity of roughly 40 percent to 50 percent.
When salted poultry or pork is placed on an elevated wire rack completely uncovered in the refrigerator for 12 to 24 hours:
- Ambient airflow steadily wicks away surface moisture: The moving, low-humidity air evaporates free water from the epidermis.
- The outer skin layer forms a dry pellicle: The surface proteins and lipids concentrate into a taut, dry, paper-thin membrane known in charcuterie as a pellicle. The skin becomes translucent, tightly hugging the contours of the meat.
- Immediate Maillard browning in the oven: Because there is virtually zero surface water to boil off, the skin hits 300 degrees Fahrenheit within minutes of entering a preheated oven. Subcutaneous fat immediately begins rendering, frying the paper-thin skin in its own natural fat like a potato chip, yielding crisp, golden skin while the interior meat remains juicy.
| Culinary Metric | Dry Brining | Wet Brining | Scientific Mechanism |
|---|---|---|---|
| Total Weight Change Pre-Cook | 0 to negative 2 percent net moisture loss | Positive 6 to 10 percent water gain | Surface evaporation vs osmotic fluid absorption |
| Cooking Moisture Retention | Retains 75 to 80 percent native juice | Loses 25 to 30 percent total weight | Denatured myosin gel traps intracellular water |
| Finished Meat Flavor Profile | Highly concentrated, rich natural savory | Diluted, mild, noticeably watery | Retention of native glutamates vs tap water uptake |
| Exterior Skin Crispness | Brittle, shattered, paper-thin crunch | Tough, chewy, flaccid, or rubbery | Complete pre-cook dehydration vs waterlogged dermis |
| Browning Reaction Speed | Instant Maillard browning within 10 minutes | Delayed 30 to 45 minutes until steam clears | Absence of 212F boiling plateau barrier |
| Refrigerator Storage Impact | Requires single rimmed sheet pan on rack | Demands 5-gallon food bucket or deep tub | Compact vertical footprint vs massive liquid volume |
| Cross-Contamination Risk | Zero liquid splashing, contained pan | Extreme hazard carrying and dumping raw brine | Static dry resting vs airborne pathogen aerosolization |
Salt Math and Equipment: Weighing, Percentages, and Granule Geometry
#Precision is the hallmark of successful food science. While traditional wet brines allowed for sloppy volume measurements because only a fraction of the salt was absorbed, dry brining is an equilibrium method: every grain of salt applied to the meat will be consumed. Measuring salt by volume using spoons is the single most common cause of dry brining failures.
The Peril of Volume Measurements and Salt Geometry
#Different brands and varieties of culinary salt have vastly different physical structures, crystal geometries, and packing densities. A tablespoon of one brand can contain more than double the sodium of a tablespoon of another:
- Table Salt: Produced through vacuum evaporation, creating dense, perfectly cubic crystals that pack tightly together with minimal air space. One level tablespoon weighs approximately 18 grams.
- Morton Coarse Kosher Salt: Manufactured by rolling cubic crystals under high-pressure steel rollers, creating dense, flat flakes. One level tablespoon weighs approximately 14 grams.
- Diamond Crystal Kosher Salt: Formed using an open-pan Alberger evaporation process, yielding hollow, microscopic pyramid-shaped crystals. These delicate pyramids do not pack tightly, creating massive pockets of air. One level tablespoon weighs approximately 10 grams.
If a recipe instructs a cook to apply "two tablespoons of kosher salt" to a four-pound chicken, a cook using Morton salt will apply 28 grams of salt, while a cook using Diamond Crystal will apply only 20 grams. If that cook substitutes table salt, they will deposit 36 grams of salt—an oversalted disaster that will render the meat unpalatable.
Volume vs Weight Disparity for One Level Tablespoon (15 ml):
Table Salt:            18 grams (100% density baseline)
Morton Kosher Salt:    14 grams (78% of table salt density)
Diamond Crystal:       10 grams (56% of table salt density)
The Universal Equilibrium Salting Ratio
#To achieve foolproof results across any cut of meat, cooks must discard measuring spoons and use a digital kitchen scale measuring in grams. 
The scientifically proven target for dry brining is 1.0 percent to 1.5 percent salt by weight of the meat:
- For Poultry (Chicken, Turkey, Duck): 1.0 percent to 1.2 percent by weight (10 to 12 grams of salt per 1,000 grams of whole bird). This accounts for the weight of non-absorbent bones and delivers a perfectly seasoned bite without overwhelming the delicate meat.
- For Red Meats (Beef Steaks, Pork Chops, Lamb Roasts): 1.2 percent to 1.5 percent by weight (12 to 15 grams of salt per 1,000 grams of meat). Dense red muscle tissues contain higher myoglobin and fat levels that benefit from slightly higher ionic concentrations.
| Salt Variety | Crystal Structure | Weight per Level Tablespoon | Relative Density Ratio | Ideal Culinary Application |
|---|---|---|---|---|
| Table Salt | Dense cubic crystals | 18 grams | 1.00 baseline | Baking and boiling pasta water only |
| Fine Sea Salt | Small granular crystals | 17 grams | 0.94 of baseline | Table shakers and measured doughs |
| Morton Kosher Salt | Flat rolled dense flakes | 14 grams | 0.78 of baseline | Dry curing roasts when weighed by grams |
| Diamond Crystal Kosher | Hollow porous pyramids | 10 grams | 0.56 of baseline | Ideal dry brining salt, clings to meat without slipping |
| Maldon Flaky Sea Salt | Large pyramidal finishing flakes | 7 grams | 0.39 of baseline | Post-carving finishing garnish only |
Protein-by-Protein Dry Brining Schedules
#The time required for dry brining depends strictly on the physical thickness of the cut, the presence of bone and skin, and the density of the muscle fibers. Sodium and chloride ions travel inward slowly. Rushing the process results in oversalted exteriors and unseasoned centers, while resting too long can degrade surface texture.
Poultry: Spatchcocking, Chickens, and Large Turkeys
#Whole birds present a distinct geometric challenge: the thickest parts of the breast and thighs are several inches deep, while the wings are paper-thin. 
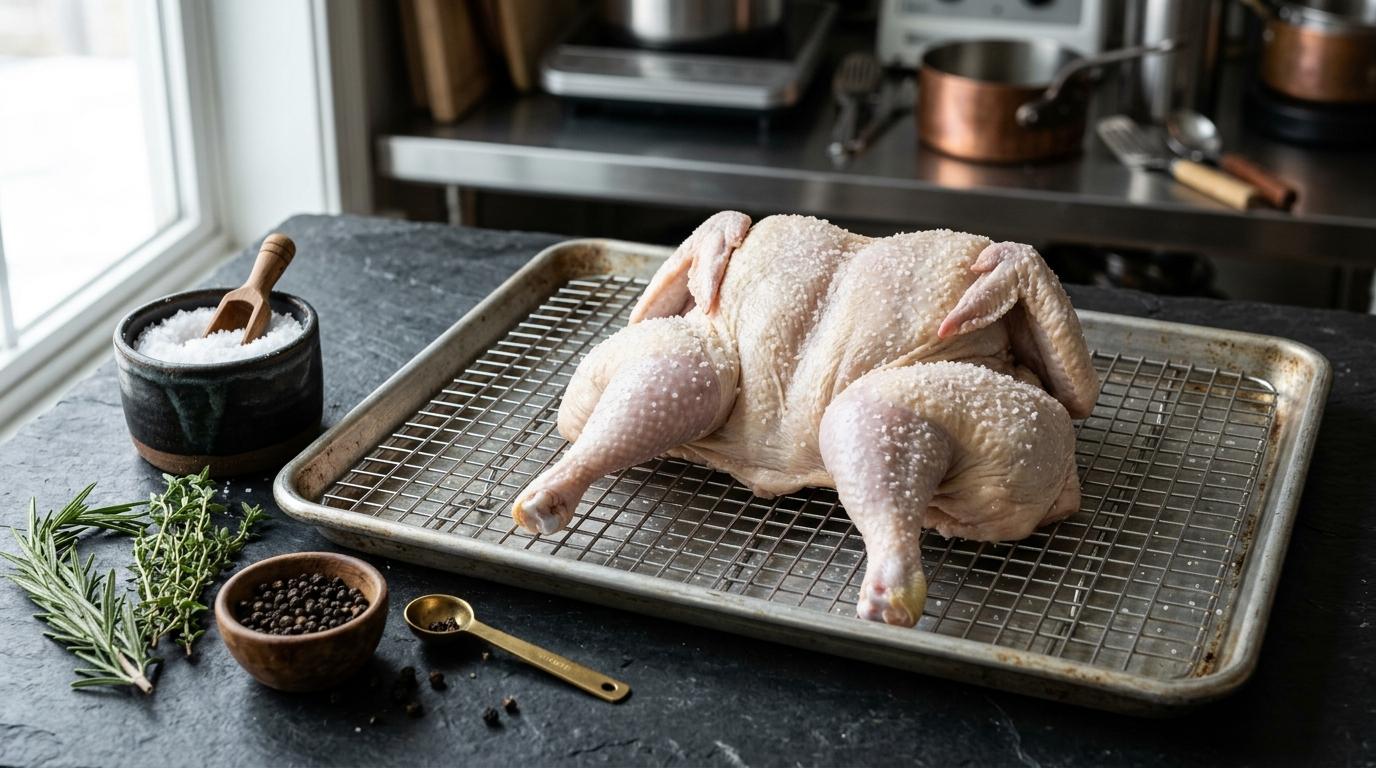
- Whole Chickens (3 to 5 pounds): Rest for 12 to 24 hours. For maximum efficiency, spatchcock the chicken by cutting out the backbone with kitchen shears and flattening the breastbone. Spatchcocking lays the bird completely flat, ensuring that every square inch of skin faces upward toward the circulating air of the refrigerator while exposing both sides of the meat to even salt diffusion.
- Bone-In Chicken Parts (Breasts, Thighs, Quarters): Rest for 6 to 12 hours. Smaller cuts reach salt equilibrium much faster than whole birds. A single afternoon uncovered in the refrigerator is sufficient to dry the skin and denature the surface proteins.
- Whole Holiday Turkeys (12 to 20 pounds): Rest for 24 to 48 hours. Due to the massive muscle mass of turkey breasts, a full 24 hours is required for the salt to diffuse into the deepest layers near the bone. If crisp skin is desired, leave the turkey uncovered for the final 24 hours of that window.
Red Meats: Steaks, Chops, and Large Roasts
#Unlike poultry, steaks and pork chops do not have skin, meaning the primary goals are internal moisture retention and surface browning for a deep, crusty sear.
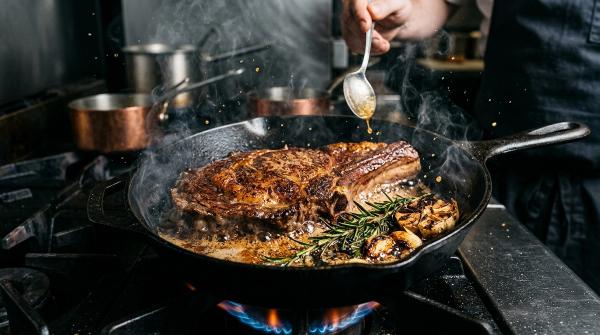
- Thick-Cut Steaks (1.5 to 2.5 inches thick): Rest for 12 to 24 hours on an elevated wire rack. The surface will turn a deep, dark ruby red as the surface proteins dehydrate and concentrate. When placed in a scorching cast-iron skillet, this pre-dried surface achieves a dark mahogany crust in under two minutes per side without developing an overcooked gray band beneath the crust.
- Thin Steaks (Under 1 inch thick): Salt 45 to 60 minutes before cooking, or salt immediately before searing. Because thin steaks cook through in minutes, long dry brining is unnecessary; 45 minutes allows the initial osmotic beads to reabsorb, preventing the steak from boiling in its own juices during searing.
- Bone-In Pork Chops and Pork Loin Roasts: Rest for 8 to 24 hours. Modern commercial pork is exceptionally lean and prone to drying out; dry brining provides an essential protective buffer against overcooking.
| Protein Cut | Typical Thickness | Target Salt Ratio by Weight | Minimum Effective Window | Maximum Recommended Window | Expected Textural and Visual Result |
|---|---|---|---|---|---|
| Whole Spatchcocked Chicken | 2.0 to 3.0 inches flat | 1.0 to 1.2 percent | 8 Hours | 24 Hours | Shatteringly crisp golden skin, fully seasoned breast meat |
| Bone-In Chicken Thighs | 1.0 to 1.5 inches | 1.1 to 1.3 percent | 4 Hours | 12 Hours | Blistered crisp skin, zero rubbery subcutaneous fat |
| Whole Turkey (14 to 18 lbs) | 4.0 to 6.0 inches deep | 1.0 to 1.2 percent | 24 Hours | 48 Hours | Deep seasoning to the bone, parchment skin, tender breast meat |
| Thick-Cut Ribeye or Strip Steak | 1.5 to 2.0 inches | 1.2 to 1.5 percent | 6 Hours | 24 Hours | Deep mahogany sear, thin gray band, rich beefy concentration |
| Pork Loin Roast | 3.0 to 4.5 inches | 1.2 to 1.4 percent | 12 Hours | 36 Hours | Tender, juicy white meat, prevents stringy chewiness |
| Skin-On Salmon Fillet | 1.0 to 1.5 inches | 0.8 to 1.0 percent | 20 Minutes | 45 Minutes | Firm flesh, prevents white albumin curd from squeezing out |
Food Safety and Refrigerator Setup
#Leaving raw meat completely uncovered in a domestic refrigerator frequently triggers anxiety regarding foodborne pathogens. However, when executed following basic microbiological principles, dry brining is extraordinarily safe and far more hygienic than wrestling with gallons of contaminated wet brine.
Preventing Cross-Contamination: The Sheet Pan and Wire Rack System
#Raw poultry frequently carries pathogenic bacteria such as Salmonella and Campylobacter. In a wet brine setup, lifting a drippy, sixteen-pound bird out of a bucket splashes microscopic aerosolized water droplets across countertops, cutting boards, dish drying racks, and kitchen sinks.
Dry brining eliminates liquid splashes entirely, provided you use the proper physical containment:
- Always use a rimmed baking sheet: Never place meat directly on a refrigerator wire shelf or on a flat plate. Use a heavy-duty, rimmed aluminum half-sheet pan capable of holding any accidental drips.
- Fit with an elevated stainless steel wire rack: The meat must sit on a wire cooling rack nested securely inside the baking pan. This elevates the cut roughly half an inch off the metal surface, allowing dry air to circulate underneath the bottom of the meat. If meat sits directly on the flat pan, it will pool in expelled moisture and turn soggy.
- Claim the lowest refrigerator shelf: Position the sheet pan on the bottommost shelf of the refrigerator. This ensures that even in the unlikely event of an accidental spill or bump, raw juices cannot drip onto ready-to-eat foods, dairy, or fresh produce stored below.
- Ensure clear convective airflow: Do not pack food tightly around or on top of the sheet pan. The refrigerator relies on internal fans to circulate cold, dry air across the surface of the meat. Leave at least three inches of clear airspace above and around the pan.
Temperature Control and Bacterial Suppression
#Bacterial pathogens thrive in the danger zone between 40 degrees Fahrenheit and 140 degrees Fahrenheit (4.4 degrees Celsius to 60 degrees Celsius). A properly maintained home refrigerator must be calibrated between 34 degrees Fahrenheit and 38 degrees Fahrenheit (1.1 degrees Celsius to 3.3 degrees Celsius).
At these cold temperatures, pathogenic bacteria cannot reproduce rapidly. Furthermore, the high concentration of salt on the exterior surface creates an environment hostile to bacterial proliferation. While the skin dries, the high surface salinity acts as a natural bacteriostatic barrier.
Finally, under no circumstances should raw meat be washed in the sink prior to dry brining. Washing raw poultry does not remove bacteria; the force of the faucet water aerosolizes pathogens across a three-foot radius in all directions. Remove the meat from its packaging, pat it thoroughly dry with clean paper towels, place it directly on the wire rack, and wash your hands.
Step-by-Step Execution: The Four Golden Rules
#Executing a scientifically perfect dry brine requires zero specialized culinary skill, only adherence to four methodical steps:
- Weigh the protein accurately: Place your raw meat on a digital kitchen scale and note the exact weight in grams. Multiply that weight by 0.011 (for an average 1.1 percent salinity target). Weigh out that exact quantity of kosher salt into a small ramekin.
- Season evenly across all dimensions: Use your fingers to sprinkle the salt from a height of eight to ten inches above the meat. Dropping salt from an elevation creates a wide, even dispersion rather than dense clumps. For poultry, gently separate the skin from the breast meat with your fingers and work roughly one-third of the salt directly onto the raw meat beneath the skin, rubbing the remaining salt across the exterior skin and inside the cavity.
- Elevate on a wire rack and chill uncovered: Transfer the seasoned meat to an elevated wire cooling rack set inside a rimmed baking sheet. Transfer immediately to the bottom shelf of a refrigerator running below 38 degrees Fahrenheit. Leave the meat completely uncovered for the scheduled duration based on its thickness.
- Cook directly from the rack without rinsing or wiping: When the resting window concludes, remove the pan from the refrigerator. Do not rinse the meat with water, and do not wipe the surface with towels. The salt is already inside the muscle fibers, and the skin is perfectly dry. Transfer the meat directly to your preheated roasting pan, oven, grill, or smoker, and cook until it reaches the desired internal temperature measured with an instant-read digital thermometer.