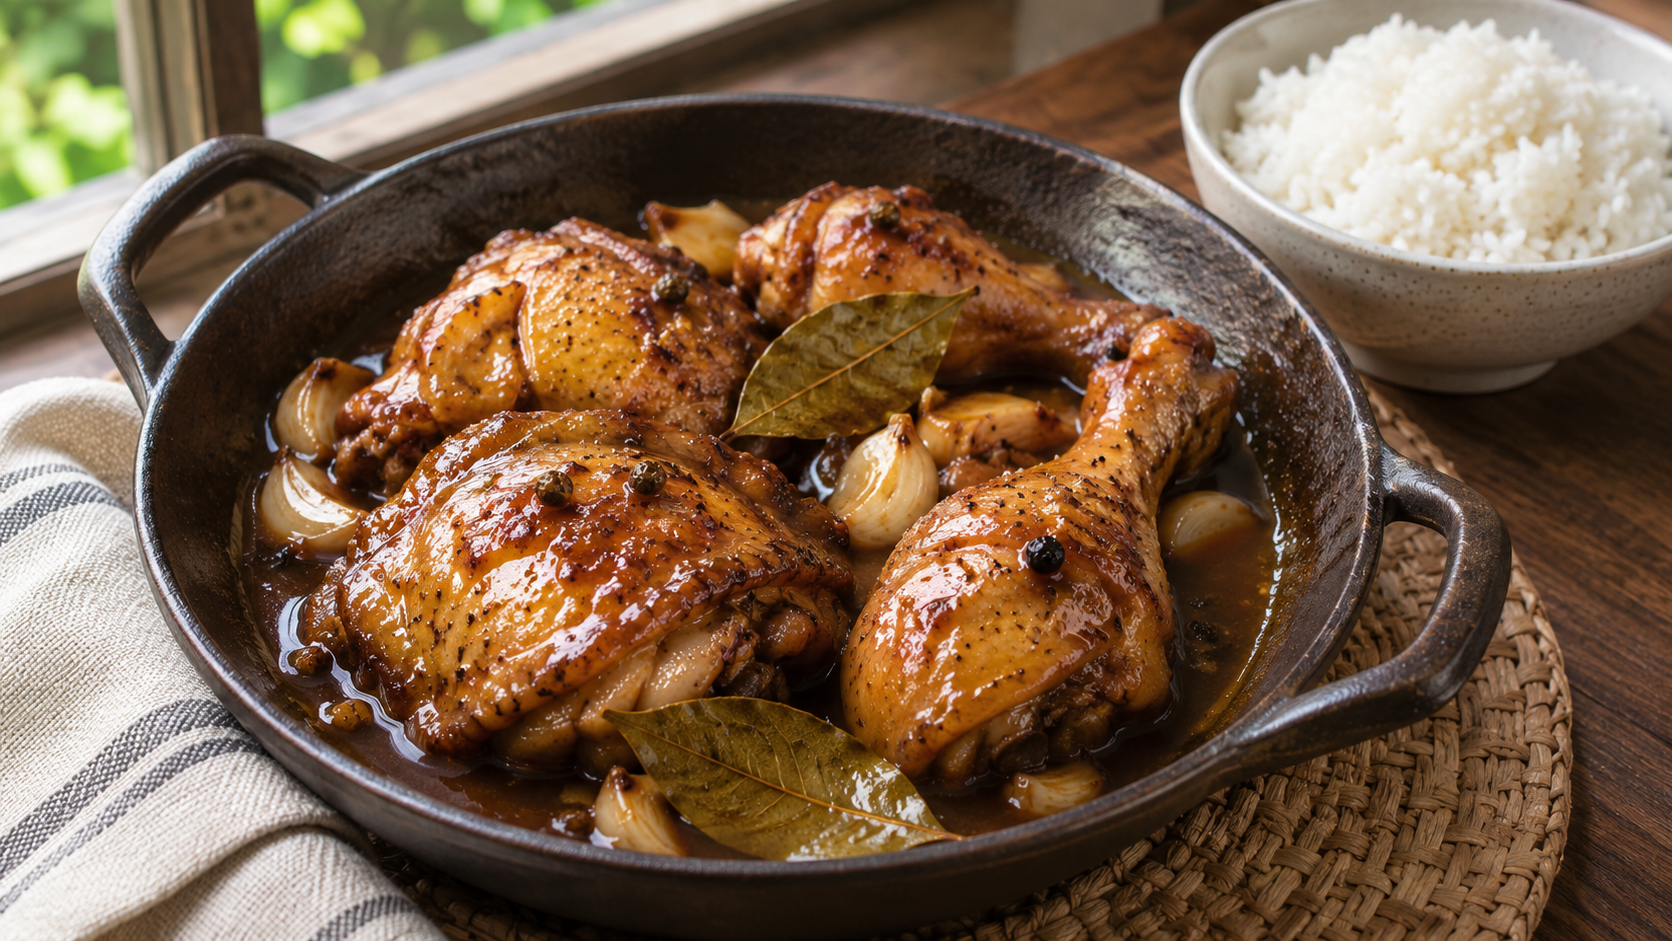
Brown the marinated chicken, simmer it gently, then reduce the soy-and-vinegar sauce until it suits the rice you're serving. For this Filipino chicken adobo, check the thickest part of the chicken with a thermometer: it needs to reach 74°C or 165°F.
I'd decide how much sauce I want before taking the lid off for the last stage. If dinner is chicken over a generous bowl of rice, a little sauce to spoon across it is useful. If you want a more concentrated coating on the chicken, you can reduce further, checking the seasoning as you go.
The ingredients are familiar enough that it's tempting to stop measuring. That is where I'd slow down for the first batch. Soy sauces differ, vinegar differs, and the amount of liquid left in your pan changes what you taste at the end.
The recipe card after the FAQs adapts Vanjo Merano's soy-and-white-vinegar chicken adobo for four people. It uses garlic, bay leaves and whole peppercorns, with bone-in chicken suited to the braise. You can learn this version without pretending it is the only way Filipino cooks make adobo.
Choose a version before changing the ingredients
#Adobo describes a Filipino way of cooking with vinegar and seasonings, with many variations. Some versions include soy sauce; others use different combinations. Potatoes and coconut milk appear in other recipes, too.
For this meal, keep the soy-vinegar version together. Use its ingredient list and order of cooking before borrowing an addition from another recipe. A potato version needs enough time and liquid for the potatoes, while a coconut-milk version changes the sauce you are trying to make.
The same point applies to sweetness. This card uses a small amount of sugar near the end. It doesn't turn the dish into a sticky sweet glaze by default. If a source recipe uses much more sugar or a sweet drink, it is aiming for a different result.
I'd make one version first, then choose a change for the next meal. You can compare the result much more easily if you change the vinegar or try a potato version on another day.
Bone-in thighs and drumsticks give you a useful starting point
#The card works with chicken cut into serving pieces, and bone-in thighs and drumsticks suit its simmering method. Try to keep the pieces reasonably similar in size. A very small piece can finish before the largest one has cooked through.
Breast meat needs different attention and can dry out during a long braise. If that's what you have, choose a version written for breast rather than assuming the complete bone-in schedule will suit it. A thermometer still matters whichever cut you use.
Look at the chicken and the pan together before you start. You need to turn the pieces without tearing them apart or piling them on top of each other during browning. If they won't fit, plan batches instead of trying to force them into one crowded layer.
Put a separate clean plate or bowl aside for cooked food. The plate that held raw chicken, and any liquid left on it, shouldn't become your serving plate without washing. That is easier to arrange now than while the pan is hot.
Don't wash raw chicken. The US Centers for Disease Control and Prevention advises keeping raw chicken and its juices away from ready-to-eat food and using separate preparation surfaces. Wash your hands and clean utensils and worktops after handling it.
Read the soy sauce and vinegar labels
#Use a regular soy sauce that fits the recipe, rather than treating every dark bottle as equivalent. Sweet soy sauce, concentrated dark soy sauce and ordinary seasoning soy sauces can give very different colour, salt and sweetness.
The card specifies white vinegar. Cane vinegar is common in other Filipino adobo preparations, and other vinegars can taste different. Choose a food-grade vinegar and follow the amount for the version you're making. Don't replace the measured vinegar with the same amount of an unfamiliar strongly flavoured product and expect no change.
For anyone who needs to avoid wheat, check the soy sauce rather than guessing from the dish's appearance. A dark sauce can contain an allergen you can't see. The recipe as written isn't a blanket gluten-free promise.
Keep the bay leaves and peppercorns measured, too. Whole peppercorns remain part of the eating experience, so people should know they are in the sauce. Remove bay leaves before serving portions if that makes the meal easier to eat.
You don't need a stock cube for this version. Another recipe may include one, but adding it here also adds seasoning to a sauce that already contains soy sauce. Taste the finished sauce before looking for more salt.
Measure this batch before looking for a universal ratio
#The card uses four tablespoons of soy sauce and four and a half tablespoons of vinegar. Measure them into separate containers because they enter the pan at different stages. The sugar is one teaspoon, not one tablespoon; keeping the measuring spoons beside the ingredients helps avoid that easy mix-up.
I'd write those three quantities down before opening a second recipe. If you compare several versions while cooking, it is surprisingly easy to remember one person's vinegar amount and another person's soy sauce amount. Finish this measured batch first. Then decide whether its sauce, served with rice, is the starting point you want for your next meal.
Marinate in the fridge, then drain before browning
#Combine the chicken with the soy sauce and crushed garlic as the card directs. Cover and refrigerate it for the marinating period. Keep the container where raw juices cannot drip onto foods that are ready to eat.
When you're ready to cook, lift out the chicken and let excess marinade drain back into the bowl. Separate the garlic and keep the liquid for the cooked braise. Wet pieces dropped into the pan bring more liquid with them and make browning harder to control.
That reserved marinade has touched raw chicken. It belongs in the cooking stage, where the recipe brings it to a boil and simmers it. It is not an uncooked finishing sauce to pour over rice at the table.
I would keep it in one clearly separate bowl until it goes into the pan. If you have several little bowls of sauce and seasonings beside the stove, it is easy to forget which one needs cooking.
Use clean utensils for the final tasting and serving. Keeping the raw bowl, tongs and cooked serving dish apart is a small bit of organisation that prevents a lot of uncertainty later.
Give the chicken colour before the long simmer
#Heat the oil in a suitable heavy pan and brown the drained chicken in a comfortable layer. You are giving the surface some colour at this stage; the pieces still need the braise and the final temperature check.
If you work in batches, keep track of which pieces have had their turn. Turn them with tongs and avoid scraping softened skin across the base. Set the browned pieces aside while you finish the remaining batch.
Garlic needs attention when it goes into the hot pan. Stir it and watch for colour so it doesn't burn while you organise the chicken. Then return the chicken with the reserved marinade, water, bay leaves and peppercorns according to the card.
Bring the liquid to a boil before lowering it to a gentle simmer. With the lid on, cook until the chicken is tender and has reached its safe internal temperature. Check the thickest part of the largest pieces, avoiding direct contact with bone when you place the thermometer.
The clock gives you a starting point for checking. Piece size, pan shape and how strongly the liquid simmers can all affect the result. Soft-looking skin or a dark sauce doesn't tell you that the centre has reached the required temperature.
The vinegar joins later in this method. Let it boil for the short period in the card, then continue the uncovered finish. Other adobo recipes add vinegar earlier; follow their full sequence if you want to try that approach on another day.
Reduce the sauce to suit the meal
#Uncovered cooking lets you watch how much liquid remains. Stir or move the chicken with care, and check the bottom of the pan so a thickening sauce doesn't catch while you wait for another part of dinner.
If the chicken is cooked and tender but the sauce is still looser than you want, lift the chicken out while you work on the sauce. Put it on a clean dish and return it for serving once the sauce is ready. You can adjust the liquid without continuing to cook every piece through the whole reduction.
Before adding salt, cool a small spoonful enough to taste. Check it with a little plain rice as well as on its own. A concentrated sauce can feel stronger from the spoon than it does over a bowl of rice.
For a sauce that seems too salty, test a little water in a small sample first. If it helps, loosen the pan in small additions. Reducing it right back to the original volume would concentrate the seasoning again, so decide what consistency you can accept.
For a sharper taste than you wanted, let the planned cooking finish before changing ingredients. Then test a small sample with the recipe's finishing sugar. Don't keep adding sugar to the entire pan in the hope that it will erase too much salt or an ingredient you dislike.
| What needs attention | What to check | What you can change |
|---|---|---|
| Chicken has little colour | Was it wet or crowded during searing? | Drain well and use batches for the next cook. |
| Chicken is ready but sauce is thin | Is the uncovered reduction complete? | Lift out cooked pieces and work on the sauce separately. |
| Sauce tastes too salty | Soy sauce type and final liquid volume | Test dilution on a spoonful before changing the whole pan. |
| A large piece is under temperature | Thermometer reading away from the bone | Continue cooking and check again; sauce appearance isn't the test. |
Put rice into the dinner plan early
#Start your rice according to its own cooking instructions so it is ready near the end of the braise. Plain rice gives you a useful way to serve and taste the sauce without adding more strong seasoning.
Imagine four people eating together, with one person wanting less sauce. Put the chicken in a serving dish and offer some sauce separately. That lets each person decide how much to spoon over their rice without you changing the whole recipe.
A cooked vegetable can go alongside. Keep raw-chicken preparation away from any salad or other ready-to-eat side, and use clean utensils at the table. The side doesn't need to become another elaborate dish while you're learning the braise.
If you want to make adobo ahead, cook it fully, cool it promptly in smaller containers and refrigerate. Don't stop halfway through the chicken's cooking as a shortcut for tomorrow. You can complete the meal and reheat a portion later with much clearer safety checks.
Vinegar doesn't replace the fridge
#Treat leftover adobo as cooked chicken. Refrigerate it promptly, within two hours, or within one hour in conditions above about 32°C, and keep the fridge at 4°C or below. Divide a large batch into shallow containers so it can cool efficiently.
For a conservative household plan, use refrigerated leftovers within 48 hours under UK Food Standards Agency guidance, or freeze them sooner. Label portions with the cooking date and keep the rice separate under its own storage guidance.
Reheat the portion you want to 74°C or 165°F, checking the chicken as well as the sauce. Add a little water if a thick sauce needs loosening while it heats. The Food Standards Agency advises reheating leftovers once, so individual portions help you avoid warming and cooling the whole batch repeatedly.
Keep a serving spoon with the sauce and let everyone add it to their own bowl. A little rice, a piece of chicken and enough sauce to reach the bottom of the bowl give you a good first taste before you decide you need anything else.