Quick answer: If an app only needs one photo, choose Selected Photos on iPhone or use the Android photo picker when it’s available. Save Full Photo Access for apps you truly trust and actually use to back up, organize, sync, or edit your whole photo library.
And before you upload a screenshot, pause for a second. Screenshots are one of the easiest ways to accidentally share private information.
Your camera roll is not just “pictures” anymore.
It might include family photos, work screenshots, school forms, receipts, medical paperwork, private chats, travel plans, IDs, bills, and random screenshots you forgot you ever saved.
So when an app asks to access your photos, it’s worth slowing down.
Most apps do not need your entire photo library. They just need the one image you’re trying to upload. But if you tap Allow All Photos or Full Access, you may be giving that app access to far more than you intended.
A safer habit is simple:
Share only what the app needs, only when it needs it.
This guide explains the difference between full photo access and selected photo access on iPhone and Android, when full access makes sense, when it doesn’t, and how to avoid oversharing private details in photos and screenshots.
Why Photo Permissions Matter
#Most people approve photo access because they’re in the middle of doing something.
You want to:
- Upload a profile photo
- Send customer support a picture of a broken item
- Scan a document
- Share a receipt
- Try an AI photo tool
- Post something on social media
- Save an edited picture
That’s normal. The issue is not that every app is suspicious. The issue is that many apps ask for more access than they actually need.
If a shopping app needs one receipt, it does not need your whole camera roll.If a support form needs one screenshot, it does not need years of photos.If an AI app needs three selfies, it probably does not need access to every video, screenshot, and private image on your phone.
Both iPhone and Android now give you better ways to limit photo access.
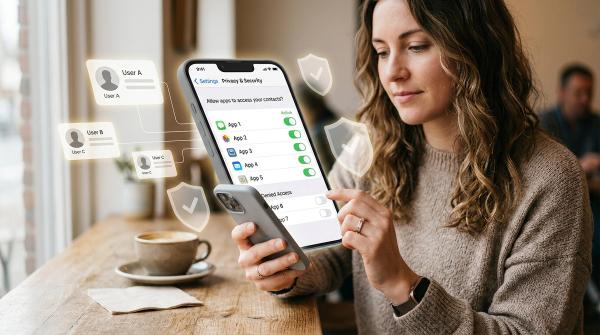
On iPhone, you can usually choose options like Selected Photos, Add Photos Only, or Full Access.
On Android, newer versions support safer options like Select photos and videos, and many apps can use the Android photo picker, which lets you choose specific photos without giving the app broad access.
The goal is not to panic. It’s to make limited sharing your default.
Use limited photo access unless there is a clear reason to allow full access.
Full Access vs Selected Photos: Quick Comparison
#What Full Photo Access Really Means
#Full photo access means the app has broad permission to access your photo library.
That can be useful for certain apps. For example, an app that backs up your photos, organizes your library, searches your images, syncs albums, or edits lots of pictures may need wider access to work well.
But for everyday uploads, full access is often more than necessary.
Full access is usually unnecessary when you are:
- Uploading one profile picture
- Sending one receipt
- Scanning one document
- Sharing one product photo with customer support
- Creating one collage
- Trying one AI filter
- Uploading one screenshot to report a bug
- Posting one image to a social app
In those cases, Selected Photos or the system photo picker is usually enough.
Think of full access like handing someone a spare key. Sometimes there’s a good reason. But you probably wouldn’t give one to every person who knocks on your door.
What Selected Photos or Photo Picker Means
#Selected photo access means the app can only use the photos or videos you choose. It does not get broad access to your entire library.
On iPhone, depending on your iOS version, you may see options like:
- None
- Add Photos Only
- Selected Photos
- Limited Access
- Full Access
- All Photos
On Android, depending on your phone and Android version, you may see options like:
- Select photos and videos
- Allow all photos and videos
- Don’t allow
You may also see the Android photo picker. This is a system-controlled screen that lets you pick photos or videos to share. The app only receives the items you select.
For most ordinary situations, selected access is the better choice.
If you’re not sure what to choose, start small. Pick selected access first. If the app truly needs more later, it can ask again.
How to Review and Change iPhone Photo Permissions
#On iPhone, you can control photo permissions app by app. Apple has offered limited photo access since iOS 14, and newer iOS versions continue to support more detailed photo permission controls.
Option 1: Review all photo permissions from Privacy settings
#- Open Settings.
- Tap Privacy & Security.
- Tap Photos.
- Choose an app from the list.
- Select the permission level you want.
You may see options such as:
- None: The app cannot access your photo library.
- Add Photos Only: The app can save images to your library, but cannot read your existing photos.
- Selected Photos / Limited Access: The app can only access the photos and videos you choose.
- Full Access / All Photos: The app can access your photo library broadly.
Option 2: Review one app directly
#- Open Settings.
- Scroll down and tap the app name, or go to Settings > Apps on newer iOS versions.
- Tap Photos.
- Change the access level.
Good iPhone privacy habits
#Use Selected Photos for apps like:
- Social media apps
- Shopping apps
- Food delivery apps
- Scanner apps
- AI photo apps
- Dating apps
- School apps
- Work apps that only need uploads sometimes
Use Add Photos Only when:
- The app only needs to save a finished image or file to Photos
- You do not want the app reading your existing photo library
Use Full Access only when:
- You trust the app
- You understand why it needs broad access
- The app’s main purpose is managing, backing up, syncing, organizing, or editing many photos
If you change an app from full access to selected access, it will usually still work. The next time you need to upload something, your iPhone may simply ask you to choose which photos the app can use.
How to Review and Change Android Photo Permissions
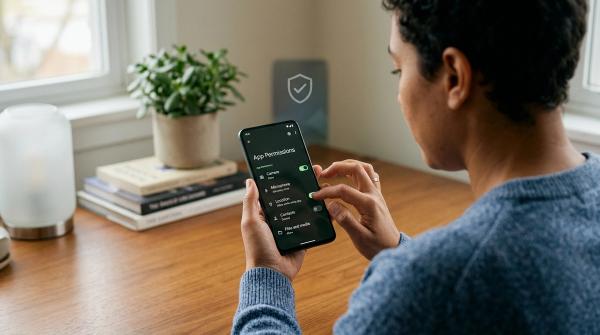
#Android settings can look different depending on your phone brand and Android version, but the basic idea is the same: check which apps have access and reduce that access when you can.
Android 14 introduced Selected Photos Access, which lets you give apps access to specific images and videos instead of your entire media library. Android also supports the Photo Picker, a safer system interface for choosing photos and videos without granting broad storage access.
Review photo permissions on Android
#- Open Settings.
- Tap Apps.
- Choose the app you want to check.
- Tap Permissions.
- Tap Photos and videos, or a similar media permission.
- Choose the most limited option that still lets the app work.
Depending on your Android version, you may see:
- Allow all photos and videos
- Select photos and videos
- Don’t allow
If you see Select photos and videos, choose that for apps that only need occasional uploads.
Use the Android photo picker when available
#When an app opens a system photo selection screen, that is usually safer than granting broad media permission.
You choose the exact photo or video. Android shares only that item with the app.
This is a good choice for:
- Uploading a profile picture
- Sending a document photo
- Sharing a screenshot
- Posting one image
- Trying a one-time photo tool
- Sending a customer support image
If your Android phone does not show selected photo options
#Some older Android versions or older apps may not show the same permission choices.
If that happens:
- Deny full photo access if the request feels unnecessary.
- Use the upload feature only if you’re comfortable.
- Check whether the app can use the system photo picker.
- Consider using a different trusted app if one demands broad access for a small task.
Which Apps Actually Deserve Full Photo Access?
#Full photo access is not always bad. Some apps genuinely need it.
You might consider full access for apps that meet most of these conditions:
- You recognize and trust the app.
- You use it regularly.
- Its main purpose involves your photo library.
- It needs to back up, organize, sync, search, or edit many photos.
- You understand the app’s privacy settings.
- Your account is protected with a strong password and two-factor authentication.
- You would not be surprised if the app could access older photos, videos, or screenshots.
Examples of apps that may reasonably need fuller access include:
- Photo backup apps
- Main gallery or photo management apps
- Serious photo editing apps
- Cloud storage apps you intentionally use for photo sync
- Work tools that manage image libraries as part of your job
Even then, don’t grant full access automatically.
Ask yourself:
Would selected access still work?
If yes, choose selected access.
Apps That Usually Do Not Need Full Photo Access
#Many apps only need one image at a time. For these, selected photo access is usually the better choice.
Be careful with full photo access for:
- Shopping apps
- Food delivery apps
- Fast-food apps
- Coupon apps
- Scanner apps
- PDF tools
- Dating apps
- Social media apps
- AI avatar apps
- AI photo editing apps
- Games
- Utility apps
- Apps you downloaded for one quick task
A shopping app may need one product photo.A scanner app may need one document.A social app may need one image for a post.
That does not mean it needs your entire camera roll.
AI Photo App Privacy: Warning Signs to Watch For
#AI photo apps and third-party editing tools can be fun. Some are genuinely useful. But they deserve extra caution because they often ask you to upload selfies, portraits, screenshots, or personal images.
Some may process images in the cloud, not just on your phone.
That does not automatically mean they are unsafe. But it does mean you should slow down before giving them broad access.
Warning signs
#Be careful if an AI photo or editing app:
- Refuses to work unless you grant full photo access for a small task
- Needs only a few images but asks for your whole library
- Does not clearly explain how uploaded photos are handled
- Makes privacy settings hard to find
- Has unclear deletion options for uploaded images
- Requests photo access before you reach a feature that actually needs photos
- Asks for unrelated permissions at the same time
- Pushes you to upload private screenshots, ID images, or sensitive documents
- Promises flashy results but says very little about what happens after upload
Safer way to use AI photo apps
#Use selected photo access whenever possible.
Choose only images you are comfortable uploading. Avoid private screenshots, documents, children’s photos, medical images, ID photos, financial information, or anything that would feel risky if copied, saved, or shared outside the app.
If an AI photo app insists on full access and you don’t trust it, skip it. There will always be another app.
Photo Sharing Privacy Checklist Before Uploading Photos or Screenshots
#Before uploading or sharing a photo, take ten seconds and look closely at what’s visible.
This matters especially for screenshots. They often show more private information than people notice at first glance.
Use this checklist before uploading:
- Am I sharing only the photo this app needs?Use selected photo access or the photo picker when possible.
- Is there private information in the background?Look for addresses, bills, prescription bottles, school names, badges, family photos, paperwork, or computer screens.
- Did I check the edges of the image?Screenshots may show browser tabs, usernames, notifications, email addresses, search terms, or account details.
- Did I crop out sensitive details?Remove order numbers, tracking numbers, QR codes, barcodes, passwords, one-time codes, payment details, and private chats.
- Is location information a concern?If you are sharing publicly or with an app you do not fully trust, use your phone’s sharing options to avoid sending location details when available.
- Does this app really need full photo access?If the answer is “no” or “I’m not sure,” use selected access.
- Is this a screenshot of money, health, school, work, or identity information?Be extra careful. These screenshots often include details scammers look for.
- Would I be comfortable if this image were saved outside the app?If not, don’t upload it.
A simple rule:
Crop first, share second.
Common Oversharing Mistakes With Screenshots
#Screenshots are one of the easiest ways to leak private information by accident.
You may mean to show one error message, but the screenshot might also show a notification, account name, chat preview, email address, browser tab, or private document in the background.
Before sending a screenshot, look for:
- Email addresses
- Phone numbers
- Full names
- Home or office addresses
- Account balances
- Order IDs
- Tracking numbers
- Student IDs
- Medical details
- Private messages
- Browser tabs
- App notifications
- Wi-Fi names
- One-time passwords or verification codes
- QR codes or barcodes
- Payment details
- Work or school information
Before you send a screenshot to customer support, an AI app, a public forum, or social media, zoom in and inspect it.
If needed, crop it, blur it, or retake the screenshot with less information showing.
What to Do If You Already Allowed Too Much Photo Access
#If you’ve granted full access to a bunch of apps, don’t panic. You can clean it up.
Step 1: Review your photo permissions
#On iPhone:
- Go to Settings > Privacy & Security > Photos.
- Check each app.
- Change unnecessary full access to Selected Photos, Add Photos Only, or None.
On Android:
- Go to Settings > Apps > [App Name] > Permissions.
- Check Photos and videos.
- Change broad access to Select photos and videos or Don’t allow, where available.
Step 2: Remove access for apps you no longer use
#If you don’t use an app anymore, uninstall it.
If you want to keep the app but rarely use it, remove photo access until you actually need it again.
Step 3: Check apps that handle sensitive images
#Pay extra attention to:
- Scanner apps
- AI photo apps
- PDF tools
- Cloud storage apps
- Social apps
- Messaging apps
- Work or school apps
- Apps used once and forgotten
These apps may have handled documents, screenshots, or personal photos in the past, so they’re worth checking first.
Step 4: Be careful with private screenshots going forward
#Changing permissions helps reduce future exposure. But it does not erase photos you already uploaded to an app or service.
If you uploaded something sensitive, check the app’s account area, upload history, privacy settings, or support options. If there is a delete option, use it.
Step 5: Make limited access your new default
#The next time an app asks for photos, pause before tapping.
Choose the smallest permission that gets the task done.
Safety Note for Hacked Accounts, Blackmail, or Active Fraud
#Changing photo permissions is a prevention step. It helps reduce what apps can access in the future.
But it may not fix an active emergency.
If your account is hacked, someone is threatening you, private photos are being used for blackmail, or you are dealing with financial fraud, do not rely on permission changes alone.
Act quickly:
- Change important passwords from a safe device.
- Turn on two-factor authentication where available.
- Contact your bank or payment provider if money or payment details are involved.
- Report the account or content to the platform’s safety team.
- Save evidence of threats or fraud.
- Contact local law enforcement or a trusted cybercrime reporting channel in your region.
If you are a child, teen, senior, or anyone feeling pressured or scared, ask a trusted person for help right away. You do not have to handle it alone.
Simple Photo Permissions Privacy Checklist
#Use this quick checklist whenever an app asks for photo access:
- Does the app need one photo or my whole library?
- Can I use Selected Photos access?
- Can I use the Android photo picker?
- Is this app trusted enough for full access?
- Am I uploading a screenshot with private details?
- Did I crop or blur sensitive information?
- Does the app explain why it needs photo access?
- Is this an AI photo app asking for more access than needed?
- Have I reviewed old app photo permissions recently?
Best default: Selected Photos or photo picker.Best exception: Full access only for trusted apps that genuinely need your library.