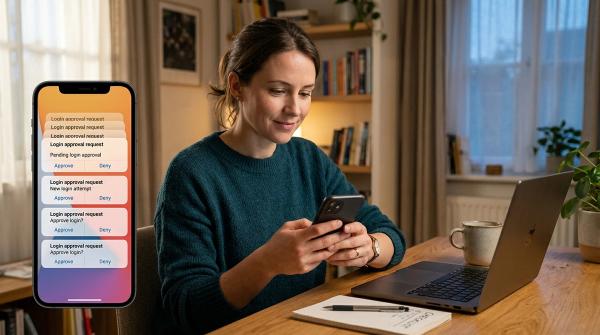
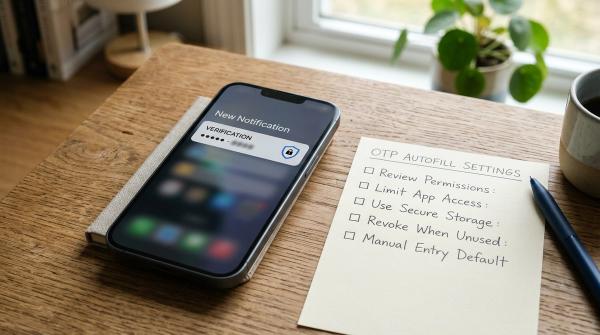
Quick answer: Before you change your phone number, update it on your most important accounts while your old SIM still works. Start with Google, Apple, Microsoft, email, banking, UPI, work, and social accounts. Save your 2FA recovery codes, move SMS login codes to your new number, use WhatsApp’s Change Number feature, and don’t deactivate the old SIM too quickly.
Changing your number feels simple. You get a new SIM, tell a few people, and move on.
But your phone number is often the key to your accounts. If you change it in the wrong order, you can lock yourself out of email, banking apps, WhatsApp, work tools, and more.
Why changing your number is more than a SIM swap
#Most of us think of a phone number as something people use to call or text us.
That’s true, of course. But these days, your number is also tied to a lot of behind-the-scenes security stuff.
It may be connected to:
- Account recovery
- OTPs
- Two-factor authentication
- Banking alerts
- UPI apps
- Work logins
- Payroll tools
- Email accounts
- Cloud backups
- Social media
- Shopping and delivery apps
That means you might know your password and still get stuck because the account wants to send a code to your old number.
And if that old SIM is already inactive, lost, or eventually given to someone else, getting back in can become much harder than it needed to be.
So don’t treat a number change like a tiny admin task. Treat it like a quick account-security cleanup. Update the important accounts first, save your backup options, and then move through the rest.
The recycled phone number problem, in plain English
#Phone numbers usually don’t disappear forever when someone stops using them.
After a waiting period, depending on the country and mobile carrier, an old number can be returned to the available pool and assigned to someone new.
That creates a risk.
If your old number is still linked to your accounts, future OTPs, password reset messages, login alerts, or security codes could be sent there after someone else gets the number.
Researchers at Princeton University have studied this issue and found that recycled numbers can still be connected to old accounts and sensitive messages.
This does not mean you need to panic. It just means you should clean up your accounts before giving up the number.
If you remember only one thing, remember this:
Do not deactivate or abandon your old SIM until you’ve updated your important accounts.
Changing phone number checklist
#Use this checklist before you cancel your old number, port to a new carrier, switch SIMs, or move from one number to another.
1. Keep both numbers working if possible
#Before you start changing account settings, make sure you can receive SMS or calls on:
- Your old number
- Your new number
Many apps will first send an OTP to your old number to confirm it’s really you. Some will then send another code to the new number.
If you’re using an eSIM, test it first. Make sure the new number can actually receive calls and texts before you start updating accounts.
This one step can save you from a lot of unnecessary stress.
2. Make a list of accounts linked to your number
#Start with the accounts where getting locked out would be a serious problem.
Check:
- Email accounts
- Google, Apple, and Microsoft accounts
- Bank accounts and payment apps
- UPI-linked apps and bank-registered mobile numbers
- Work accounts, HR portals, VPNs, payroll tools, and school portals
- Password managers
- Social media accounts
- Creator accounts and ad platforms
- Shopping apps and subscriptions
- Cloud storage
- WhatsApp, Signal, Telegram, and other messaging apps
- Government, tax, insurance, or health portals, if you use them
A good way to find forgotten accounts is to search your email inbox for terms like:
- “OTP”
- “verification code”
- “security code”
- “recovery phone”
- “two-step verification”
- “new login”
- “phone number changed”
You’ll probably find a few accounts you completely forgot about. Most people do.
Update your main recovery accounts first
#Your email and device accounts often help you recover everything else. So update those before you worry about shopping apps or delivery profiles.
Google: update your recovery phone and 2-Step Verification
#Go to your Google Account security settings and check:
- Recovery phone
- 2-Step Verification numbers
- Backup options
- Recovery email, if needed
In your Google Account, look under:
Security > How you sign in to Google
Add and verify your new number first. Once you know it works, remove the old number if you no longer use it.
This is especially important if you use Gmail, Android, Google Drive, YouTube, Google Photos, or Google Pay.
Apple: update your trusted phone numbers
#For Apple ID, update your trusted phone number.
On iPhone, go to:
Settings > [your name] > Sign-In & Security
Add your new trusted phone number and verify it. After that, remove the old number if it is no longer yours.
This matters because your Apple ID may be tied to iCloud, App Store purchases, Find My, device backups, and your iPhone setup.
Microsoft: update your security info
#For your Microsoft account, review your security info.
Check options such as:
- Text a code
- Email a code
- Authenticator app
- Other sign-in or recovery methods
Add your new number, verify it, and only then remove the old one.
This helps protect Outlook, OneDrive, Windows, Xbox, and other Microsoft services.
2FA and recovery code steps
#If you use phone number 2FA, update it while your old SIM still works.
Don’t wait until the old number is gone. That’s exactly when accounts start asking for the one code you can no longer receive.
Step 1: Find accounts using SMS codes
#Check your most important accounts first:
- Banks and payment apps
- Work logins
- Password manager
- Social media
- Cloud storage
- Domain registrar or creator tools
- School or university accounts
- Shopping and subscription apps
Look inside each account for sections called:
- Security
- Login and security
- Two-factor authentication
- Two-step verification
- Account recovery
- Recovery phone
- Security info
Every app uses slightly different wording, which can be annoying. But it is usually somewhere under security, login, privacy, or account settings.
Step 2: Add the new number before deleting the old one
#Where possible, add your new number first.
Then verify it by SMS or call.
Only after that should you remove the old number.
Do not remove the old number first unless the app forces you to. Some platforms send a confirmation code to your old number before allowing the change. If your old SIM is already gone, you may get stuck.
Step 3: Save backup recovery codes
#Many accounts give you one-time backup codes. These are meant for moments when you cannot receive a 2FA code.
For important accounts:
- Log in while your old number still works.
- Go to the security or 2FA settings.
- Find backup codes, recovery codes, or similar wording.
- Download, print, or securely store them.
- Don’t store them only inside the account they are meant to help recover.
These codes can save you if your SIM transfer fails, your phone is lost, or an OTP keeps going to the old number.
Step 4: Reduce your dependence on SMS where possible
#SMS codes are common, but they are not always the strongest or most convenient long-term option.
Where available, consider using:
- An authenticator app
- Built-in password manager codes
- Passkeys
- Hardware security keys, if you already use them
You don’t need to change every account in one sitting. That can get messy too.
The main goal is simple: make sure your old phone number is not the only way back into your important accounts.
India-specific checks: banking, UPI, and OTPs
#In India, your mobile number is often closely tied to banking and payments.
It may be used for:
- Bank alerts
- Net banking OTPs
- Debit and credit card messages
- UPI registration
- Wallet apps
- Delivery apps
- Aadhaar-adjacent or government portals
- Insurance, tax, mutual funds, or demat accounts
Before changing your number, review:
- Bank-registered mobile number
- Net banking login and OTP settings
- Debit or credit card alerts
- UPI apps like Google Pay, PhonePe, Paytm, or bank UPI apps
- Wallet apps
- Mutual fund, insurance, tax, and demat platforms
- Salary, payroll, or employer portals
Many banks and payment apps may require verification through your old number before they let you switch to the new one.
Some changes can be done inside the app or net banking. Others may require an ATM, branch visit, or customer support process.
If you are locked out or suspect fraud, use only the official support channel of the bank or platform. Don’t trust random phone numbers from search results, WhatsApp forwards, or social media comments.
And never share OTPs with anyone.
WhatsApp Change Number guidance
#WhatsApp needs special attention because your account, groups, and chats are tied to your registered phone number.
If you simply install WhatsApp with a new number, the move may not work the way you expect. Use WhatsApp’s built-in Change Number feature instead.
This feature changes the phone number linked to your WhatsApp account and helps move your account information to the new number.
Before using WhatsApp Change Number
#Make sure:
- Your old number is currently registered on WhatsApp.
- Your new number can receive SMS or calls.
- You are using your primary device, not only WhatsApp Web or Desktop.
- You have backed up chats if you are also changing phones.
How to change your WhatsApp number
#On WhatsApp, go to:
Settings > Account > Change Number
Then:
- Enter your old phone number.
- Enter your new phone number.
- Follow the verification steps.
- Choose whether to notify contacts.
- Continue through the prompts.
WhatsApp group chats are notified when you change your number. You can also choose whether to notify individual contacts during the process.
If you are changing both your number and your phone, take it slowly. Back up your chats first, then change the number properly.
Practical changing phone number checklist
#What not to do after losing your old SIM
#If you have already lost your old SIM, don’t panic. What you should do depends on whether the number is still active, inactive, or already reassigned.
Don’t assume OTPs will still reach you
#If the SIM is lost or inactive, OTPs may no longer come to you.
Also, don’t keep retrying blindly if the platform warns that too many attempts may lock your account. That can make recovery harder.
Don’t share OTPs with anyone
#No genuine support agent needs you to read out an OTP that gives access to your account.
Be especially careful with calls or messages claiming they can “help recover” your bank account, payment app, SIM, or email. A lot of scams start exactly like that.
Don’t use unofficial support numbers
#Use the official app, website, statement, card, or verified support page for your bank, mobile carrier, email provider, or platform.
Avoid phone numbers found in random comments, forwarded messages, or unverified search results.
Don’t delete recovery options in a hurry
#If you can still access an account from a logged-in device, first add a new recovery method and save backup codes.
Do not remove the old number until the new number or new recovery method is confirmed and working.
Don’t throw away the old SIM too soon
#If your old SIM still works, keep it safely until you finish updating your accounts.
There is always one forgotten portal that sends an OTP to the old number. You’ll be glad you kept it for a little while.
Don’t assume billing number and security number are the same thing
#Changing your contact number for delivery, marketing, or billing does not always update your recovery phone number.
Always check the security, login, recovery, and 2FA sections separately.
The safest order to change your phone number
#If you want a simple plan, follow this order:
- Keep both old and new numbers active.
- Update Google, Apple, and Microsoft recovery settings.
- Update your main email accounts.
- Save 2FA recovery codes.
- Update banking, payment, and UPI-linked accounts through official flows.
- Update work, school, and password manager accounts.
- Use WhatsApp Change Number.
- Update social media, shopping, creator, and subscription accounts.
- Search your email for old OTP and verification messages to find missed accounts.
- Keep the old SIM active for a short time, if possible, until you’re confident nothing important is left.
This order works because it protects your recovery access first. Once that’s handled, the everyday apps are much easier to clean up.
Helpful next reads on AllBlogs
#If you are tightening account safety, these related AllBlogs guides may help:
- SIM Swap Prevention Checklist: Protect Your Phone Number From Account Takeovers
- WhatsApp Two-Step Verification Checklist: PIN, Recovery Email and Scam-Safe Setup
- Google Account Security Checklist: Passkeys, 2-Step Verification, and Recovery Setup
- Password Manager Recovery Checklist: What to Set Up Before You Get Locked Out
Source and fact notes
#This checklist is based on official account-recovery and security guidance from Google, Apple, Microsoft, and WhatsApp, along with recycled phone number risk research from Princeton University researchers.
For active lockouts, suspected fraud, or account misuse, use the official support process of the affected bank, carrier, email provider, or platform.