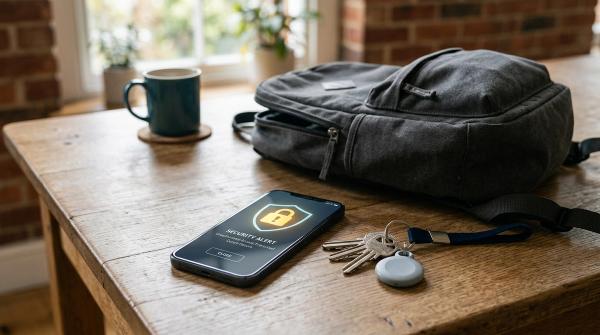
Getting locked out of your Google Account can block Gmail, Photos, Drive, YouTube, Android backups, saved passwords, calendars and app logins at once. Google Account recovery contacts give you another trusted way to confirm it is really you during account recovery. They do not get access to your private data. Use them alongside a recovery email, recovery phone, passkeys, 2-step verification and Google Security Checkup.
What are Google Account recovery contacts?
#A Google Account recovery contact is a trusted person you add to your account so they can help confirm your identity if you cannot sign in.
For example, a recovery contact may help if:
- You forget your password
- You lose your phone
- You cannot access the device with your passkey
- Your usual 2-step verification method is unavailable
- Google needs more confidence that the recovery request is really from you
Google allows you to add up to 10 recovery contacts. But the most important part is this: recovery contacts do not get access to your account.
They cannot read your Gmail, open your Google Drive files, view Google Photos, check your search history, change your password or manage your account settings.
Their role is limited. If you start Google’s official account recovery process and Google offers the recovery contact option, your trusted contact may be asked to help verify that it is really you. Google may still ask for other proof, such as your recovery email, recovery phone, passkey, 2-step verification method or recent account activity.
Think of recovery contacts as a backup layer, not a magic unlock button.
Recovery contact vs recovery email vs passkey vs 2-step verification
#Google gives you several ways to protect and recover your account. They are easy to mix up, but they do different jobs.
The simple version: A recovery contact helps Google believe it is really you. They are not your password, not your passkey and not a shared login.
Who should use Google Account recovery contacts?
#Almost anyone who depends on a Google Account should consider adding recovery contacts.
They are especially useful if your account is connected to:
- Gmail for bills, banking alerts, work, school or family messages
- Google Photos for personal memories
- Google Drive for documents, invoices, assignments or creative work
- Android backups and device sign-in
- YouTube channels or creator tools
- Google Ads or business tools
- Saved passwords
- Calendar events and contacts
- Google sign-in for other apps and websites
- A passkey stored on a phone, laptop or tablet you could lose
For families, recovery contacts can be helpful because one person often becomes the “tech person” everyone calls when something goes wrong.
For students, they can be useful before changing phones, graduating, moving schools or losing access to an old school email.
For creators, freelancers and workers, they can protect years of files, channels, projects and business access.
If your Google Account is managed by a workplace, school or organization, recovery options may be different. In that case, check with your administrator.
Who should you choose as a recovery contact?
#Choose carefully. A recovery contact does not get into your account, but they may matter a lot when you are stressed, traveling, locked out or dealing with a lost phone.
A good recovery contact should be someone you trust and can reach outside your Google Account.
Good recovery contacts are usually:
#- Close family members: A parent, sibling, spouse, partner, adult child or trusted relative can be a strong choice if you stay in regular contact.
- Long-term trusted friends: Pick someone steady in your life, not someone you barely know.
- Easy to reach in an emergency: You should be able to call, text or meet them without needing Gmail.
- Comfortable following basic instructions: They do not need to be tech experts. They just need to read Google’s instructions, sign in to their own account and avoid suspicious links.
- Careful with their own security: Someone who protects their own account is a better choice than someone who often loses passwords or clicks on strange messages.
- People with private Google Accounts: Use a real person’s personal account, not a shared family inbox, group email or business mailbox.
Avoid choosing:
#- Casual acquaintances
- Temporary roommates
- People you may lose contact with soon
- Short-term classmates
- Coworkers you only know through your job
- Anyone who pressures you for account access
- People who often fall for scams
- Shared family email accounts
- Group inboxes
- Another account that you control yourself
A recovery contact should be another trusted person, not just a second account you own. If you lose access to both accounts, that does not help you much.
How many recovery contacts should you add?
#Google lets you add up to 10 recovery contacts, but you do not need to use all 10.
For most people, 2 to 4 reliable contacts is better than a long list of people they rarely talk to.
A simple setup might be:
- One close family member
- One trusted friend
- One backup contact in a different household
- One partner, spouse or adult family member if appropriate
The goal is not to add as many people as possible. The goal is to add people who are trustworthy, reachable, still part of your life and able to follow Google’s instructions if needed.
Step-by-step checklist to set up Google Account recovery contacts
#Google sometimes changes menu names and settings, so the exact wording may look a little different in your account. Always start from Google’s official Account settings. Do not click random “account recovery” links from emails, texts, social media posts or ads.
Before you start
#- Make sure you are signed in to the correct Google Account.
- Use a trusted phone, tablet or computer.
- Use a safe internet connection.
- Decide who you want to add before opening the settings.
- Tell the person first so the request does not surprise them.
Add recovery contacts
#- Open your Google Account settings.
- Go to the Security section.
- Look for sign-in or recovery options.
- Choose Recovery Contacts, if it is available on your account.
- Follow Google’s on-screen instructions.
- Add trusted contacts, up to Google’s limit of 10.
- Complete any identity check Google asks for.
- Make sure your contact understands they do not get access to your account.
- Ask them to accept or respond to any Google prompt if required.
- Confirm you can reach them by phone, text or in person without using Gmail.
Review your recovery contacts later
#- Remove anyone you no longer trust.
- Remove people you no longer speak to.
- Replace contacts who changed accounts.
- Replace contacts who are hard to reach.
- Review the list after moving, changing schools, changing jobs or changing phones.
- Recheck your recovery contacts during Google Security Checkup.
Do not set it once and forget about it for five years.
What to set up alongside recovery contacts
#Recovery contacts are useful, but they should not be your only backup plan. A safer Google Account setup has several layers.
1. Add or review your recovery email
#Your recovery email should be an email account that you still use, only you control, has a strong password or passkey, is not shared with other people and is accessible even if your main Google Account is locked.
Try not to use an old school email, work email or internet provider email if you might lose access to it later.
2. Add or review your recovery phone
#Your recovery phone should be your current phone number. Update it if you change SIM cards, switch carriers, move countries, stop using an old number, get a new phone plan or lose access to your previous phone number.
An old recovery phone number can make account recovery slower and more frustrating.
3. Use passkeys where available
#Passkeys can make signing in easier and safer. They are harder to phish than regular passwords because they are tied to your device and usually protected by your fingerprint, face unlock, PIN or screen lock.
But passkeys also need planning. Know which devices hold your passkeys, what happens if one device is lost, whether you have another way to sign in and whether your backup devices are still available.
Do not rely on one phone for everything. It feels fine until that phone is gone.
4. Keep 2-step verification turned on
#2-step verification helps protect your account if someone gets your password. Even if you have recovery contacts, 2-step verification is still important.
Review your 2SV methods and remove anything outdated, such as old phone numbers, devices you no longer own, security keys you lost or backup methods you no longer control.
The best security setup protects you before someone gets in and helps you recover if you get locked out. You need both.
5. Run Google Security Checkup
#Google Security Checkup helps you review your account protections, recovery settings, devices and security alerts.
Use it when you get a new phone, lose a device, change your phone number, see a suspicious sign-in alert, leave a job or school, add or remove a recovery contact or have not reviewed your account in a while.
It only takes a few minutes, and it can catch problems before they turn into lockouts.
Lost phone Google Account preparation checklist
#A lost phone can create a chain reaction. That same phone may hold your passkey, receive your 2-step verification prompts, keep you signed in to Gmail, store recovery messages or contain your backup codes and contacts.
Do this now:
- Add Google Account recovery contacts.
- Add at least one recovery email you can access separately.
- Keep your recovery phone number current.
- Turn on 2-step verification.
- Use passkeys on devices you control.
- Keep another trusted device signed in, if appropriate.
- Review the devices listed in your Google Account security settings.
- Make sure you can access your recovery email without your main phone.
- Save important non-Google contact numbers somewhere outside Gmail.
- Run Security Checkup after any device change.
What to do if your phone is already lost
#First, stay calm. Then use Google’s official sign-in and recovery process. Do not trust strangers, paid “recovery agents,” unlocking services or anyone who says they can bypass Google’s security.
You may need to:
- Try signing in from a trusted device.
- Use your recovery email, if Google offers that option.
- Use your recovery phone, if available.
- Use a passkey from another device.
- Use a 2-step verification backup method.
- Choose the recovery contact option, if Google presents it.
- Contact your recovery contact by phone, text or in person.
A recovery contact can help confirm your identity, but they cannot force Google to unlock the account or bypass Google’s recovery checks.
Common mistakes to avoid
#Do not treat recovery contacts like shared access
#A recovery contact is not a co-owner of your account. Do not give them your password, let them sign in as you, send them private verification codes, ask them to manage your account or treat them like an emergency login.
They are only there to help inside Google’s official recovery process.
Do not choose someone just because they are nearby
#Convenience is helpful, but trust matters more. A roommate may be easy to reach today, but they might be out of your life next year.
Choose people who are likely to remain trustworthy and reachable.
Do not rely only on coworkers
#A coworker might be responsible and helpful, but work relationships can change quickly. You might change jobs, lose access to work chat, leave on bad terms, move to another team or lose touch completely.
If you add a coworker, make sure you also have personal recovery contacts outside work.
Do not forget old recovery details
#Old recovery information can slow you down when you need help fast. Review and remove old phone numbers, abandoned recovery emails, outdated devices, contacts you no longer trust and people you no longer speak to.
Your recovery setup should match your real life now, not your life from three years ago.
Do not rely on only one recovery method
#If your only recovery method is the phone you just lost, you may have a problem. Use layers: recovery contacts, recovery email, recovery phone, passkeys, 2-step verification and Security Checkup.
One backup is good. Several backups are better.
Do not fall for account recovery scams
#No one outside Google can magically unlock your Google Account.
Be suspicious of anyone who asks for your password, 2-step verification codes, recovery codes, passkey approval, remote access to your device or payment to “recover” or “unlock” your account.
Use only Google’s official sign-in and account recovery pages. If someone claims they can bypass Google, they are almost certainly trying to scam you.
What recovery contacts cannot do
#Recovery contacts are helpful, but they have strict limits.
They cannot:
- Read your Gmail
- View your Google Photos
- Open your Drive files
- Change your password
- Turn off your 2-step verification
- Approve sign-ins whenever they want
- Unlock your account outside Google’s process
- Guarantee that Google will restore access
They can only help when Google offers that option inside the official recovery flow. That limit is a good thing. If recovery contacts could unlock accounts by themselves, the feature would be risky. Their limited role is what makes them safer.
Simple setup examples
#Family setup
#For a family setup, you might choose your spouse or partner, one adult sibling, one parent or adult child and one long-term trusted friend.
Then make sure your recovery email is active, your recovery phone is current, 2-step verification is turned on, passkeys are available on trusted devices and everyone understands that recovery contacts do not get account access.
Student setup
#For a student, a practical setup could include one parent or guardian, one sibling or close relative and one trusted long-term friend.
Also check your recovery email carefully. If you use a school email as your backup, remember that school accounts may not stay available forever. If possible, use a personal recovery email that you control.
If your Google Account is provided by your school, your recovery options may be managed by the school administrator.
Creator or worker setup
#If your Google Account is connected to YouTube, Drive files, client documents, ads or business tools, recovery planning is not optional.
A safer setup could include two or more trusted recovery contacts, a private recovery email, a current recovery phone, 2-step verification, passkeys on trusted devices and regular Security Checkup reviews.
Avoid choosing only coworkers. If your work situation changes, your recovery path could change too.
Quick review checklist
#Use this checklist every few months, or whenever your phone number, device, school, job or trusted relationships change.
- Are my Google Account recovery contacts still trusted?
- Can I reach each recovery contact without using Gmail?
- Have any of my contacts changed their Google Account?
- Is my recovery email still active and secure?
- Is my recovery phone number current?
- Do I still control the devices listed in my Google Account?
- Are my passkeys on devices I still use?
- Is 2-step verification enabled?
- Have I completed Google Security Checkup recently?
- Do I know what I would do if I lost my phone today?
If you answer “no” to any of these, fix it while you are still signed in. That is much easier than trying to fix it during a lockout.
Final takeaway
#Google Account recovery contacts are a practical safety layer for anyone who depends on Gmail, Photos, Drive, Android, YouTube or Google sign-in.
Choose people you truly trust. Make sure you can reach them outside Gmail. Keep the list updated as your life changes.
But do not rely on recovery contacts alone. Pair them with a secure recovery email, a current recovery phone, passkeys, 2-step verification and regular Google Security Checkup reviews.
The best time to prepare for a Google Account lockout is while you are still signed in.