
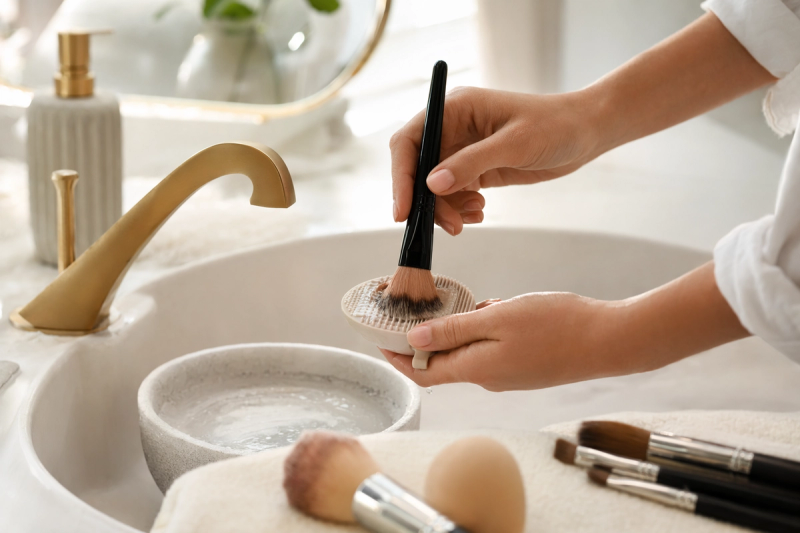
The tiny hygiene habit that makes makeup feel better on your skin
#Cleaning makeup brushes and sponges is one of those wellness chores that sounds so small, almost silly, until you think about what those tools touch every week. Foundation, concealer, sunscreen, sweat, facial oil, setting spray, dead skin cells, bathroom air, the inside of a makeup bag that probably has crumbs in it from who knows when. Not glamorous, but real. A clean brush does not magically give anyone perfect skin, and it definitely is not a cure for breakouts or irritation. Still, regular cleaning can support a cleaner makeup routine, help products apply more smoothly, and may lower the amount of grime and microbes sitting on tools that keep going back onto the face.
The American Academy of Dermatology commonly recommends washing makeup brushes about every 7 to 10 days, especially tools used with liquid or cream products. Sponges usually need even more attention because they stay damp and soak up product. That does not mean you need to panic or toss every brush you own. It just means your tools are part of skin care, in a quiet, boring, very practical way. If your skin is already inflamed, infected, unusually sensitive, or you have eye symptoms like pain, swelling, discharge, or vision changes, cleaning tools is not enough. That is a good time to speak with a qualified healthcare professional, and urgent symptoms around the eyes should be taken seriously.
Why dirty brushes and sponges can be rough on skin
#Makeup tools are not sterile, and they do not need to be sterile for everyday use. Skin naturally has bacteria and yeast living on it, and most of the time that is normal. The concern is when brushes and sponges collect layers of product and moisture, especially liquid foundation, concealer, cream blush, sunscreen, primer, and long-wear formulas. That sticky buildup can trap debris and create a less-than-fresh environment. Research looking at used cosmetic products and applicators has found microbial contamination in some samples, with damp sponges often being a bigger issue than dry powder brushes. That does not mean every sponge is dangerous. It means damp, product-soaked tools deserve regular washing and proper drying.
For acne-prone or reactive skin, dirty tools may add one more irritant into the mix. Not the only cause, not always the main cause, but maybe one contributor. Brushes can also get scratchy when product hardens in the bristles, which can create extra friction on skin that is already sensitive. Around the eyes, hygiene matters even more because eye tissue is delicate. The FDA has long advised against sharing eye cosmetics, and it is generally recommended to discard eye makeup used during an eye infection so you are not reintroducing contaminated product. If you are dealing with recurring styes, conjunctivitis, eyelid irritation, or anything that feels unusual, get proper medical advice rather than trying to solve it only with brush cleaner.
How often should you clean them, realistically?
#The “perfect” schedule is the one you can actually keep. A professional makeup artist cleaning tools between clients has a very different standard than someone doing a five-minute face before work. For personal use, a good baseline is: wash foundation and concealer brushes once a week, wash eye brushes every week or two, clean powder brushes every 1 to 2 weeks, and wash sponges after every few uses, ideally after each use if they are used wet. If you use makeup during workouts, in humid weather, or over heavy sunscreen, you may want to clean tools more often because product buildup happens fast.
Long-wear products also cling. Primers, fixing sprays, setting sprays, waterproof formulas, and sunscreen-heavy base layers can leave a film on brush fibers and sponges. If your foundation suddenly looks patchy, your blush is muddy, or your sponge has that weird slick feeling even when it looks okay, residue may be part of the problem. If humid weather is making your base products pill or roll up, the same kind of product buildup can transfer to tools too, which is why the guide on Why Your Sunscreen Pills Under Makeup: Humid Weather Fixes fits right into this conversation.
| Tool type | Suggested cleaning rhythm | Why it matters |
|---|---|---|
| Beauty sponge | After each use if possible, or at least every few uses | Damp sponge material can hold product and moisture |
| Foundation or concealer brush | About once a week | Cream and liquid formulas build up quickly |
| Powder, bronzer, blush brush | Every 1 to 2 weeks | Powder tools still collect oil and skin debris |
| Eye brushes | Weekly, or sooner if used with cream products | Eye area hygiene needs extra care |
| Shared tools | Clean before and after sharing, or avoid sharing | Sharing can transfer microbes between people |
What to use: gentle soap beats fancy drama most of the time
#You do not need a complicated setup. A gentle liquid soap, baby shampoo, brush cleanser, or mild facial cleanser can work. For very oily foundation buildup, a small amount of dish soap can remove grease, but it may be drying to natural hair brushes if used often. Some people use olive oil mixed with soap for stubborn foundation, but oil can leave residue if it is not rinsed extremely well. For most home routines, simple is better: lukewarm water, gentle cleanser, clean towel, and enough patience to rinse until the water runs clear.
Try to avoid harsh disinfectants directly on brushes that touch your skin unless the product is specifically made for cosmetic tools and used according to its instructions. Bleach, strong household cleaners, and random antibacterial sprays are not skin-care shortcuts. They can damage bristles, irritate skin, or leave residue. Alcohol sprays are sometimes used by professionals for quick sanitizing, but they do not replace washing away product buildup, and they can dry out bristles over time. Also, please do not boil brushes or microwave sponges. It sounds like a hack, but it can damage the tool, create burns, or just turn into a gross little science project.
Step-by-step: cleaning makeup brushes without ruining them
#Start by laying out what you need before your hands are slippery. Gather the brushes, a gentle cleanser, a clean towel, and maybe a textured silicone mat if you have one. A mat can help, but your palm works fine. Use lukewarm water, not hot. Hold the brush with the bristles pointing downward or sideways so water does not flood into the ferrule, which is the metal part that holds the bristles. Too much water in there can loosen glue and shorten the life of the brush.
- Wet only the bristles under lukewarm running water. Try not to soak the handle or ferrule.
- Add a small drop of cleanser to your palm, a mat, or directly onto the bristles.
- Gently swirl the brush. Do not mash it straight down like you are scrubbing a pan. Soft pressure is enough.
- Rinse with the bristles facing down until the water looks clear and there are no suds left.
- Squeeze out extra water with clean fingers or a towel, reshape the bristles, and lay flat to dry with the brush head hanging slightly over the edge of a counter if you can.
Drying matters almost as much as washing. Brushes should dry in open air, not inside a drawer, closed pouch, or damp bathroom cabinet. Do not stand wet brushes upright in a cup, because water can drain into the ferrule. Depending on how dense the brush is, drying can take several hours or overnight. Big kabuki brushes and dense foundation brushes are the slow ones. If a brush smells musty after washing, feels slimy, sheds heavily, or never seems to dry properly, it may be time to replace it.
Step-by-step: cleaning makeup sponges properly
#Sponges need a slightly different approach because product gets trapped inside. A sponge can look clean on the surface while still holding foundation in the middle, which is annoying and also kind of the point of why washing takes a minute. Use lukewarm water and fully wet the sponge first. Then apply a gentle soap or sponge cleanser and squeeze repeatedly. Avoid twisting aggressively because that can tear the sponge. Squeeze, rinse, squeeze, rinse, and keep going until the water is clear. It feels excessive, yes. But sponges are thirsty little things.
After rinsing, press the sponge in a clean towel to remove extra water, then let it dry in a well-ventilated spot. Do not leave it damp in a sealed container or makeup bag. Damp plus dark plus old foundation is not a cute combination. If your sponge has black spots, a sour smell, tearing, a permanently stained center, or a texture that feels crumbly or sticky, replace it. Many brands suggest replacing makeup sponges every 1 to 3 months depending on use, but the real answer depends on how often you use it, how well it dries, and whether it still looks and smells clean.
What about quick cleaning sprays and daily brush cleaners?
#Quick cleaners can be useful, especially for eye brushes when you want to switch colors or for people who wear makeup most days and need a little maintenance between deep washes. They usually work by dissolving pigment and drying quickly. That is handy. But they are not the same as a full wash with water and cleanser. Think of them like wiping the kitchen counter after making toast, not deep-cleaning after cooking with raw ingredients. Helpful, but not everything.
If you use lots of primer, setting spray, fixing spray, waterproof sunscreen, or long-wear complexion products, your brushes may need deeper cleaning more often because those formulas are designed to stay put. Great on the face, stubborn on the brush. For anyone trying to understand why some sprays make makeup last while others just melt into the routine, Primer vs Setting Spray vs Fixing Spray: What Actually Works in Humid Weather? is a useful side read. It also explains why some products leave more residue behind than you would expect.
A few hygiene habits that make cleaning easier
#Brush cleaning gets easier when the rest of the routine is a little cleaner too. Wash your hands before doing makeup, especially if you are using fingers for concealer or cream products. Keep caps on products. Do not pump mascara wands in and out of the tube because that can push air into the product. Avoid sharing eye makeup. Clean the outside of compacts and palettes now and then, because hands touch those surfaces constantly. And try not to store tools right next to the sink or toilet where they can pick up splashes and bathroom humidity.
- Let brushes and sponges dry fully before storing them. Fully dry is the boring but important part.
- Use a breathable brush cup, clean drawer organizer, or washable pouch rather than a sealed plastic bag for damp tools.
- Keep “clean” and “used” tools separate if you do makeup often. Even two cups on the vanity can work.
- Wash makeup bags occasionally, or wipe the inside if the material allows it. A clean brush tossed into a dirty bag is basically back to square one.
- If a product changes smell, texture, or color, do not rely on clean tools to make it safe.
Skin sensitivity, breakouts, and when to be extra careful
#If your skin is sensitive, eczema-prone, acne-prone, or recovering from a procedure, be gentle. Use fragrance-free cleanser for tools if fragrance tends to bother your skin. Rinse extremely well, because leftover soap in bristles can transfer to the face and cause irritation for some people. It can also make foundation apply strangely, which is less of a health issue and more of a “why does my makeup hate me today” issue. If you are using prescription acne treatments, topical steroids, retinoids, or other active skin medications, ask your clinician what kind of makeup and tool hygiene makes sense for your situation.
It is also worth saying clearly: cleaning brushes may help reduce one possible source of irritation or contamination, but it will not diagnose or treat acne, rosacea, dermatitis, infections, allergic reactions, or eye conditions. If you have painful bumps, spreading redness, swelling, pus, crusting, fever, sudden rash, worsening irritation, or symptoms near the eye, please get medical advice. Same if breakouts or irritation keep coming back despite reasonable changes. Skin is complicated, and it is not a moral failure when a clean routine does not fix everything.
The sunscreen and cleansing connection nobody talks about enough
#Modern sunscreen formulas can be tenacious, especially water-resistant ones. Add primer, foundation, powder, and setting spray on top, and your tools are basically working through layers of film every day. That film can cling to sponge pores and brush fibers. If you use a lot of sunscreen under makeup, cleaning tools well matters, but so does removing products from your skin without stripping it. Over-cleansing the face can leave skin tight and irritated, while under-cleansing can leave residue behind. There is a useful breakdown here: Cleansing Balm vs Micellar Water vs Face Wash: How to Remove Sunscreen Without Over-Cleansing. It pairs nicely with brush hygiene because both are really about reducing buildup without being harsh.
One practical trick: if a foundation brush has sunscreen and liquid base caked into it, start with a short pre-rinse and a little cleanser worked through the bristles before the full wash. Let the cleanser sit for maybe 30 seconds, then swirl and rinse. You do not need to soak the whole brush. For sponges, wetting them fully first helps soap move through the center rather than just sliding around the outside. And if a sponge still releases beige water after five rounds of rinsing, it is not you being bad at cleaning. It is just sponge life.
Common mistakes that quietly wreck brushes or skin comfort
#The biggest mistake is waiting until brushes look visibly dirty. By then, they may already have plenty of product buildup. Another one is using water that is too hot, which can weaken glue and damage natural fibers. Scrubbing too hard can splay bristles and make brushes rougher on the face. Not rinsing well enough is also common. If cleanser stays in the brush, it can dry stiff, affect makeup application, and maybe irritate skin. With sponges, the mistake is usually storing them wet. A damp sponge sealed in a case for days is just asking for smell and breakdown.
Sharing tools is another area where people get casual, especially with friends or family. For powder cheek brushes, the risk may be lower than with eye tools, but sharing still transfers skin oils and microbes. Shared mascara, eyeliner, and eye brushes deserve extra caution. If you are doing makeup for someone else, use clean tools, disposable applicators where appropriate, and clean hands. If someone has an active cold sore, eye infection, open skin lesion, or unknown rash, it is better not to share makeup or tools. That is not rude. That is basic care.
When to replace makeup brushes and sponges
#Good brushes can last years if they are washed gently and dried properly. Replacement is less about the calendar and more about condition. Toss or retire a brush if the bristles shed constantly, smell bad even after washing, feel scratchy, lose their shape, or the handle/ferrule becomes loose and traps water. A damaged brush can create uneven application and more friction on skin. Natural hair brushes may need extra care, while synthetic brushes often tolerate frequent washing better, especially for cream products.
Sponges have a shorter life. Replace them sooner if they tear, develop spots that do not wash out, smell musty, feel sticky, or stay damp too long. If you had a skin infection or eye infection and used a sponge during that time, it is often safest to replace it rather than trying to rescue it. The same idea applies to tools used on broken or infected skin. When in doubt, especially around infection concerns, ask a healthcare professional. A sponge costs less than dealing with a bigger skin or eye issue.
A simple weekly routine that does not take over your life
#Pick one day. That is honestly the secret. Sunday night, Wednesday morning, whenever. Put brushes by the sink, wash the ones that touched liquid or cream products, and let them dry overnight. If you wear makeup daily, keep a second sponge or backup foundation brush so you are not tempted to use something damp before it dries. If you only wear makeup once in a while, wash tools after use before storing them away, because old product sitting for weeks is not ideal. The routine does not need to be aesthetic. It just needs to happen.
A low-effort version still counts: wash the sponge, wash the foundation brush, wipe down the handles, and leave powder brushes for the next day if you are tired. People abandon routines when they become too perfect. A decent, repeated habit is better than a massive deep-clean once every three months followed by guilt. Also, clean tools can make makeup apply better, so there is an immediate payoff. Softer blending, less patchiness, truer pigment, and fewer mysterious streaks across the cheek. Not medical magic, just clean fibers doing their job.
Clean makeup tools are not about being obsessive. They are about giving your skin one less thing to deal with, and giving your products a fair chance to work the way they are supposed to.
A careful final note
#Cleaning makeup brushes and sponges properly is a small act of skin-supportive hygiene. Use lukewarm water, gentle cleanser, thorough rinsing, and open-air drying. Clean cream and liquid tools more often than dry powder tools. Replace sponges when they smell, tear, stain deeply, or stay damp. Be extra careful with eye products, shared tools, irritated skin, and anything that looks infected. And remember, if symptoms are severe, persistent, worsening, painful, unusual, or close to the eyes, a qualified healthcare professional is the right next step.
The nice thing is that this is not an all-or-nothing wellness habit. You do not need a perfect vanity or a fifteen-step brush spa. Just a repeatable routine, a little common sense, and maybe a clean towel you do not mind staining with foundation. For more practical beauty, skin, and wellness reads that keep things realistic, you can always wander through AllBlogs.in.